Manufacture
The Manufacture module helps you oversee and control the production process within your
company. It enables you to effectively manage and track the creation of goods or products
from start to finish.
Step 1:
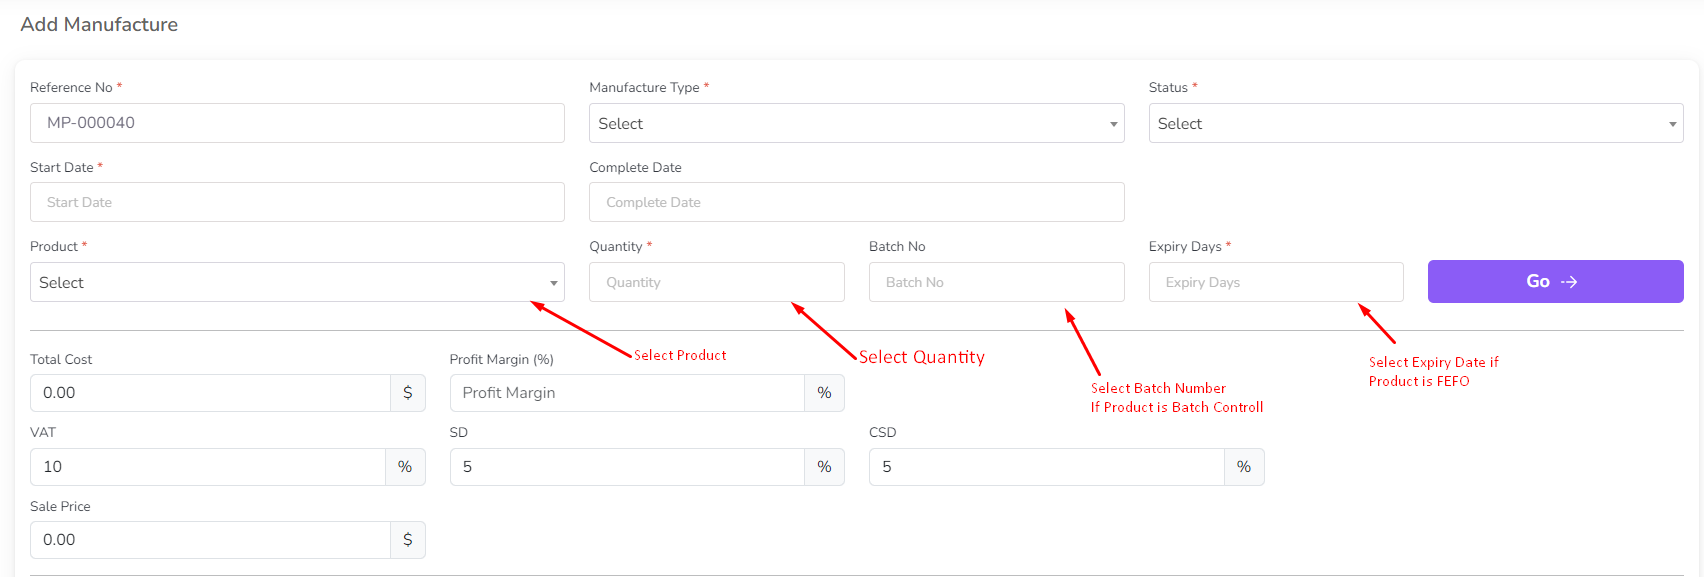
Go to the Manufacture menu from the left sidebar and click on "Add Manufacture".

Fist need to select a product and enter product quantity then click on the "Go" button. If this product stock type is "Batch" then you need to enter batch number also. If product stock type is "Expiry" then you need to enter expiry date also.
Note: If you don't have any product then first you need to add a product. For
add product go to the Product
section.
After the click on the "Go" button a form will be shown with raw material, Non Inventory Item, and production stage.
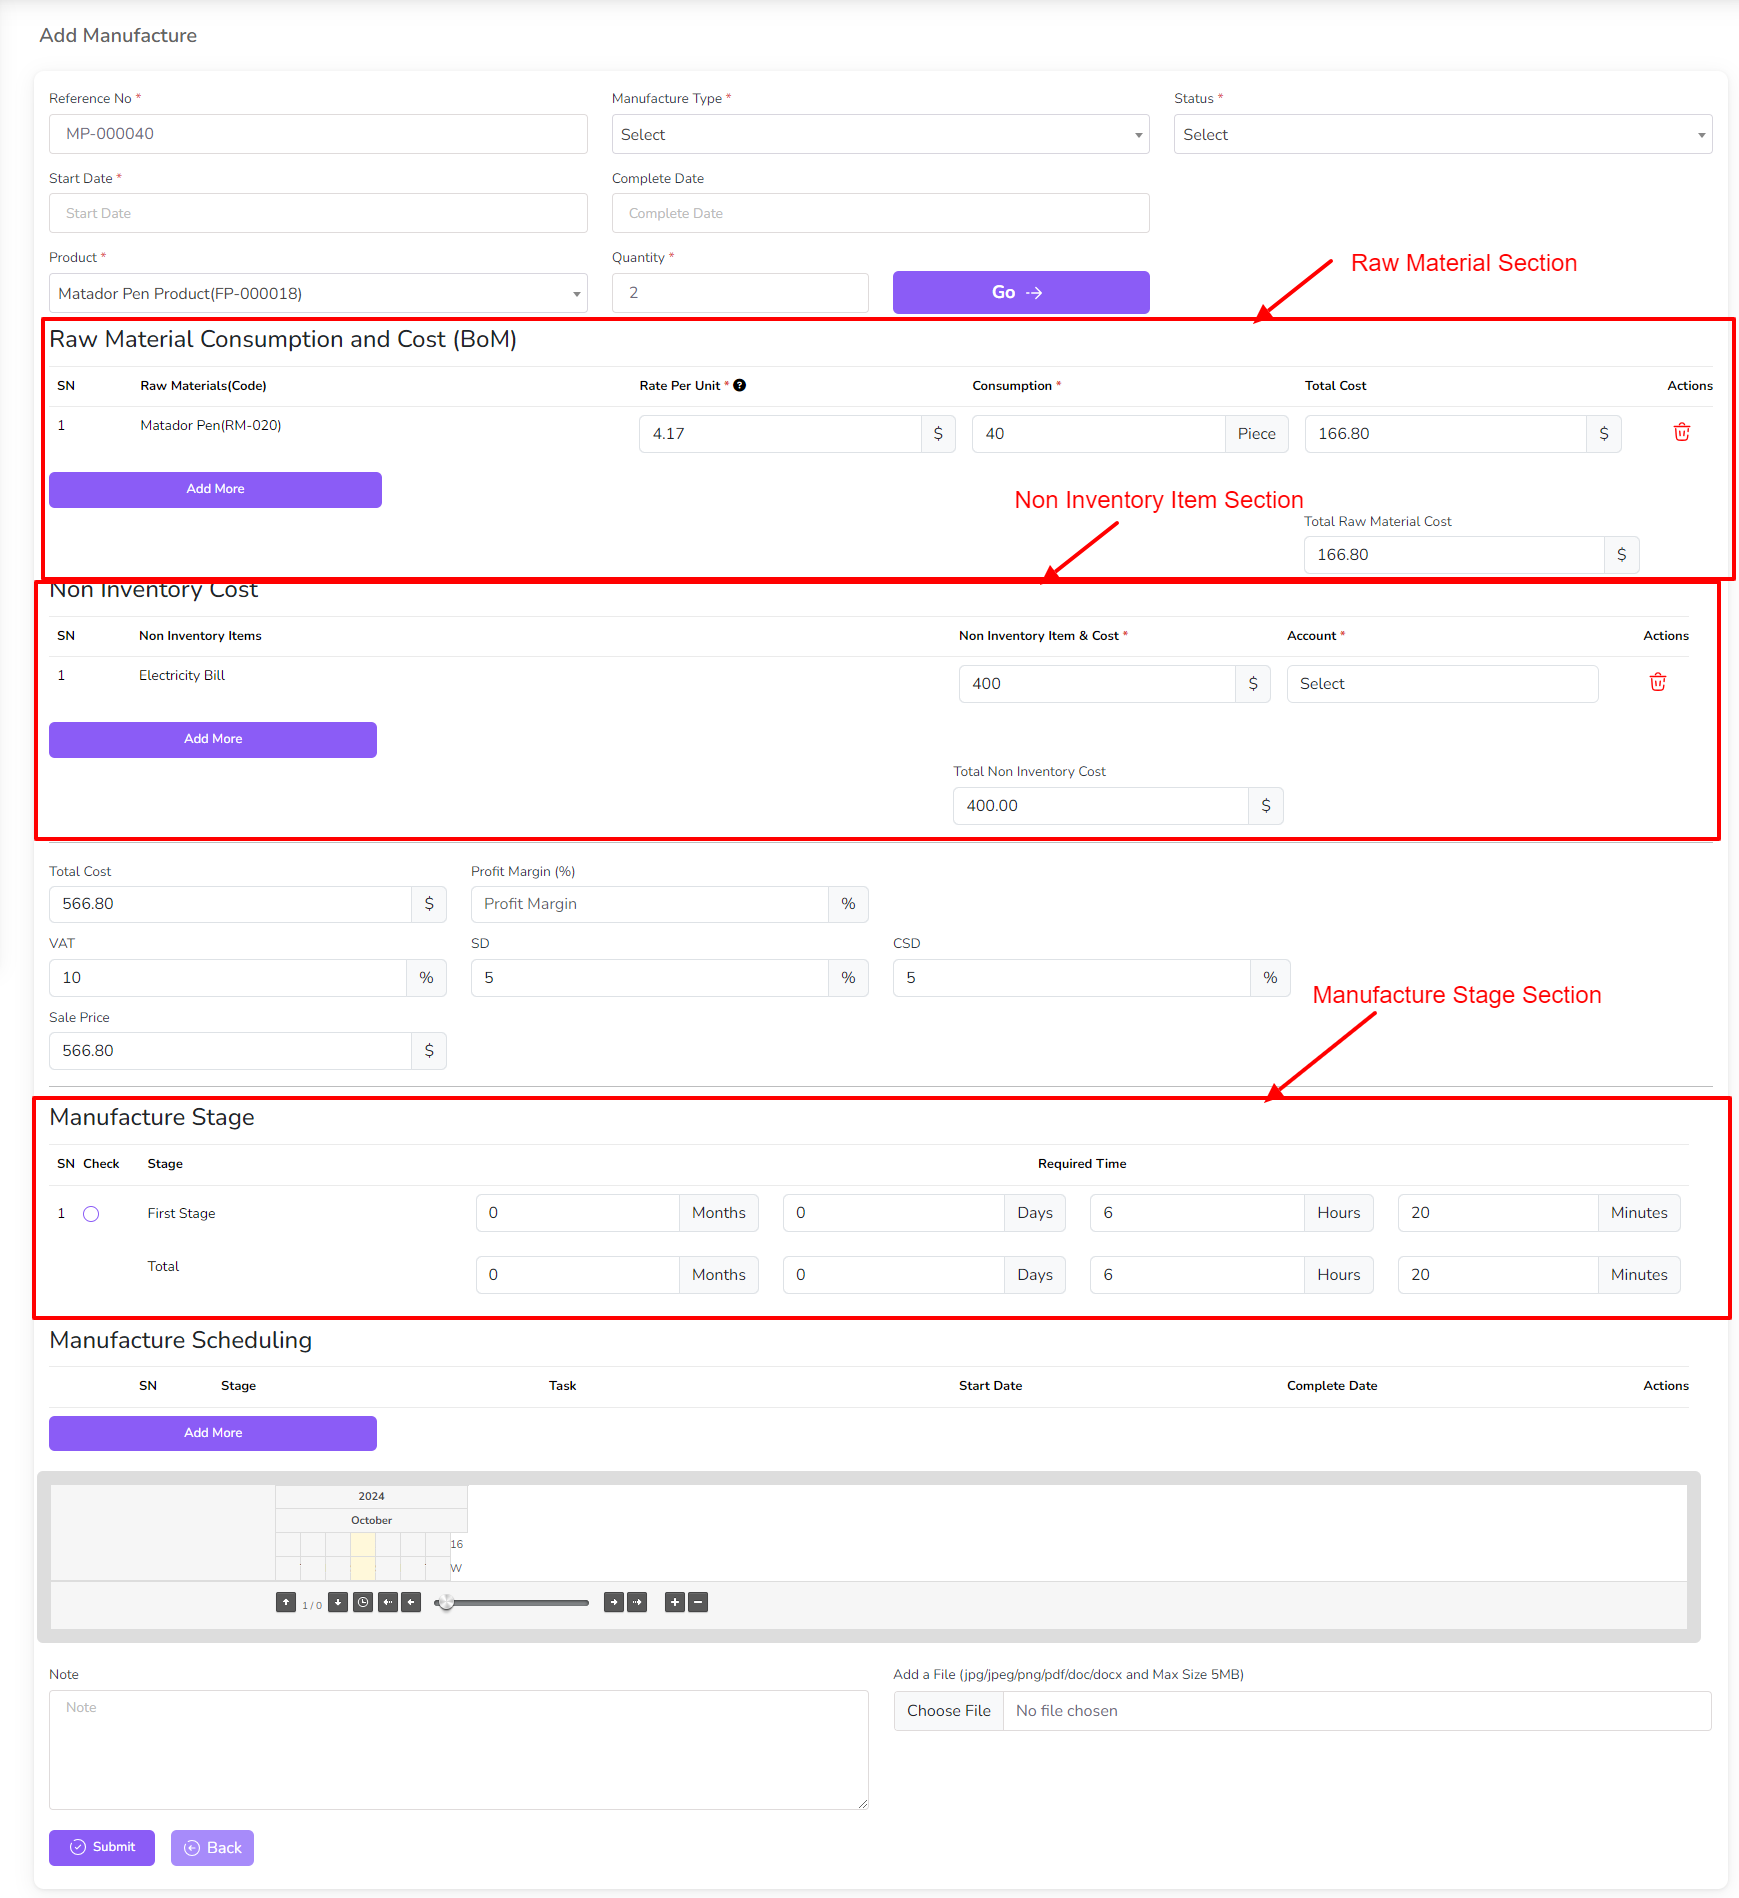
You can change the quantity of raw material, Non Inventory Item cost, and production stage time.
Also that you can add manufacture scheduling from here.
Manufacture scheduling is a feature that allows you to plan and schedule your production process in advance. This includes setting specific dates and times for each stage of production, ensuring that your products are manufactured and delivered on time. By scheduling your manufacturing process, you can optimize your production workflow, reduce delays, and increase overall efficiency.
When you add production schedule the genchat will be automatically generated.

After click "Add More" button from the manufacture scheduling table a modal will be open. and you need to fill up this form and submit it.

After submit the form the manufacture scheduling table will be updated.

Note: If your manufacture has been done you cannot edit this manufacture. Also in edit form you cannot change product, product quantity, batch number, expiry date and you cannot change manufacture type
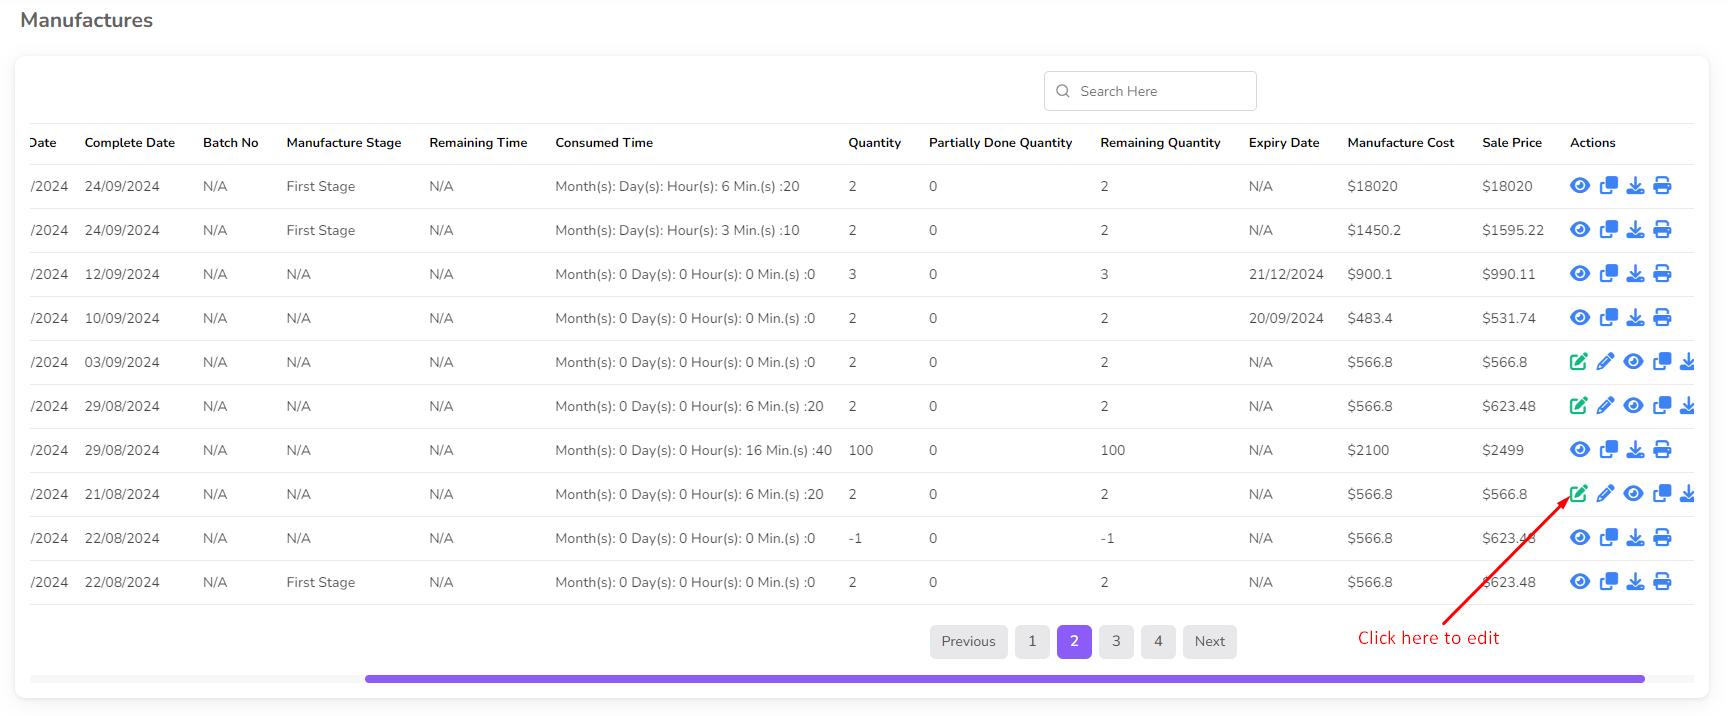
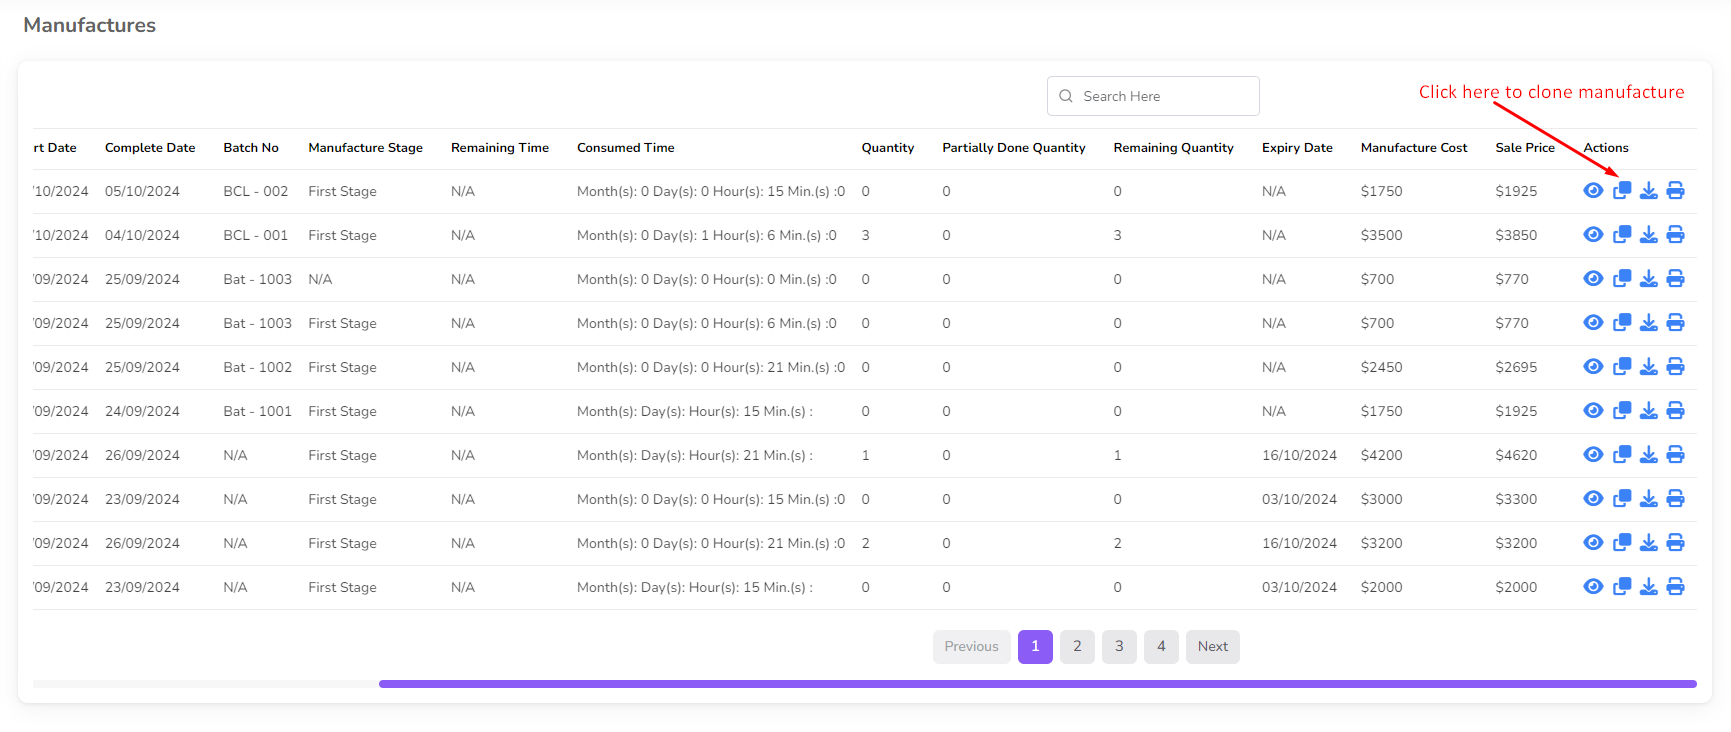
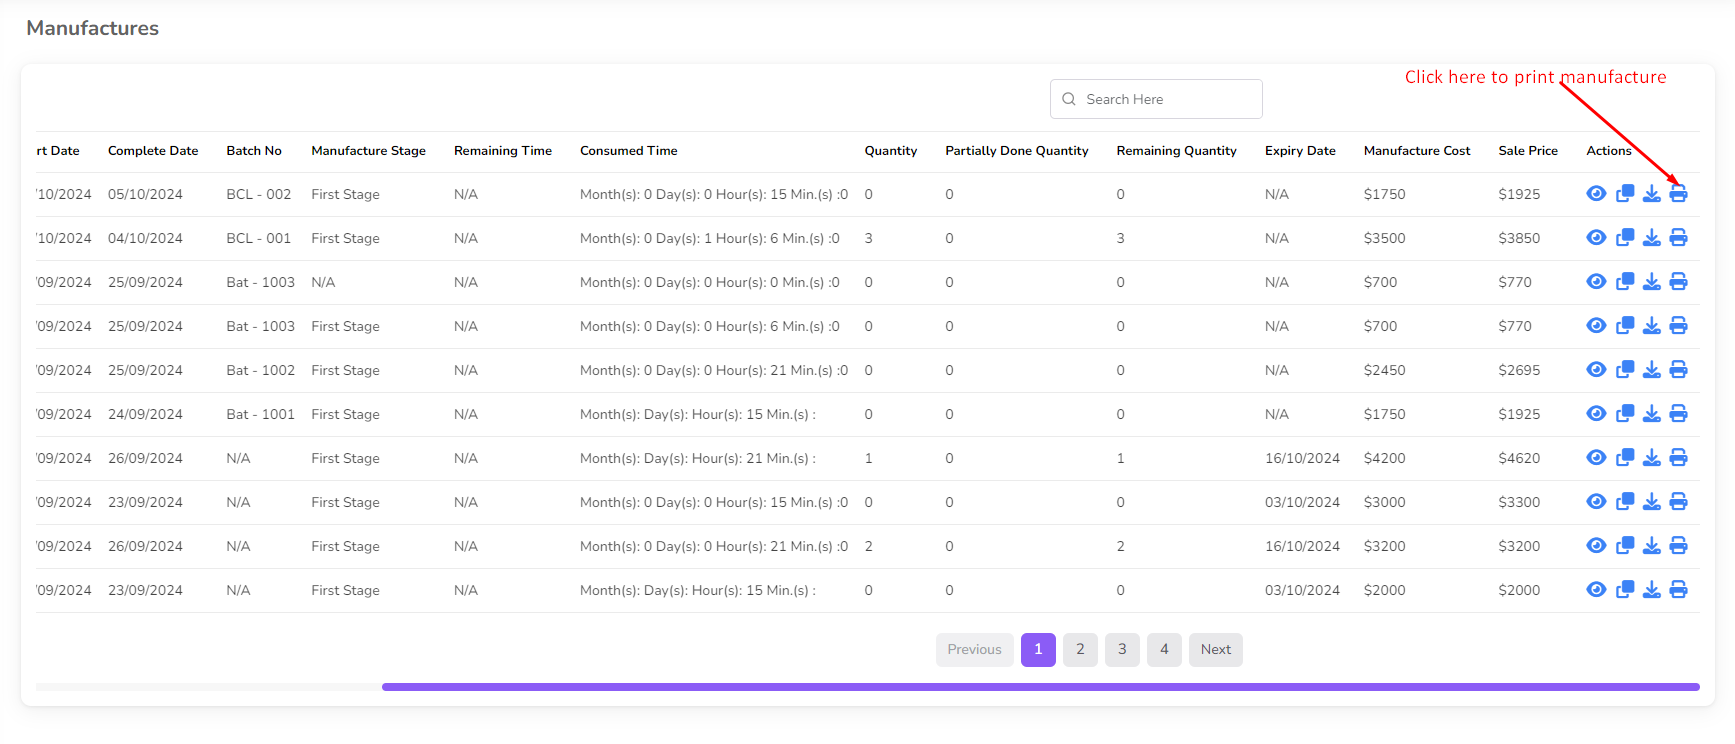
For list of manufacture go to the Manufacture List menu from the left sidebar.

In manufacture list table you can see all manufacture list with manufacture details and action button.

For Edit manufacture click on the "Edit" Icon from the action column.
Note: If your manufacture has been done you cannot edit this manufacture. Also in edit form you cannot change product, product quantity, batch number, expiry date and you cannot change manufacture type
After click edit button a form will be shown with raw material, Non Inventory Item, and production stage.
Change if you want and click on the "Submit" button.

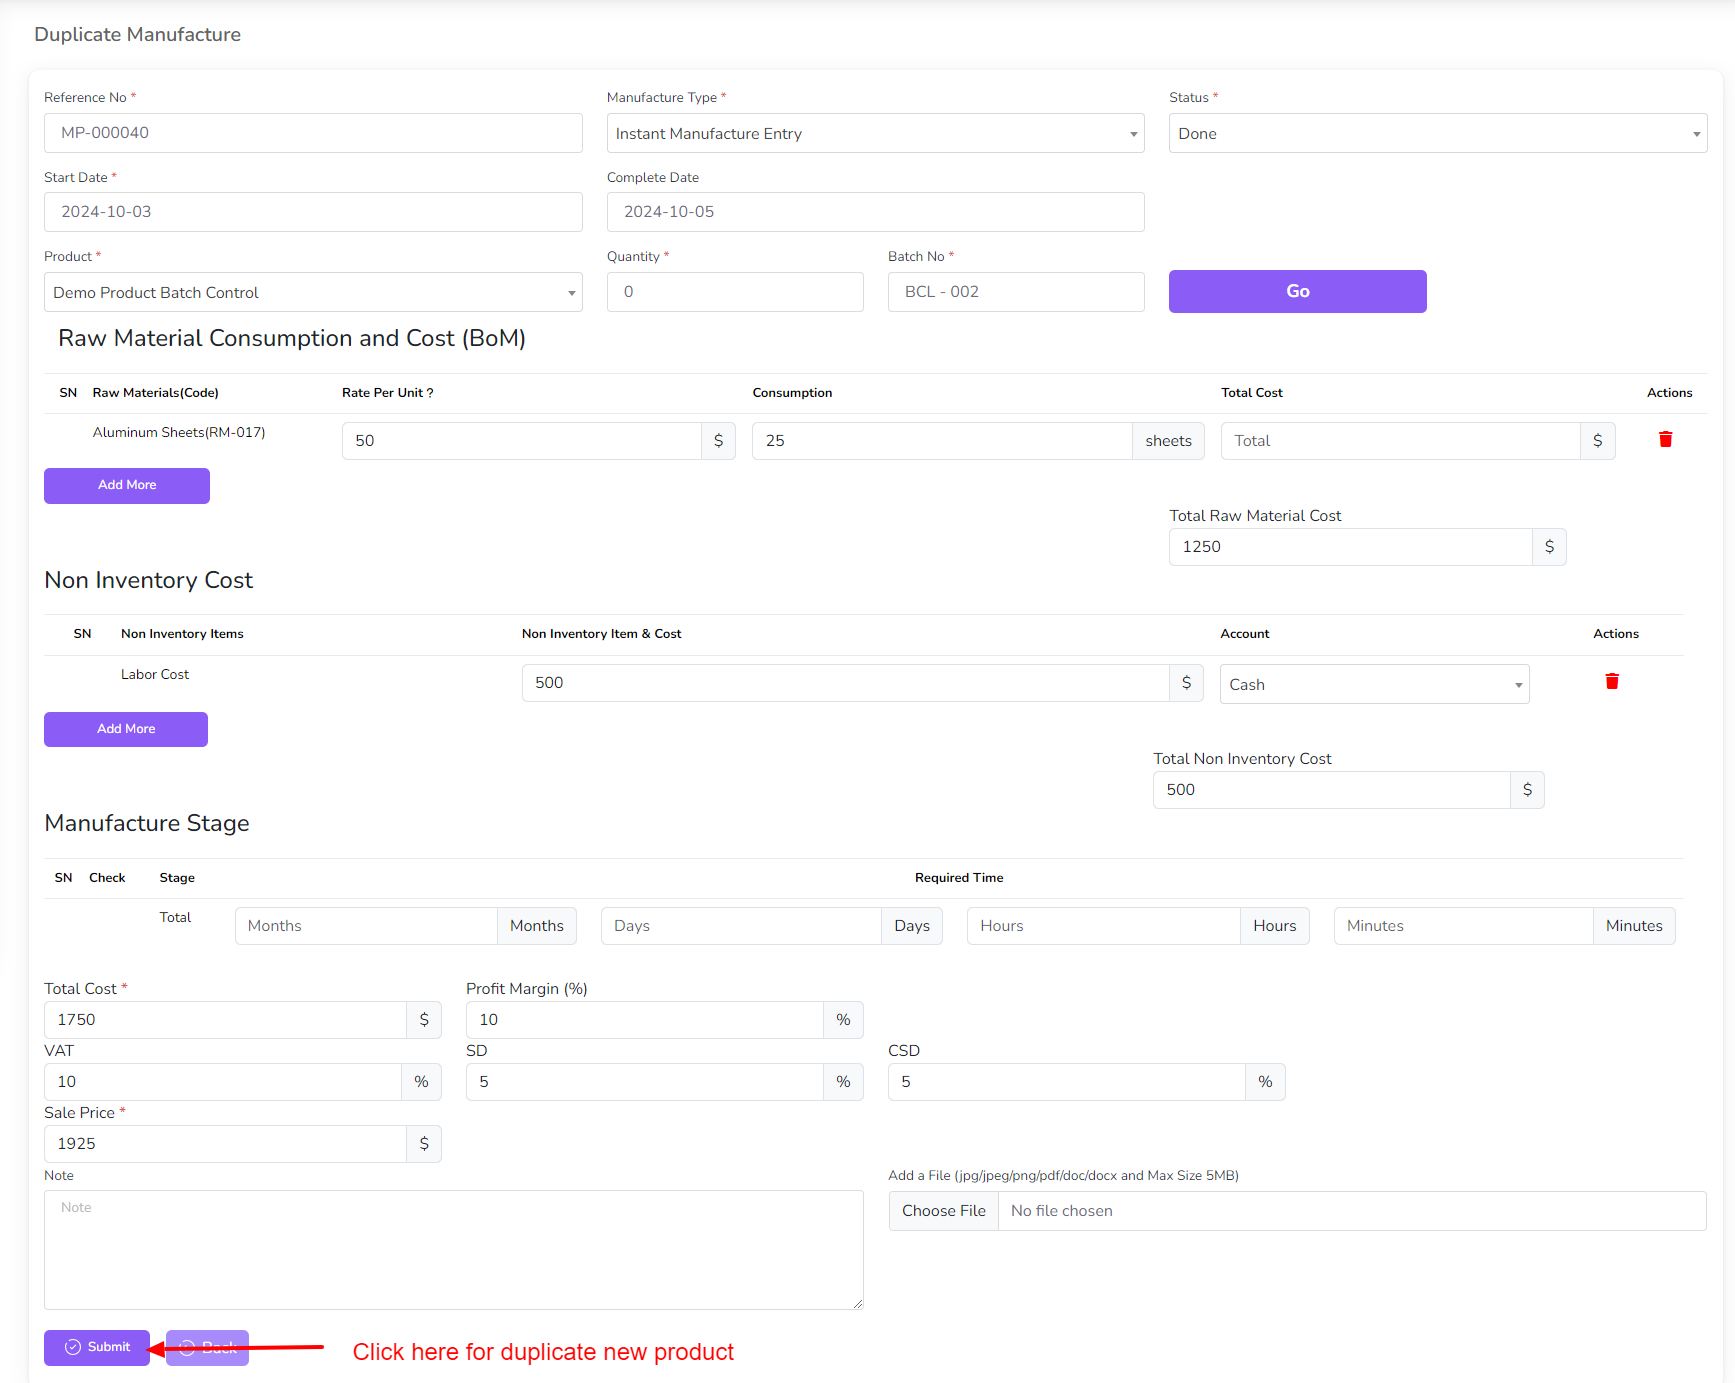
For clone manufacture click on the "Clone" Icon from the action column.
After click clone button a form will be shown with raw material, Non Inventory Item, and production stage.
Change if you want and click on the "Submit" button.
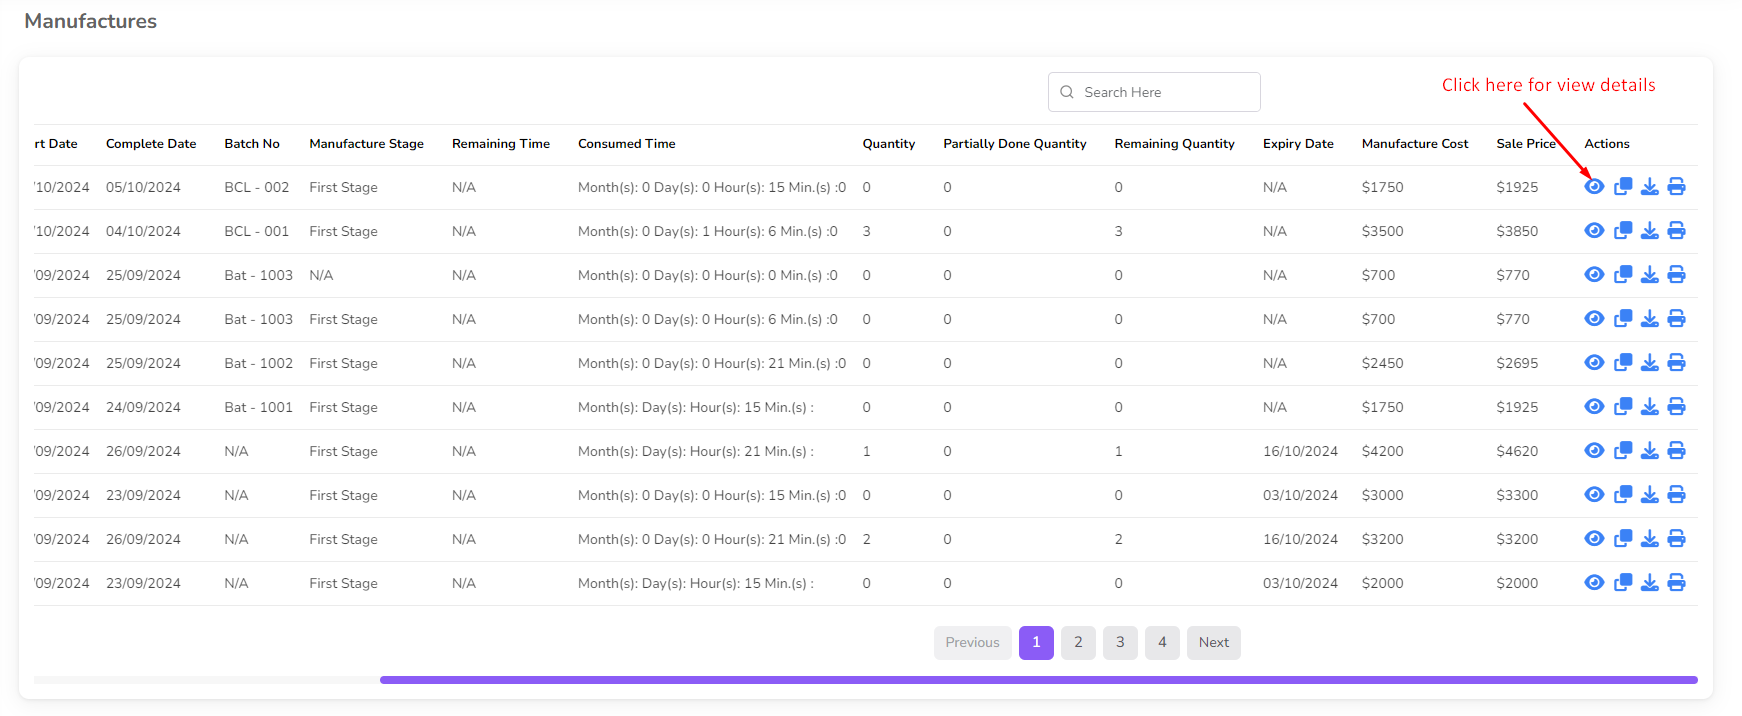
For View manufacture details click on the "View" Icon from the action column.
For Download manufacture details click on the "Download" Icon from the action column.
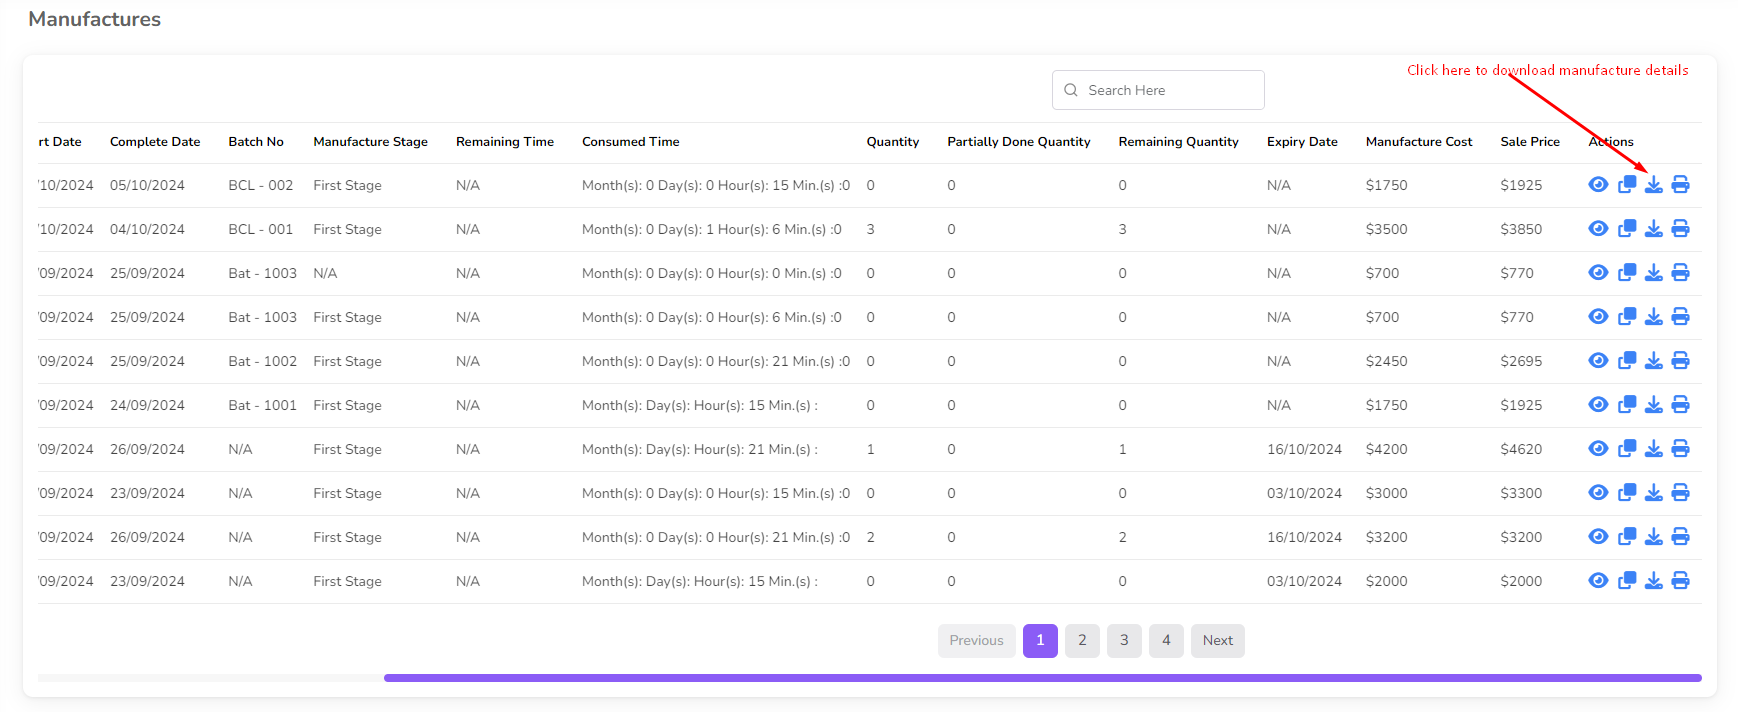
For Print manufacture details click on the "Print" Icon from the action column.
Production Loss
Production loss is a feature that allows you to track and manage the loss of production. In production if have any loss then you can add that loss here.
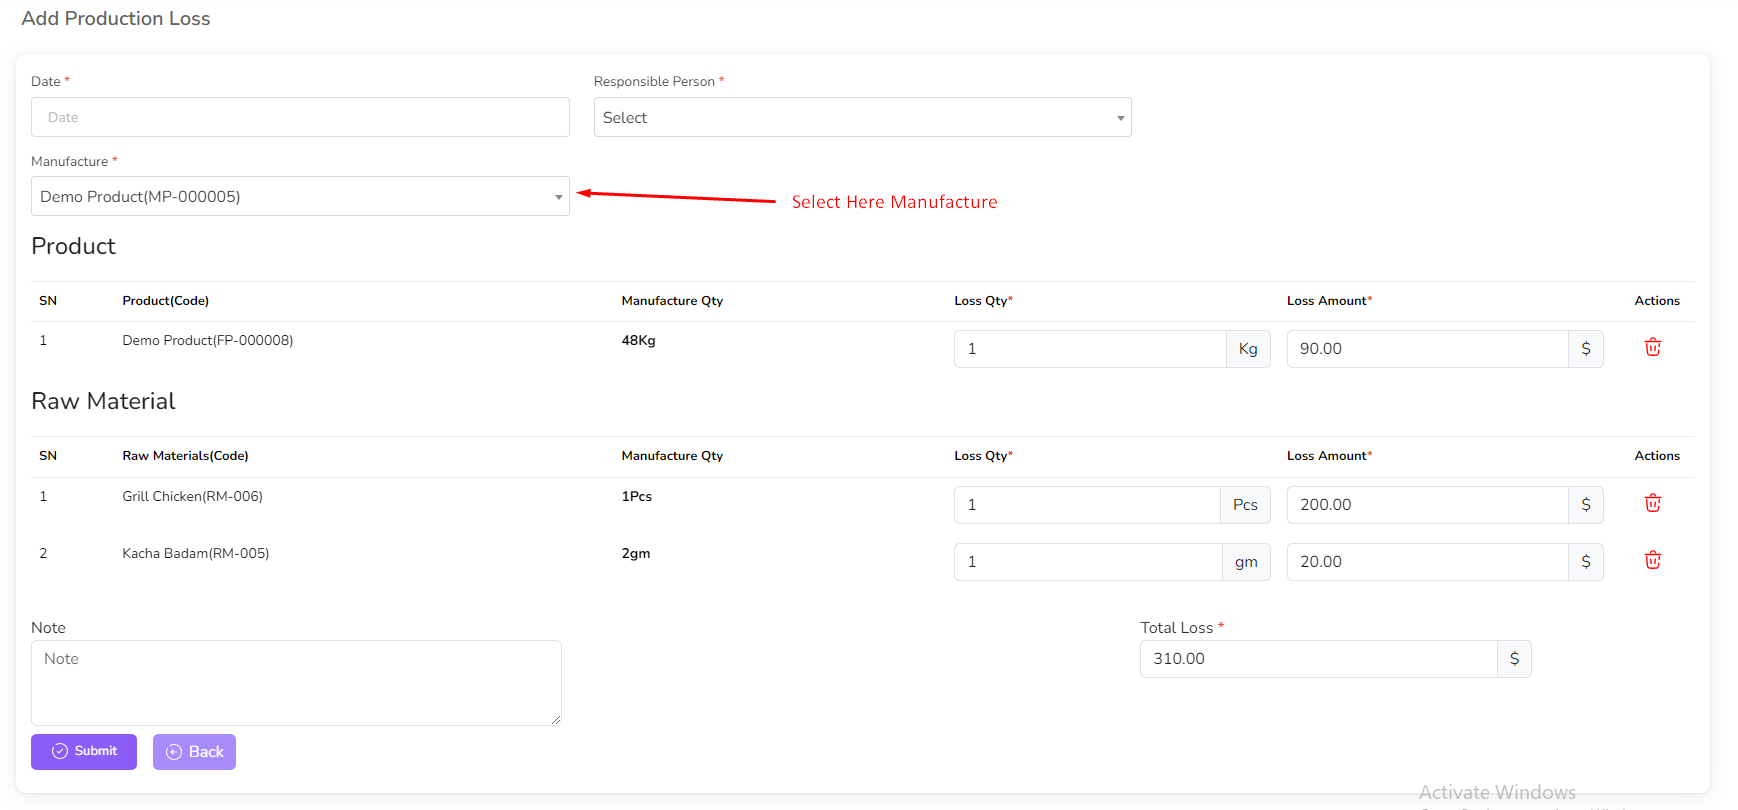
To add production loss go to the Manufacture menu from the left sidebar and click on "Add Production Loss".

After click add production loss button a form will be shown. Select a manufacture from the dropdown then this manufacture product and raw material will be shown. You can change the quantity of raw material and product and add loss note.
You cannot input loss quantity more than production quantity. After that click on the "Submit" button.
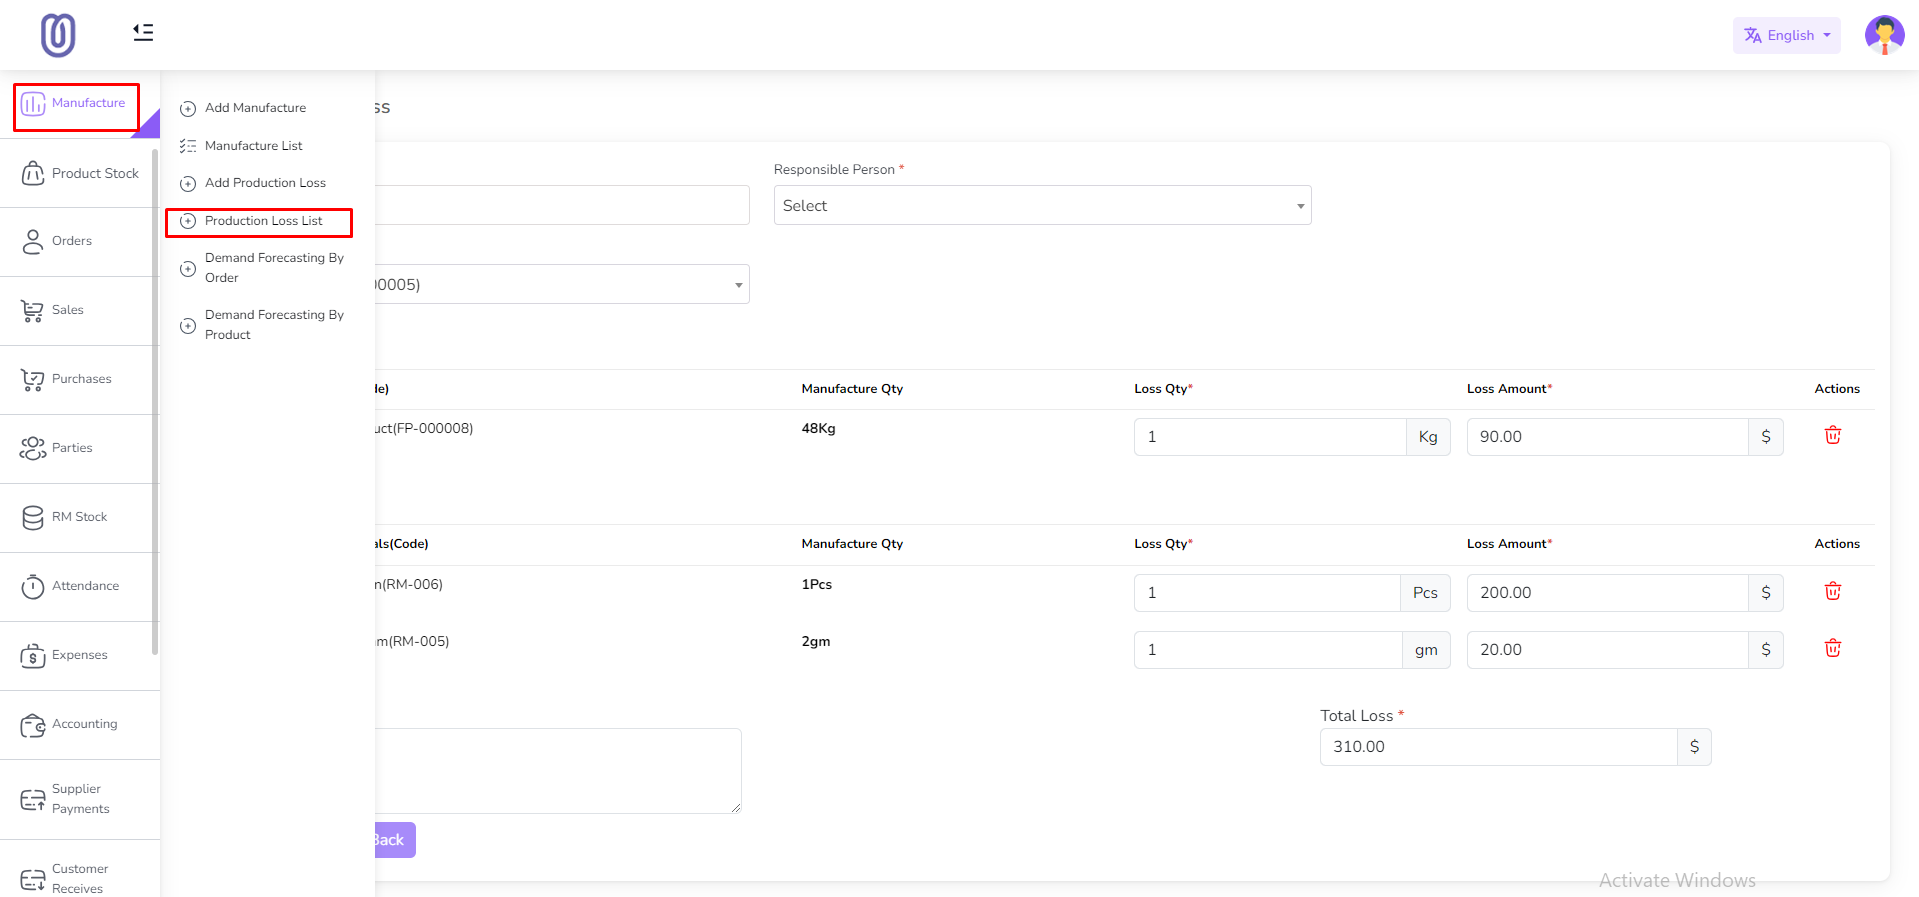
After submit the form the production loss table will be updated. you will be redirected to the production loss list page. Also you can see the production loss list from the production loss list menu from the left sidebar.
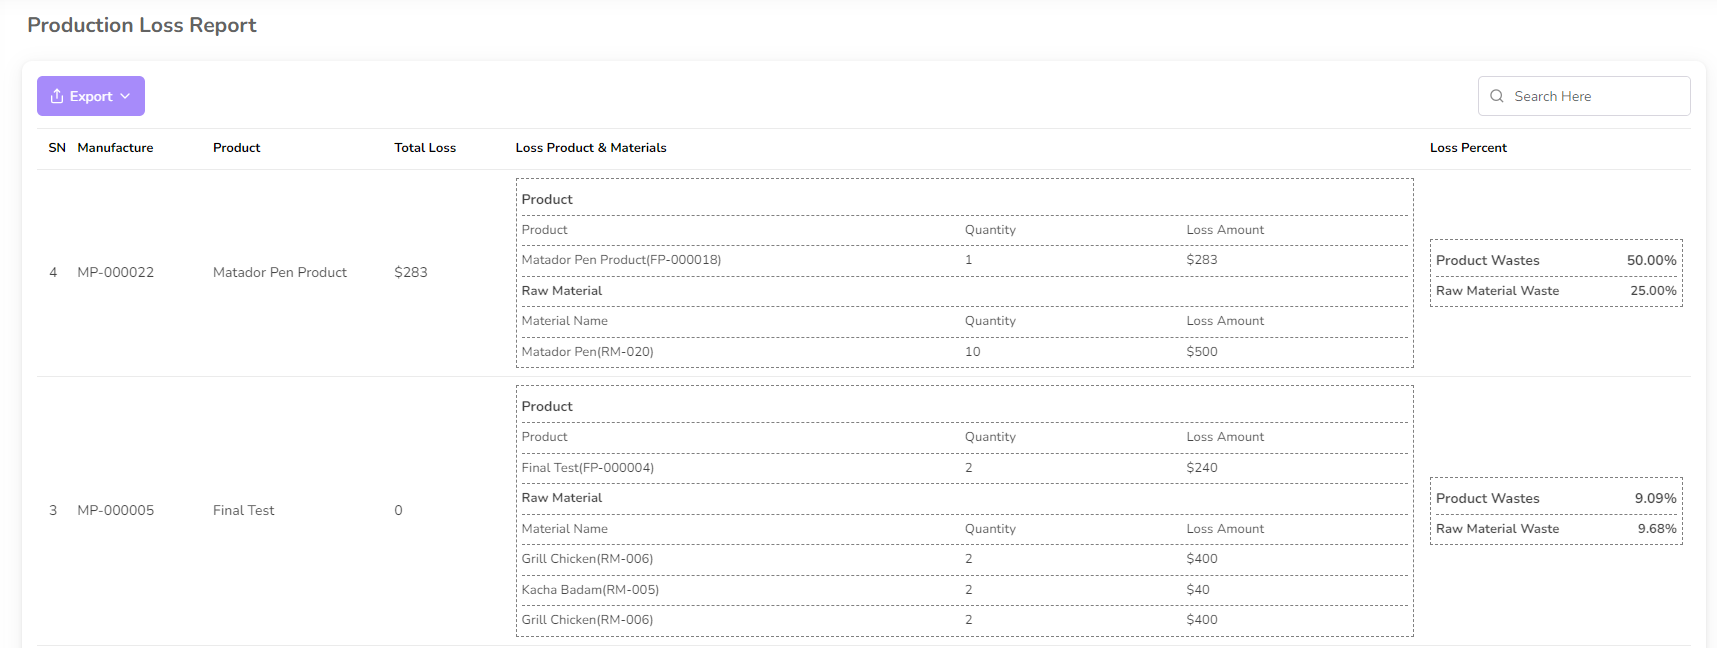
In Production List you will see Loss product and Quantity also the loss percentage.
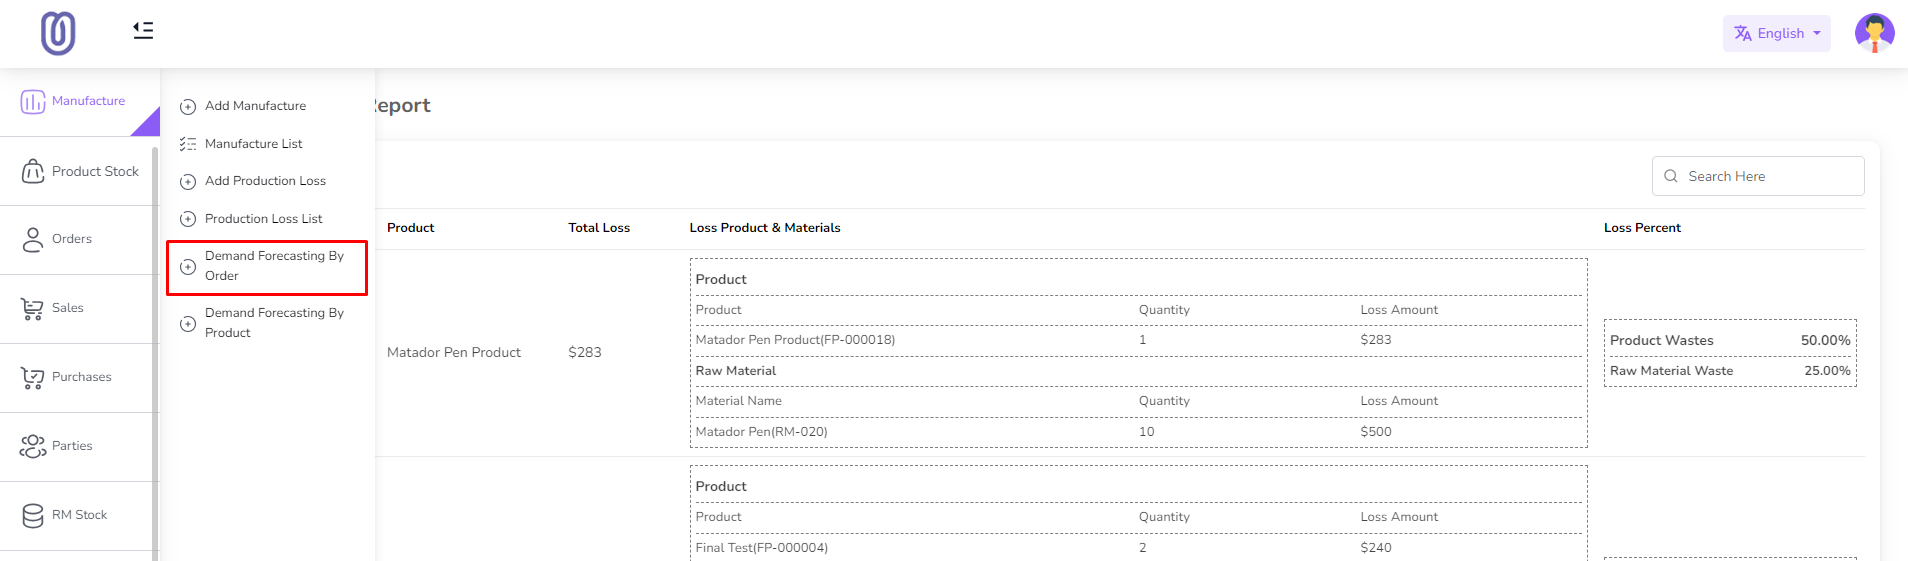
Demand Forecasting By Order
Demand forecasting by order is a feature that allows you to forecast the demand for your products based on your orders.
To forecast demand by order go to the Manufacture menu from the left sidebar and click on "Demand Forecasting By Order".
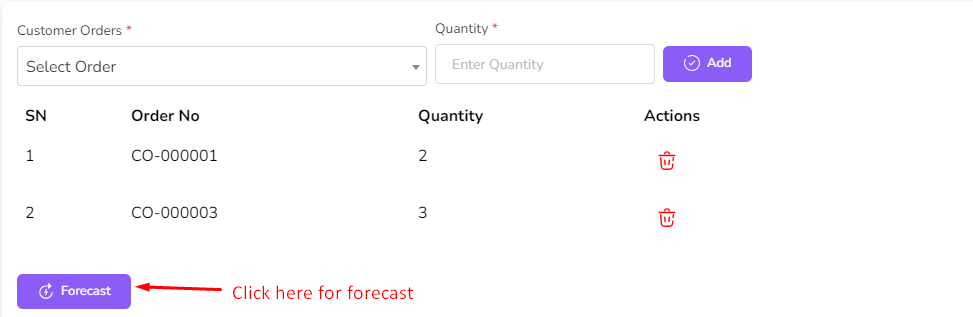
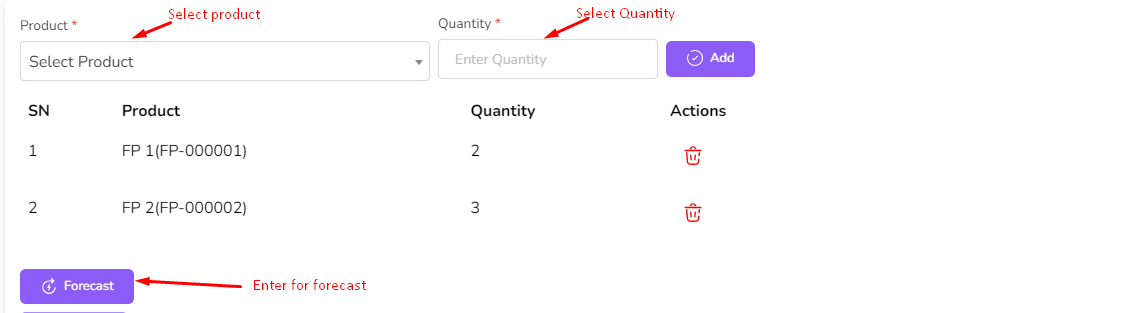
Select Order First from the dropdown then enter a quantity then click on the "Add" button.
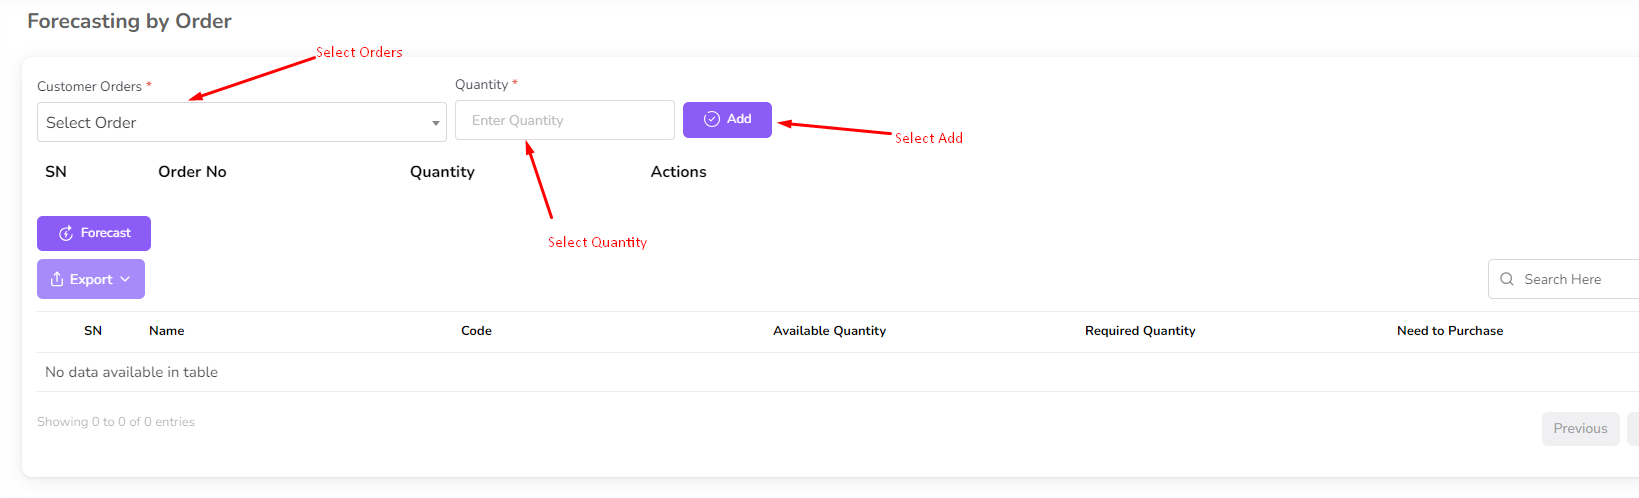
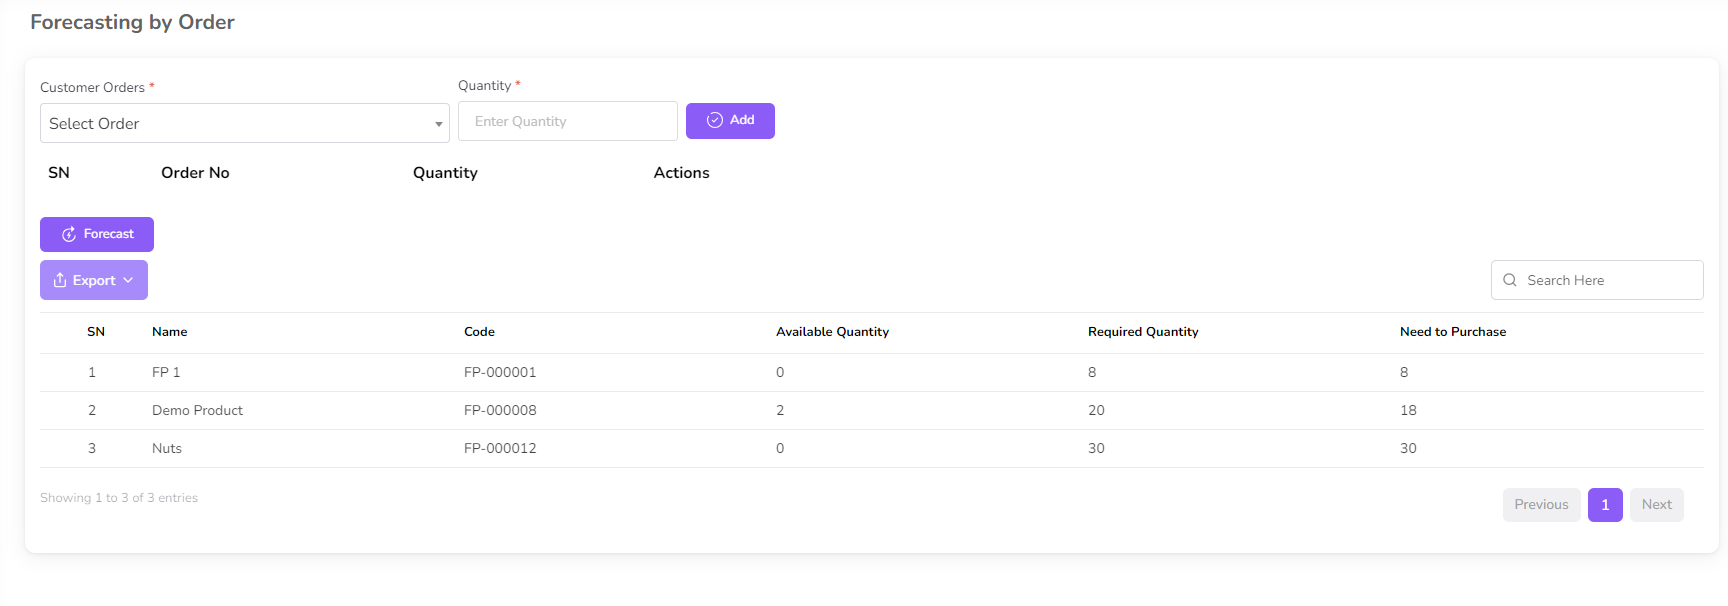
You can add multiple order for a forecasting. After adding all order click on the "Foreacast" button.
After forecasting the demand the forecasting table will be updated.
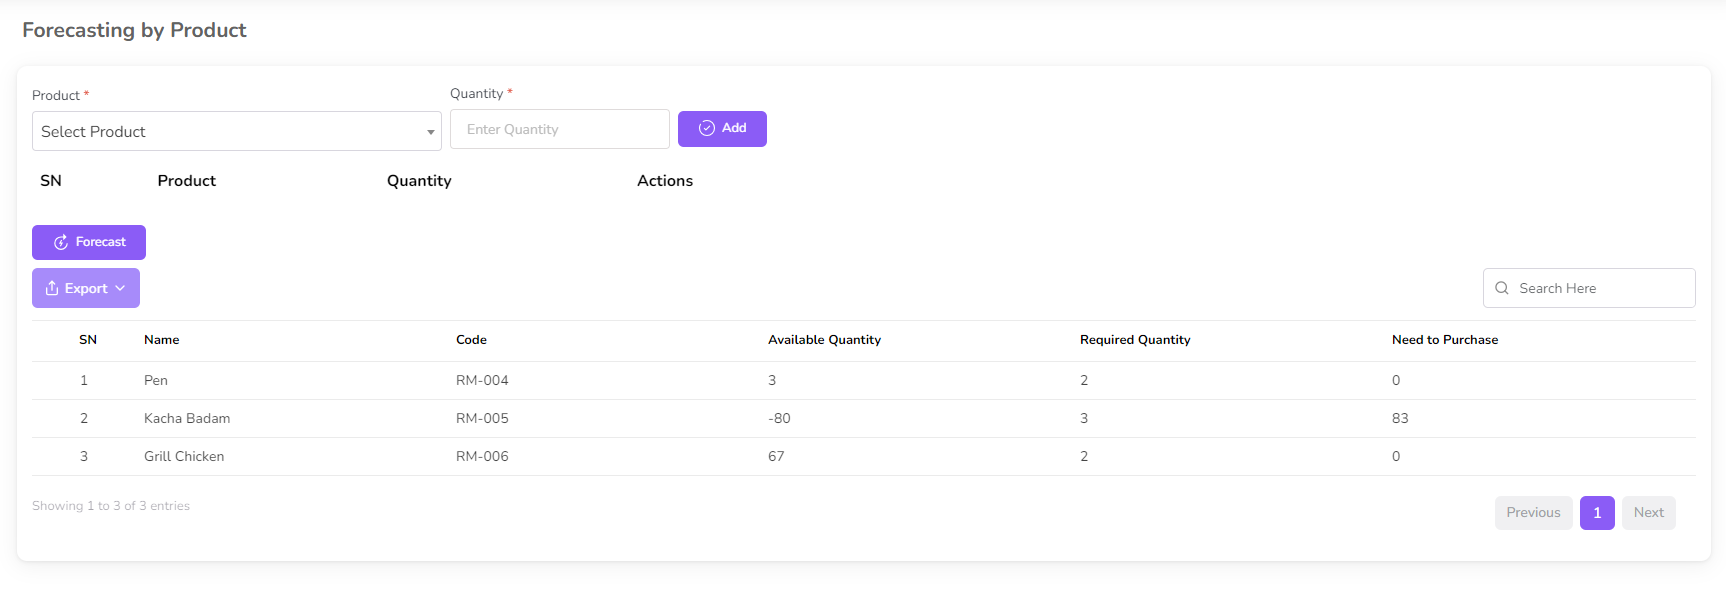
Demand Forecasting By Product
Demand forecasting by product is a feature that allows you to forecast the demand for your products based on historical sales data and other factors.
To forecast demand by product go to the Manufacture menu from the left sidebar and click on "Demand Forecasting By Product".

Select a product from the dropdown then enter a quantity for which you want to forecast the demand. Click on the "Forecast" button.
You can add multiple product for a forecasting.
The system will analyze historical sales data and other factors to provide a forecasted demand for the selected product.
Product Stock
Product Stock is a feature that allows you to manage your product inventory effectively. You
can add, edit, and delete products, as well as track their stock levels.
To manage product stock, go to the “Product Stock” menu from the left sidebar.
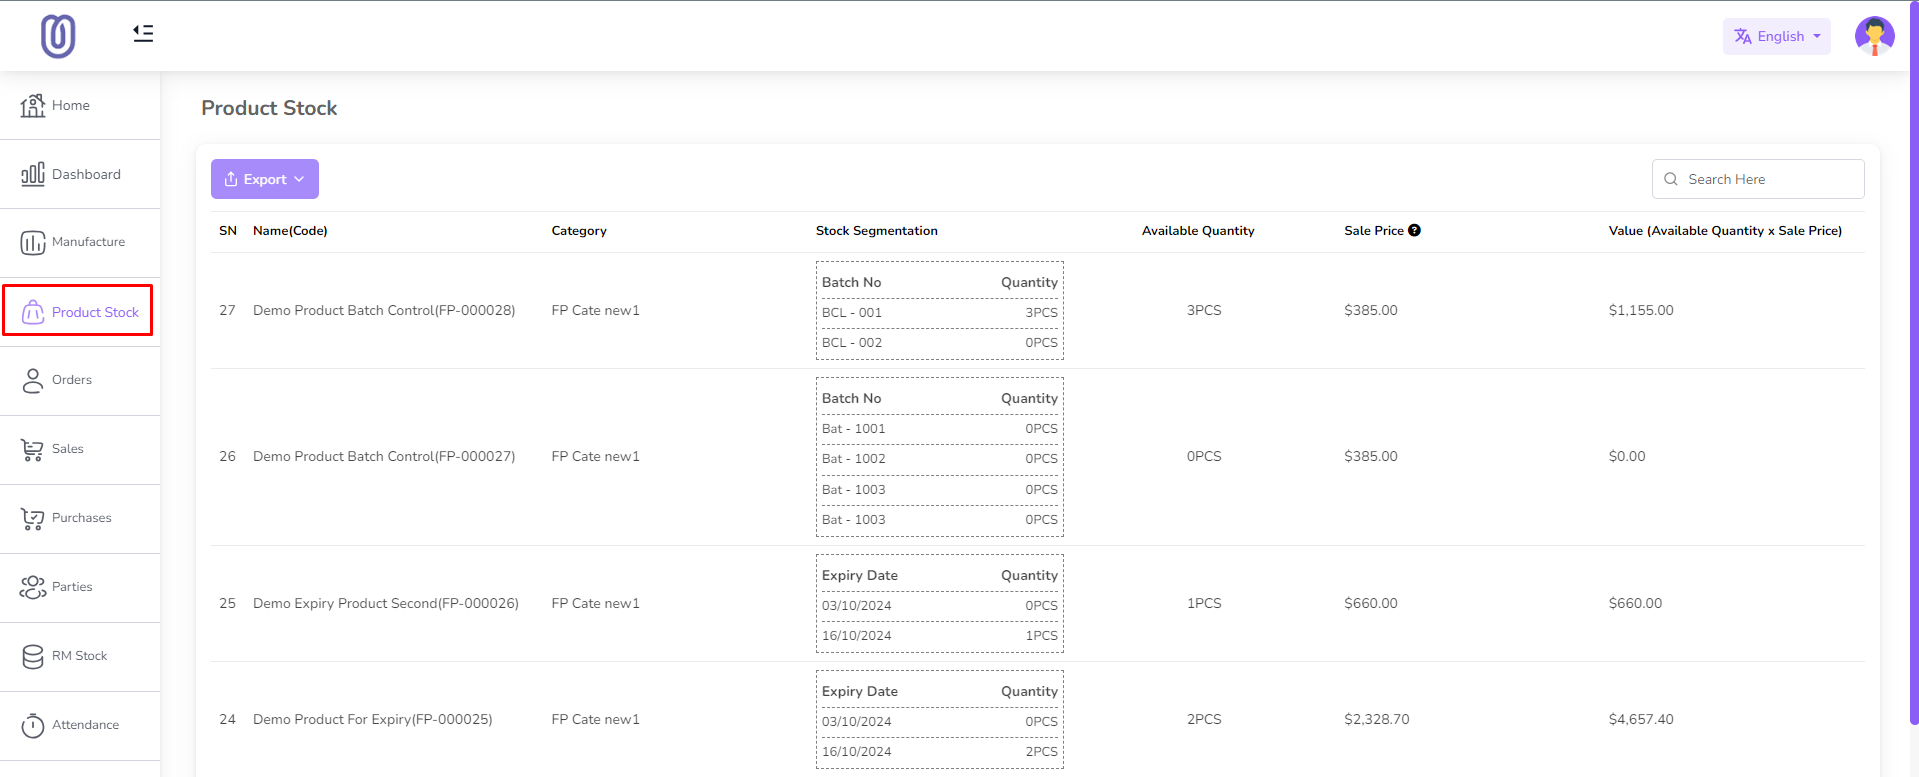
In product stock table you can see Stock segmentation where you can see the stock of each
product Batch number wise and Expiry date wise. Also you can see total available stock and
total value of the stock.
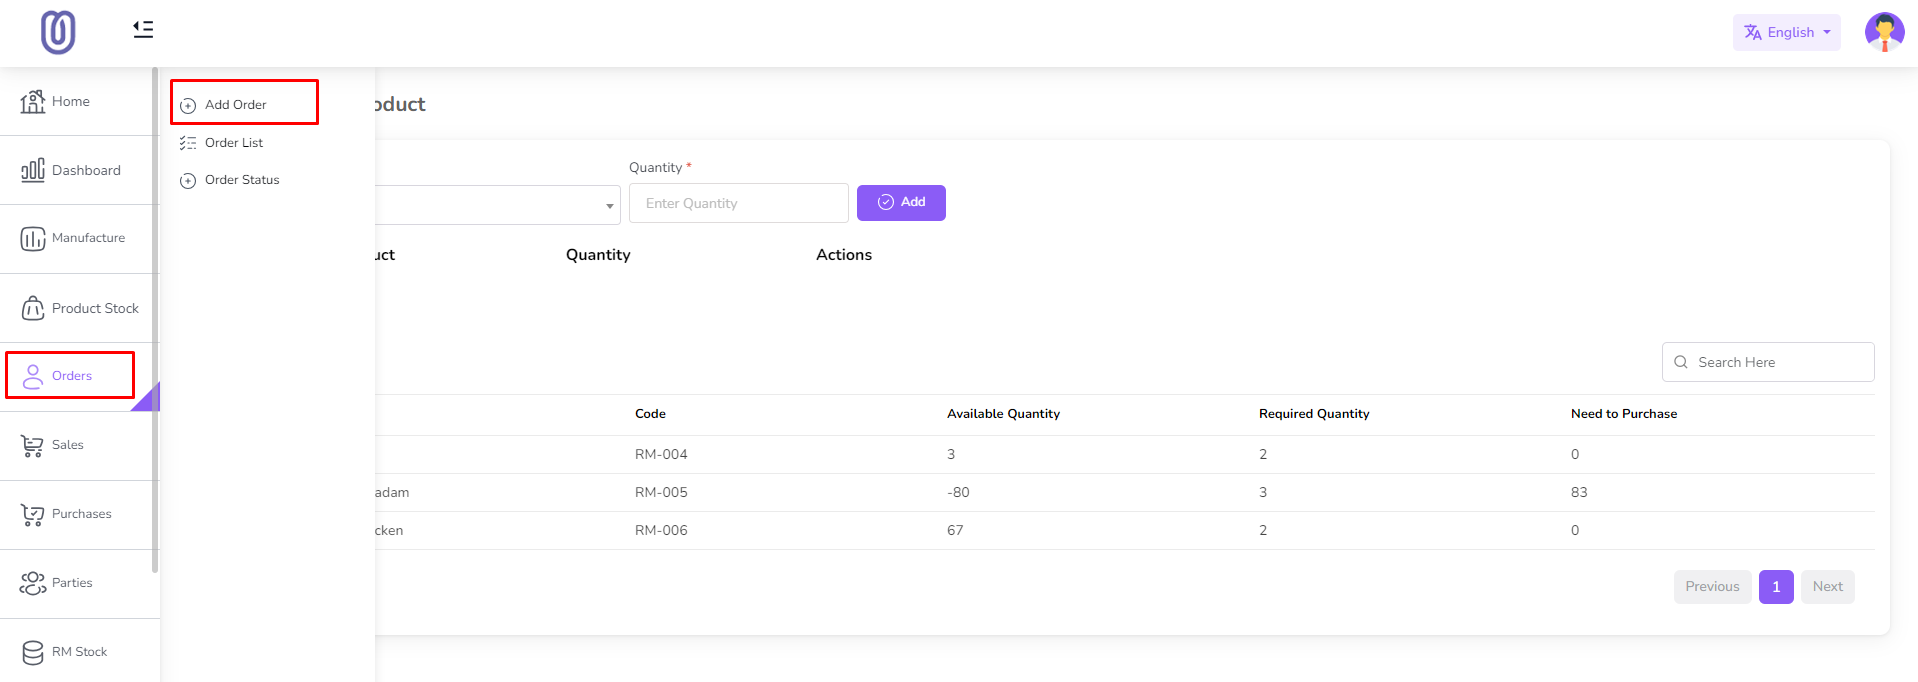
Customer Orders
To add customer orders go to the Orders menu from the left sidebar and click on "Add Order".
Click Add more button from the order item table to add more items to the order.
After click add more button a a form will be populated with product and product rate.
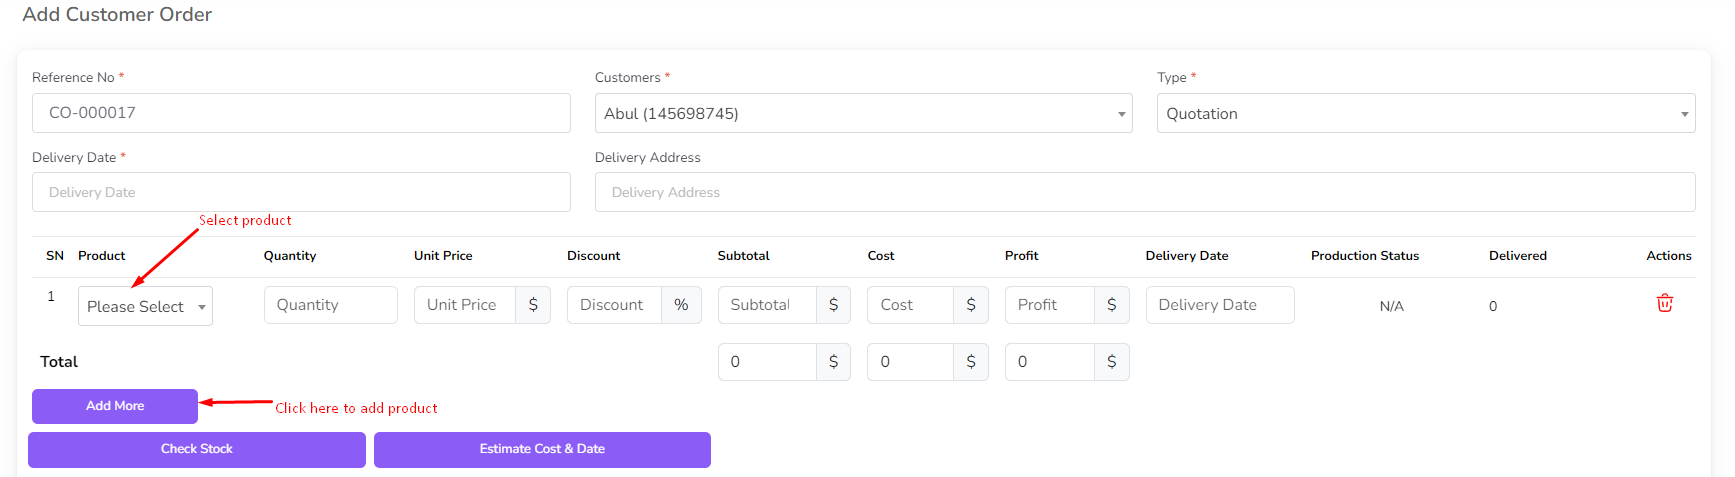
If order type is work order you can be add Invoice Quotations and Deliveries.
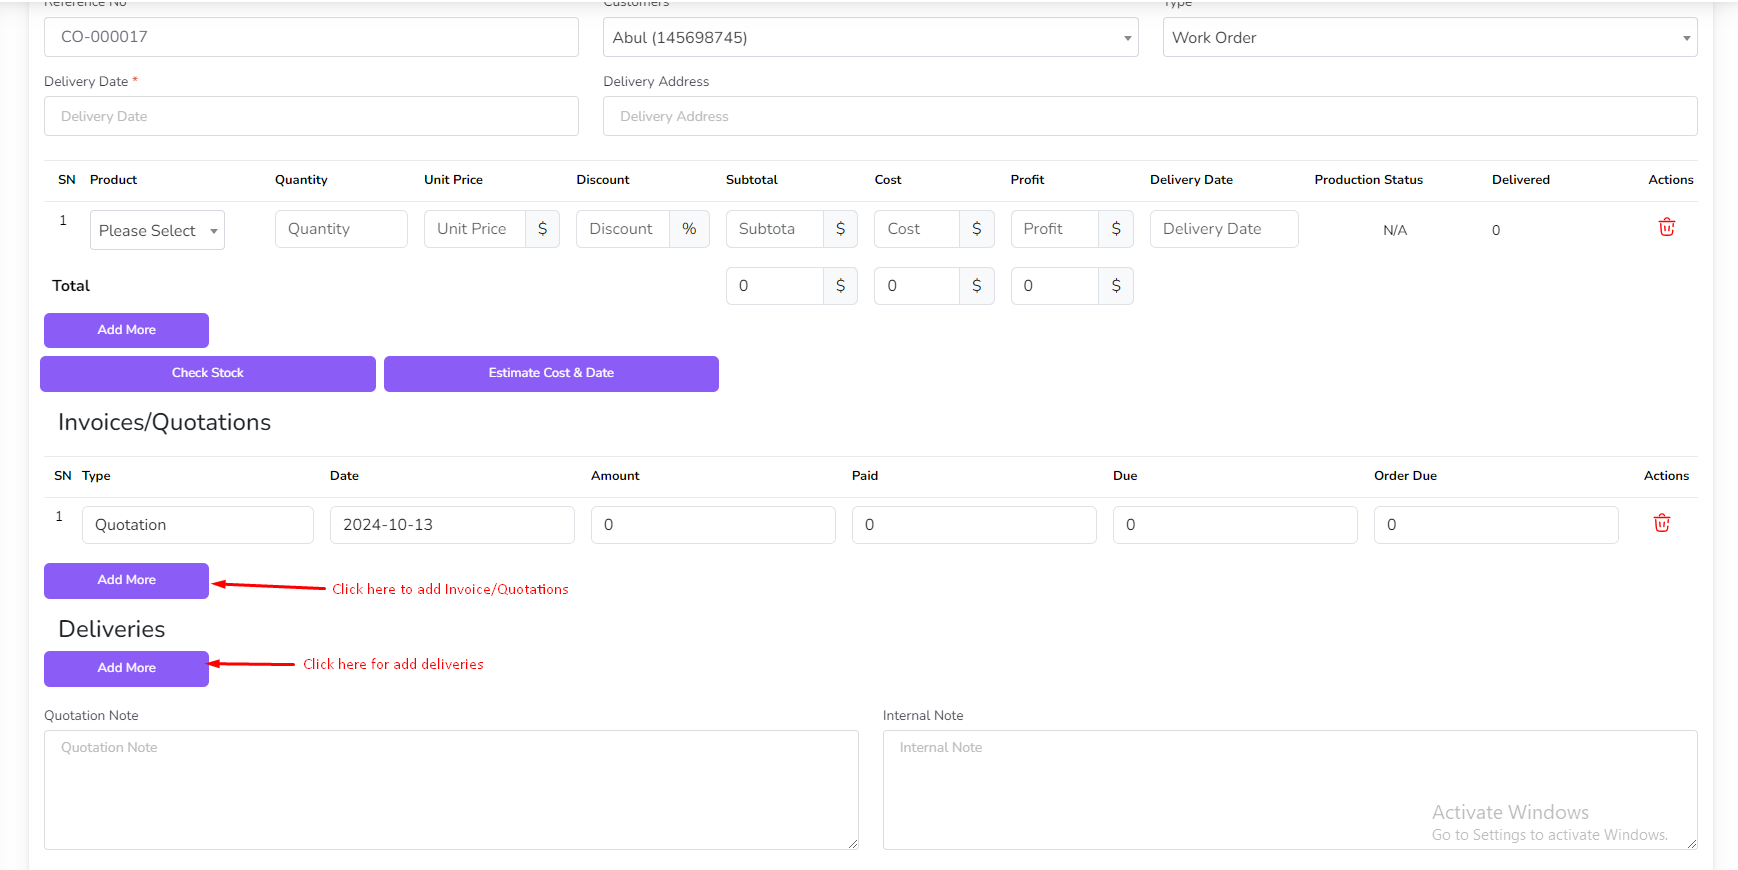
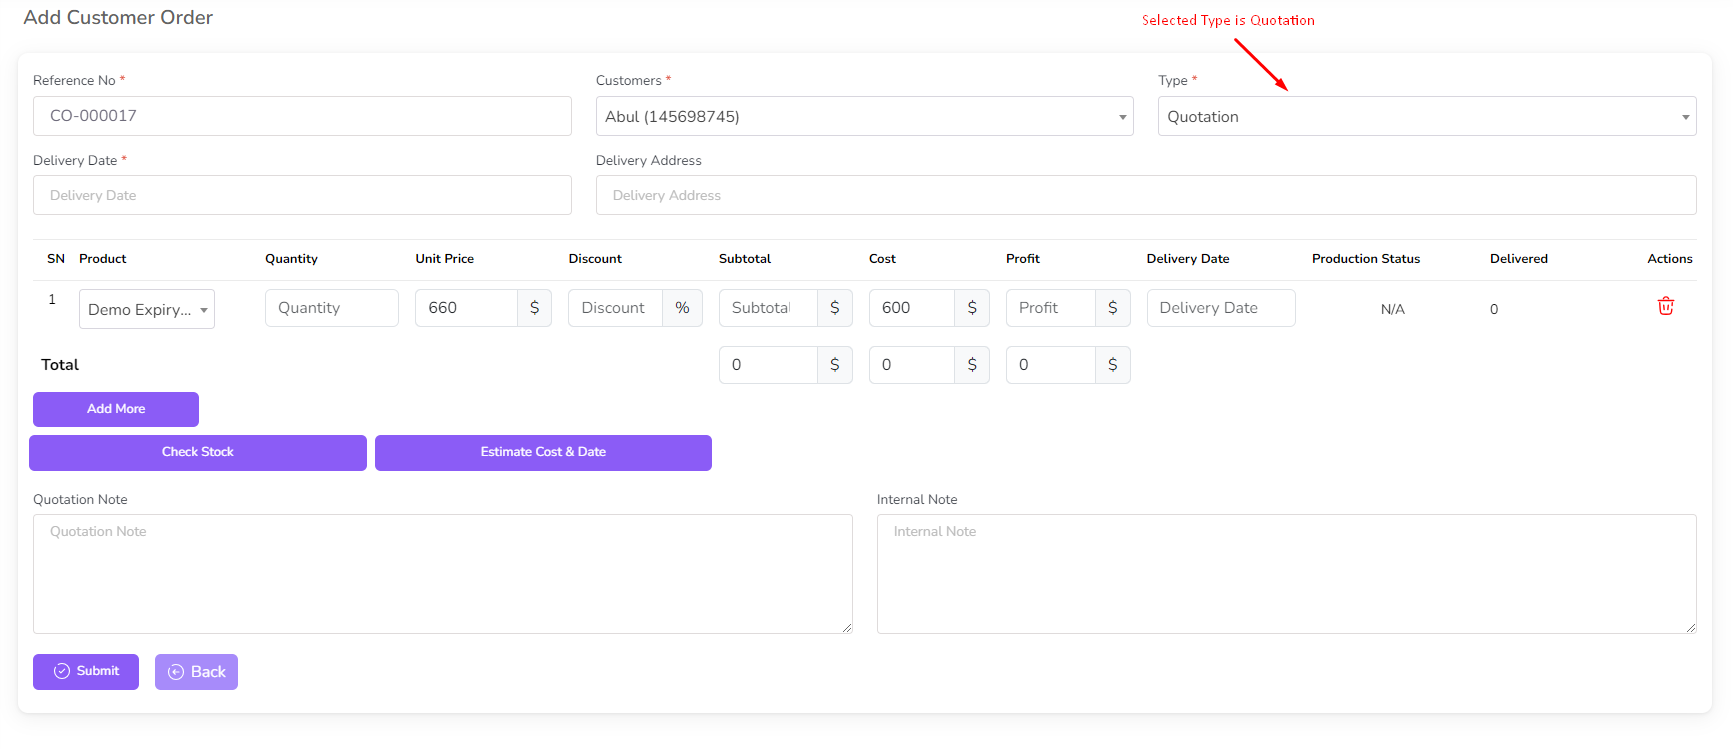
If Order type is quotation then Invoice and Deliveries option are hide.
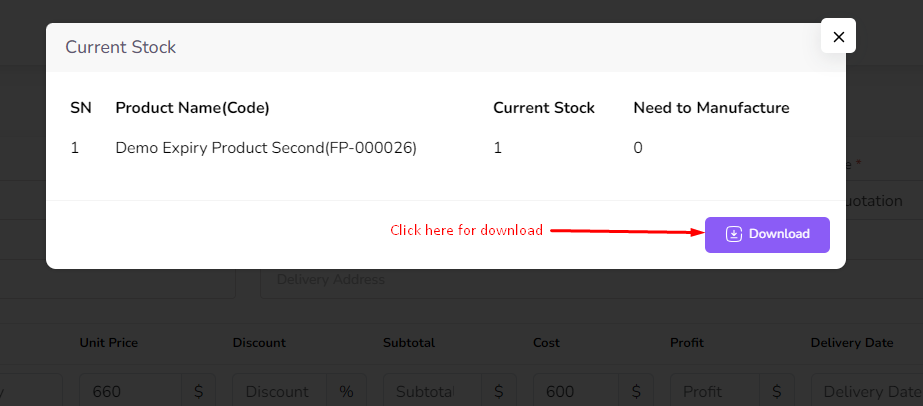
When you add product to the order. you can check Stock and Estimated Cost and Date. For check stock first add product and check "Check Stock" button.
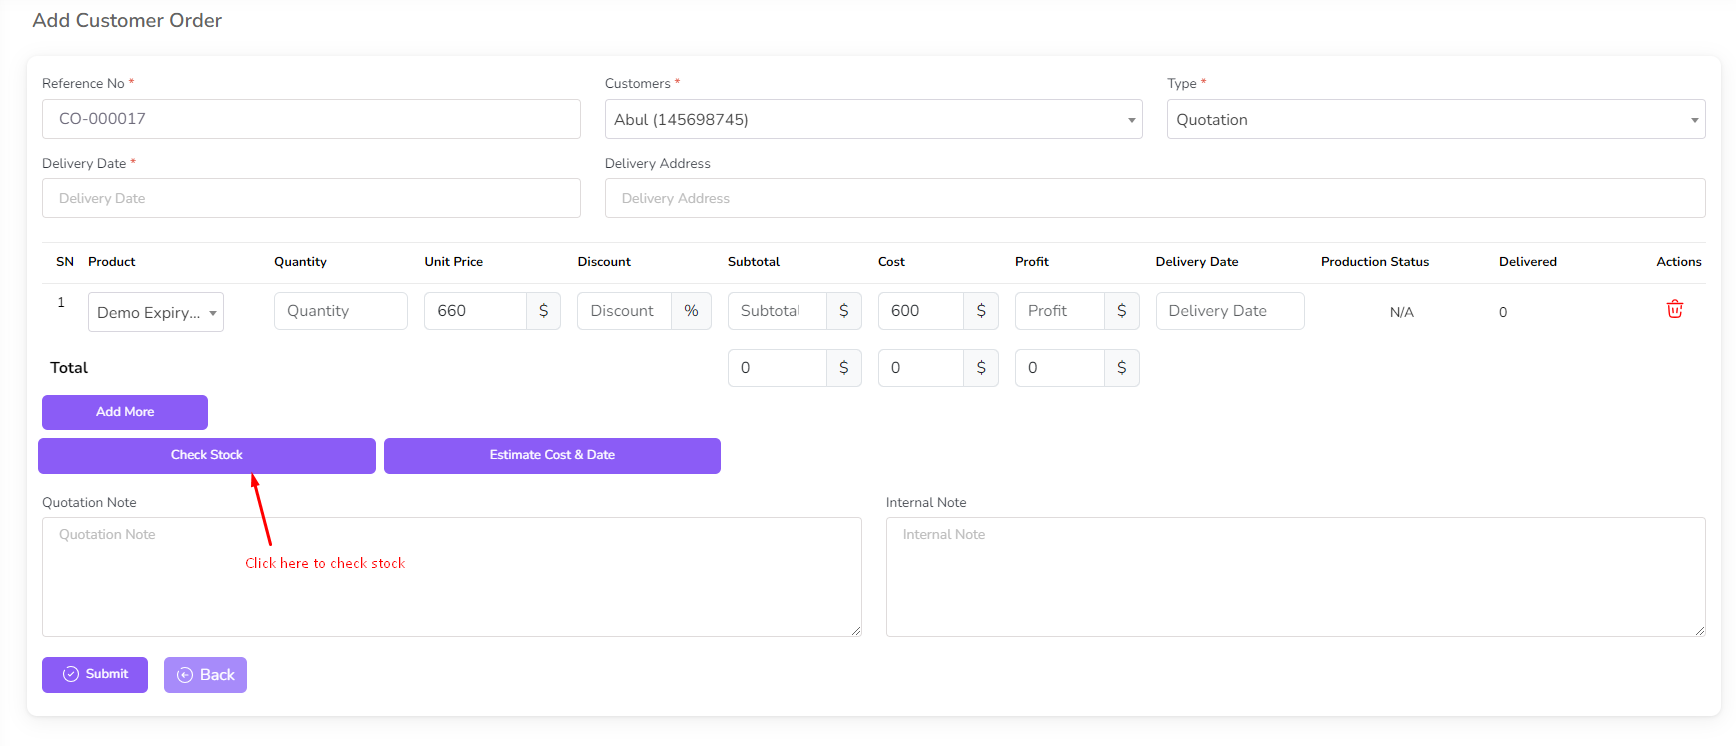
After Click check stock button a modal will be open with stock details.
For check Estimated Cost and Date you need to click "Calculate Estimated Cost and Date" button.
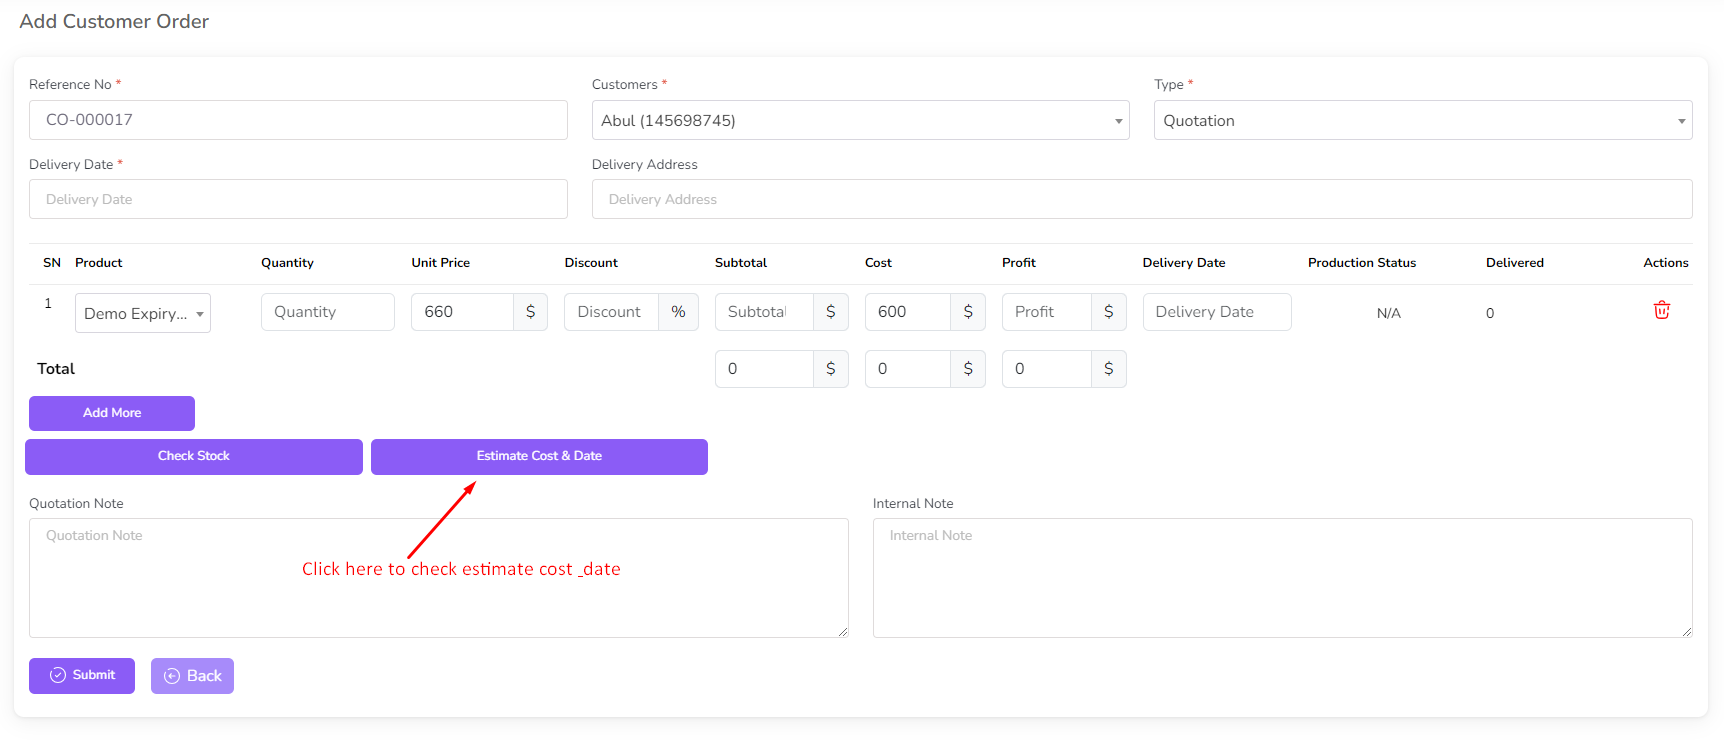
After click calculate button Estimated Cost and Date will be shown.
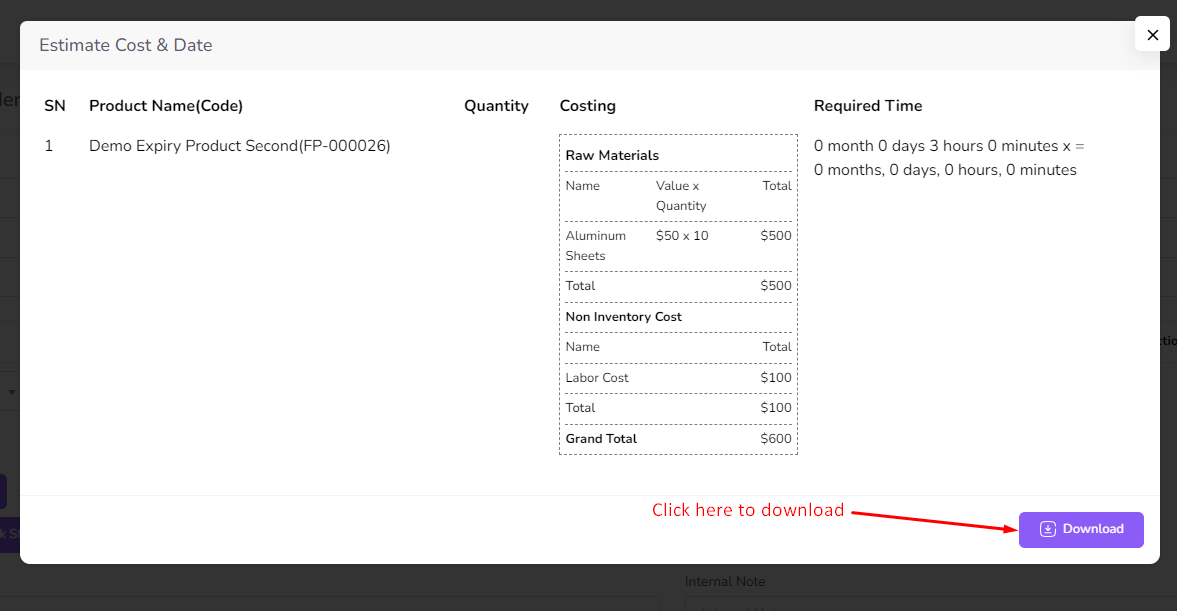
If Order type is work order then Invoice/Quotation section will be show and one row will be added automatically.

For Add more Invoice/Quotation click on the "Add More" button from the Invoice/Quotation table.
After click add more button a form will be shown. Input necessary details and click on the "Submit" button.
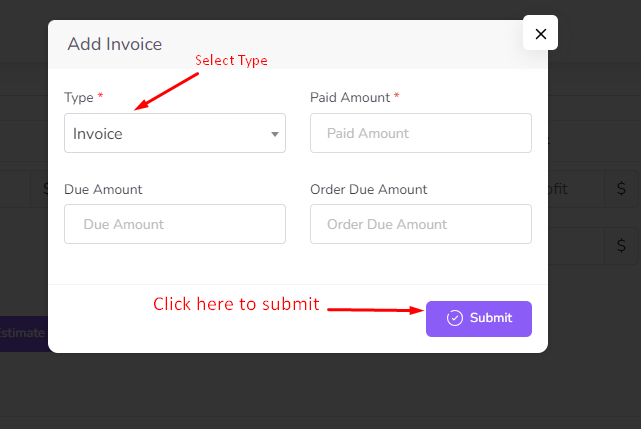
After submit the form the Invoice/Quotation table will be updated.

For add delivery note click on the "Add More" button from the Deliveries table.
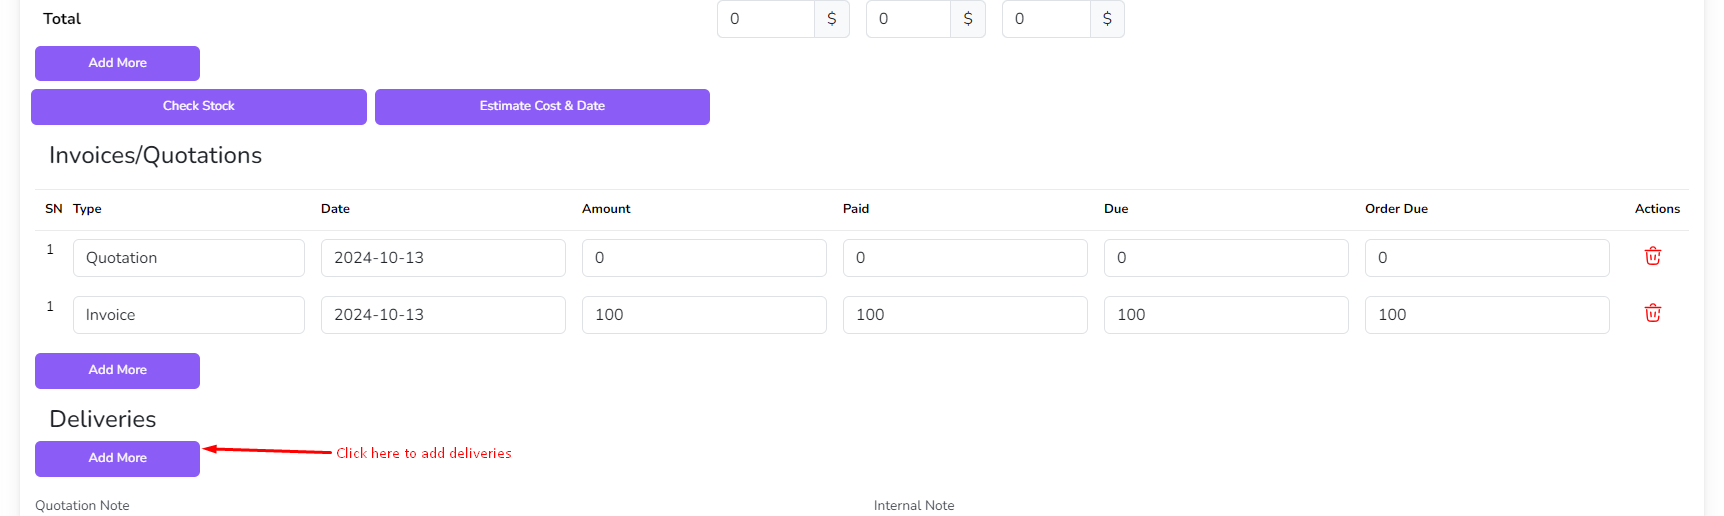
After click add more button a form will be shown. Input necessary details and click on the "Submit" button.

After submit the form the Deliveries table will be updated.
After that click on the "Submit" button. Then you will be redirected to the order list page.
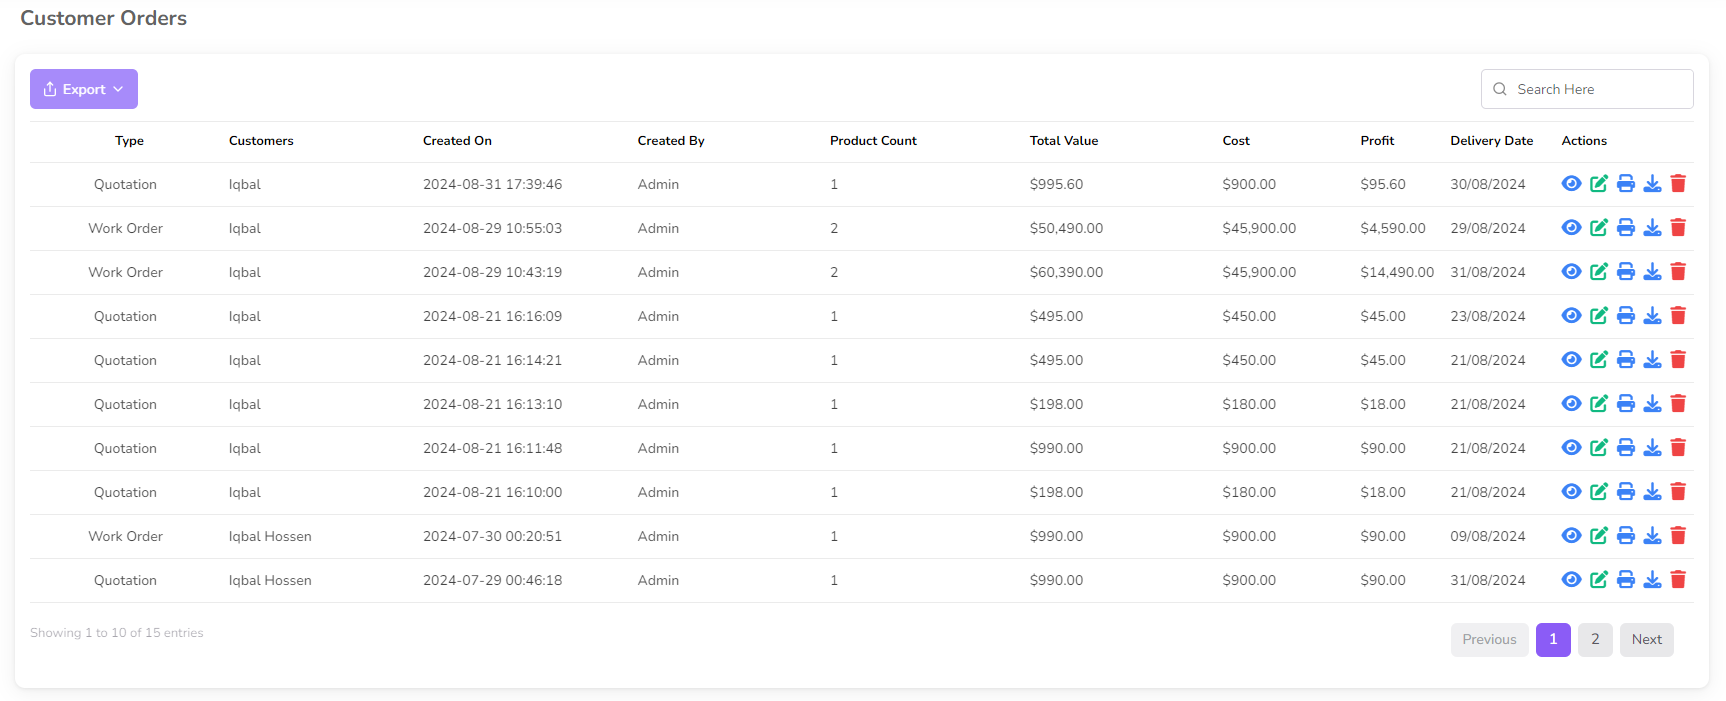
For View order details click on the "View" icon from the action column.
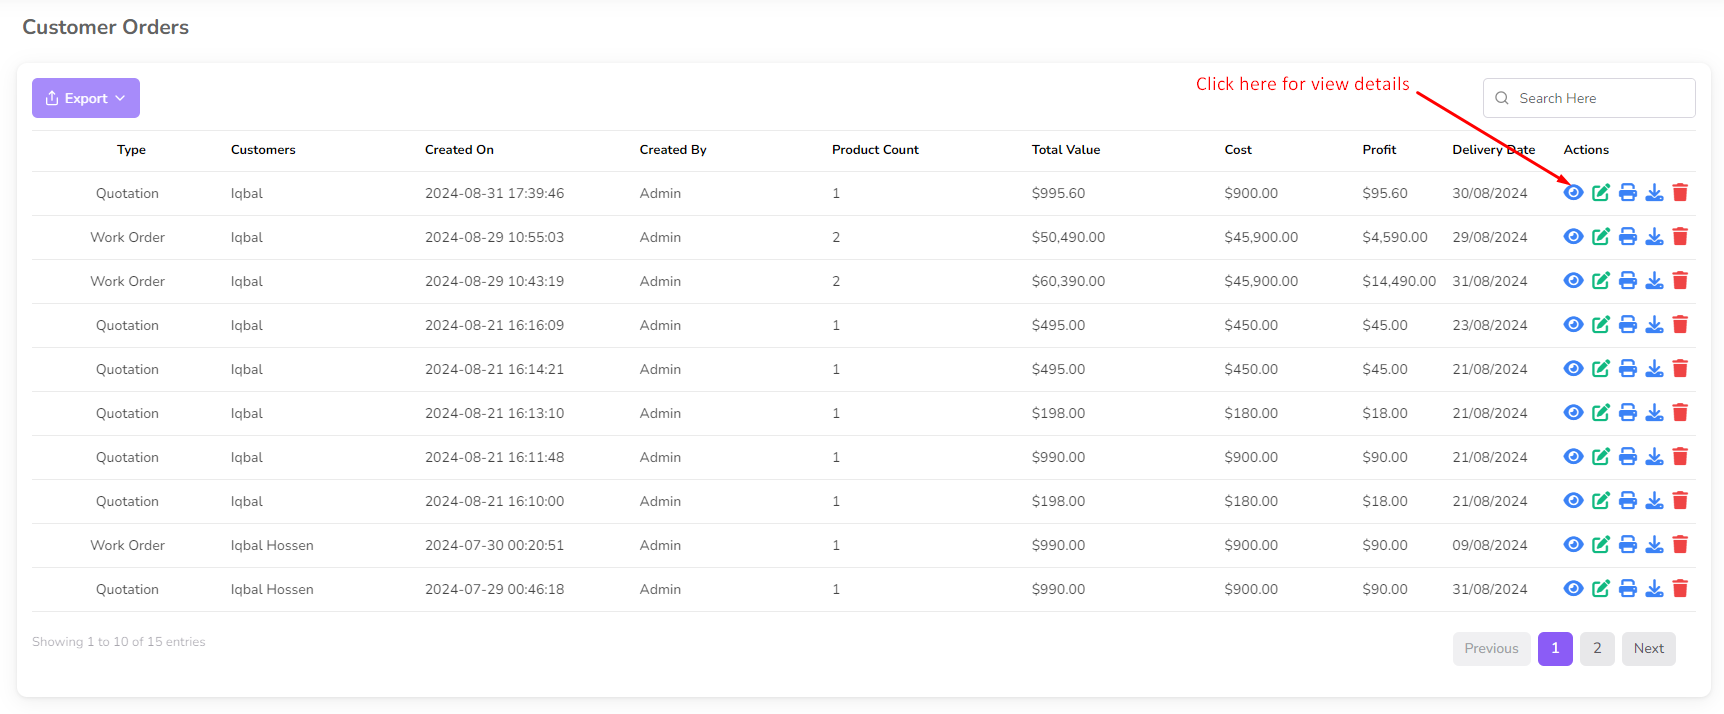
For Download order details click on the "Download" icon from the action column.

For Print order details click on the "Print" icon from the action column.

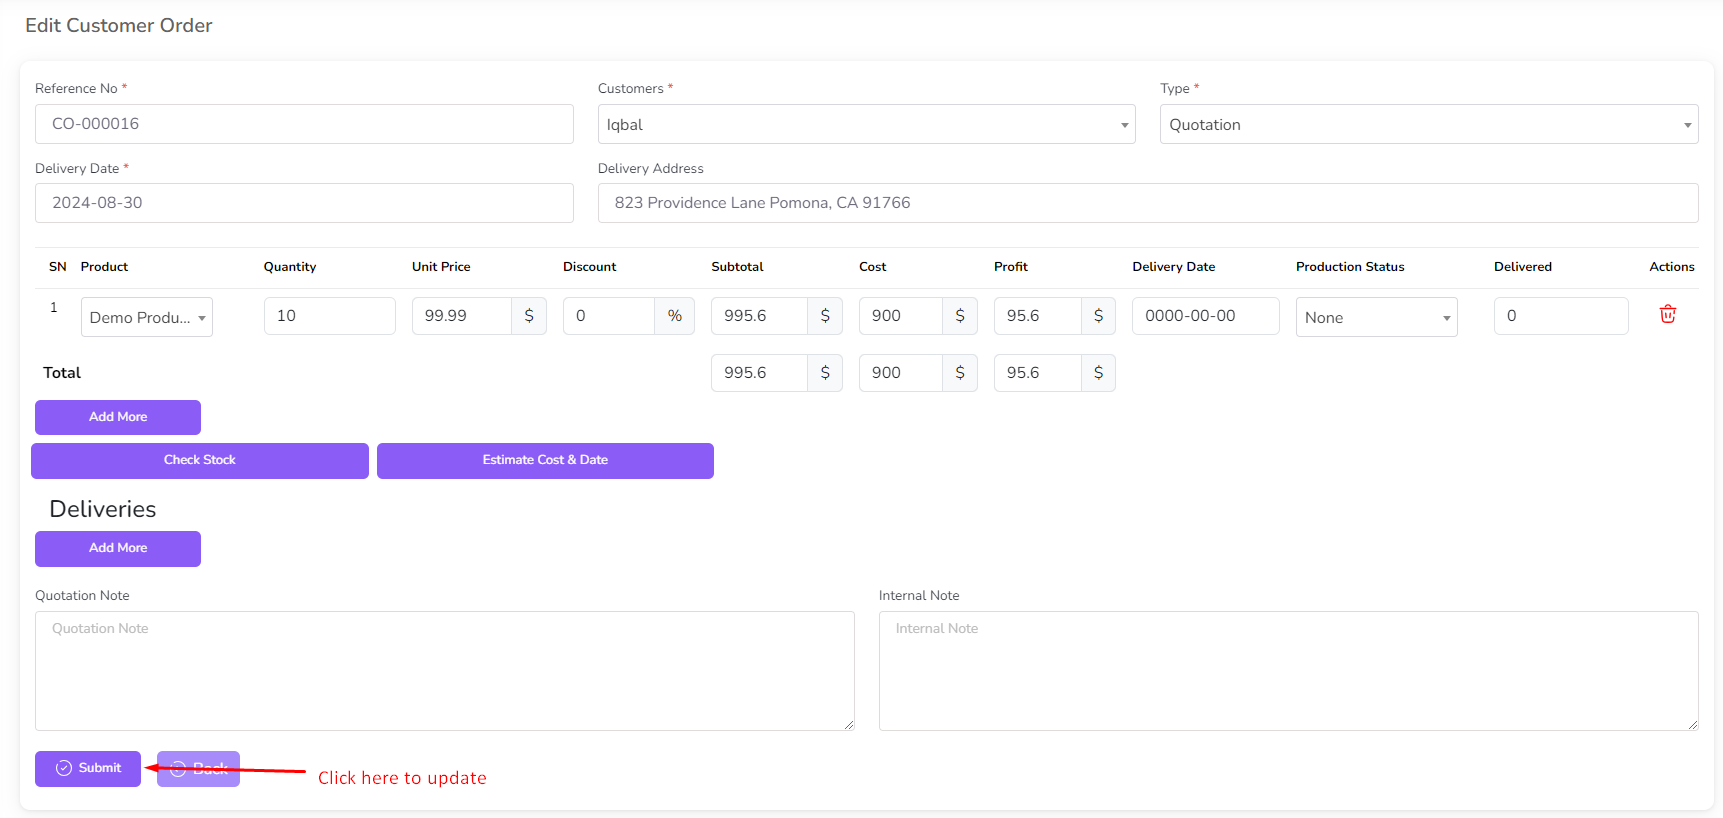
For Edit order click on the "Edit" icon from the action column.
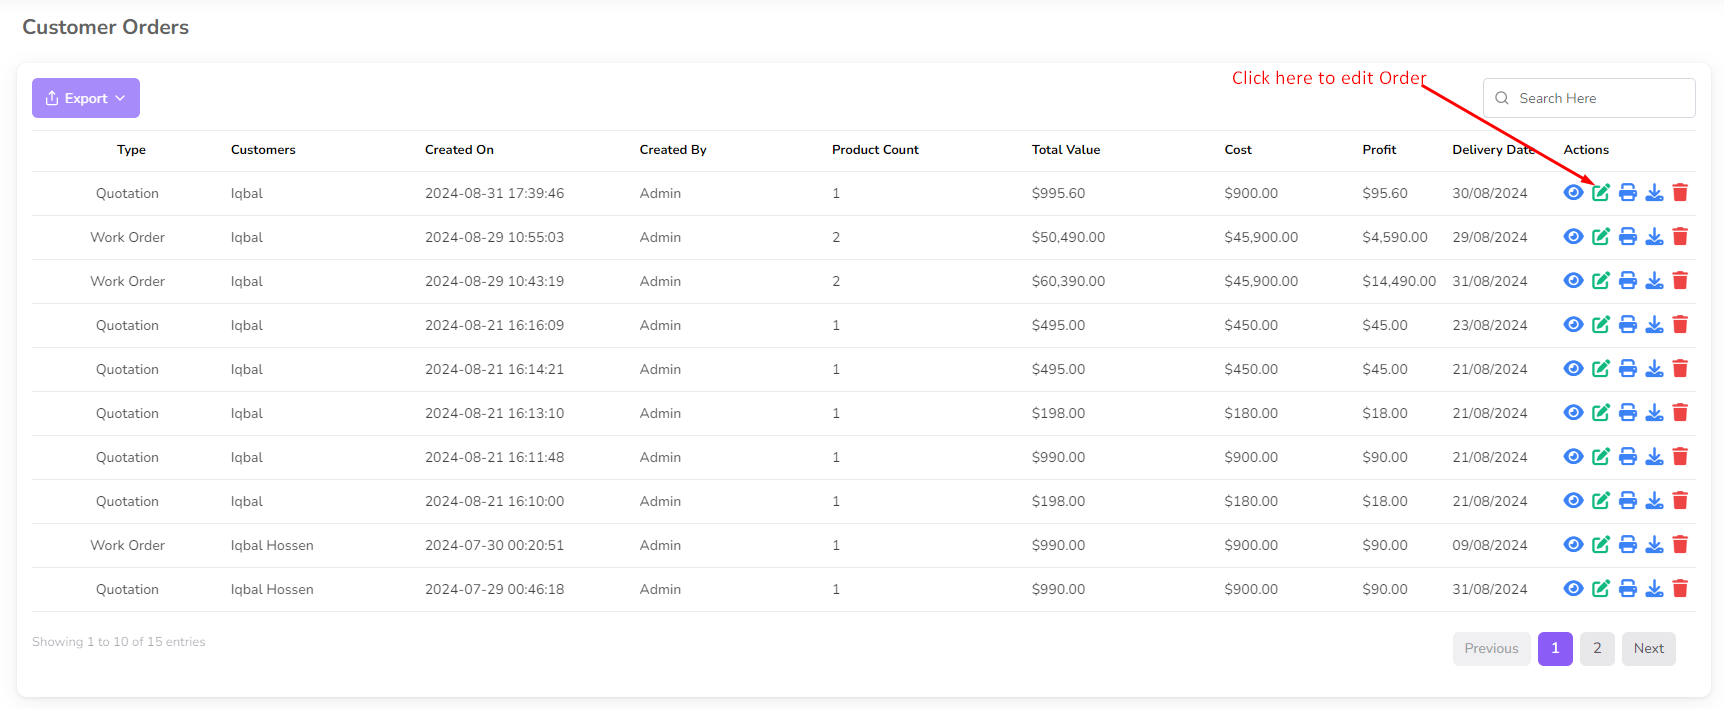
After click edit button a form will be shown with order details. Change if you want and click on the "Submit" button.
For delete order click on the "Delete" icon from the action column.

Sales
To add sales go to the Sales menu from the left sidebar and click on "Add Sales".
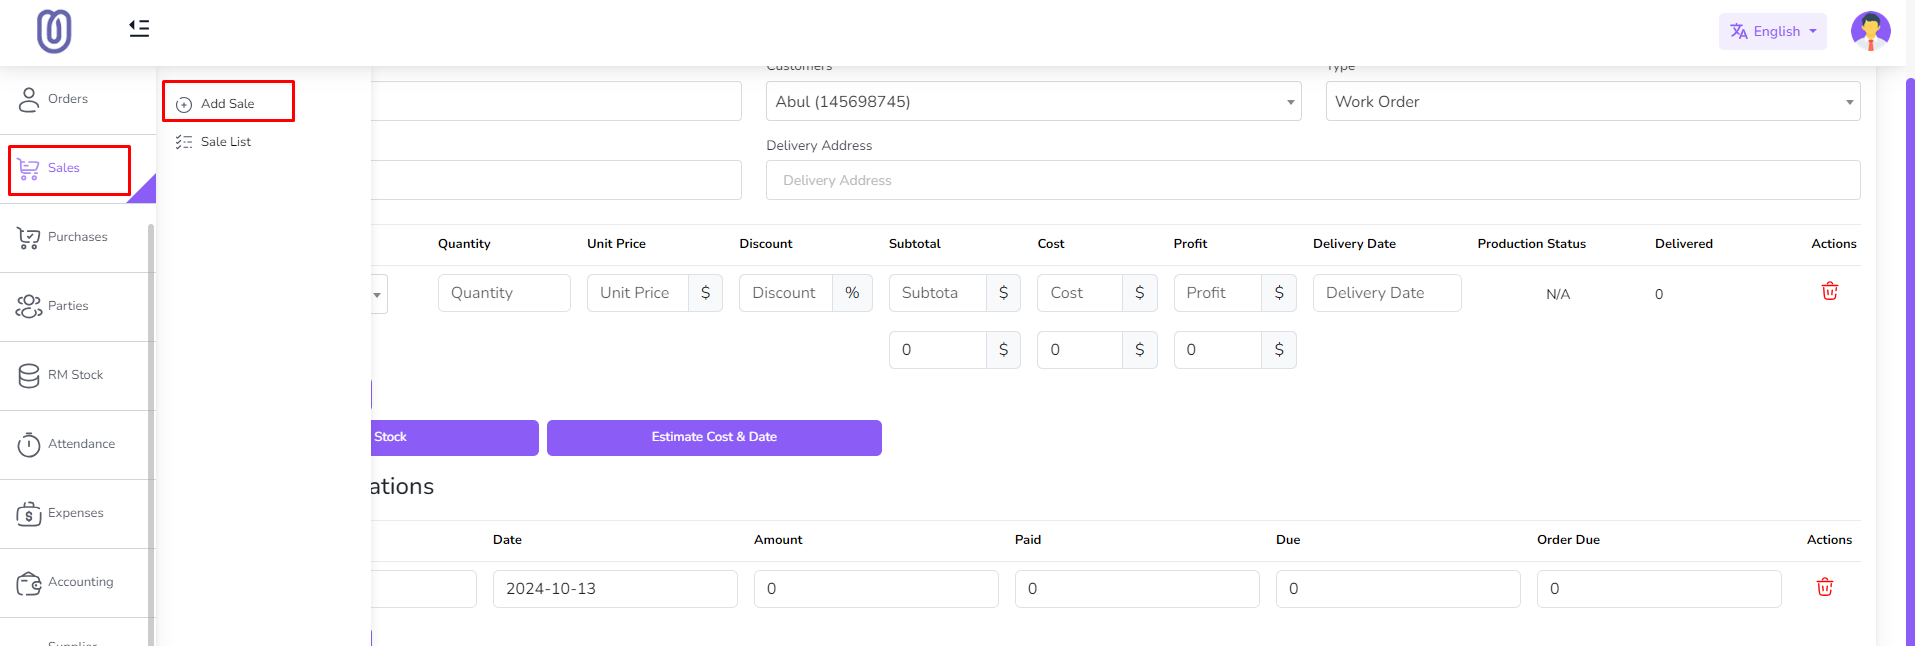
Select a product from the dropdown then form will be populated with product rate. Enter quantity.
You can add multiple product to the sales.

If Product is Batch Control then you can input quantity for each batch.
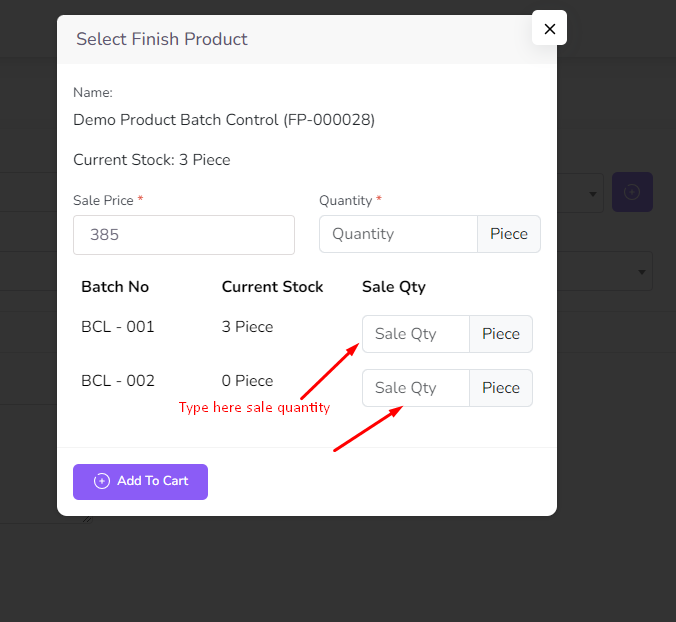
Note: If the product is marked as expired, the product stock will be automatically reduced based on the expiry date.
After add all product click on the "Submit" button. Then you will be redirected to the sales list page.

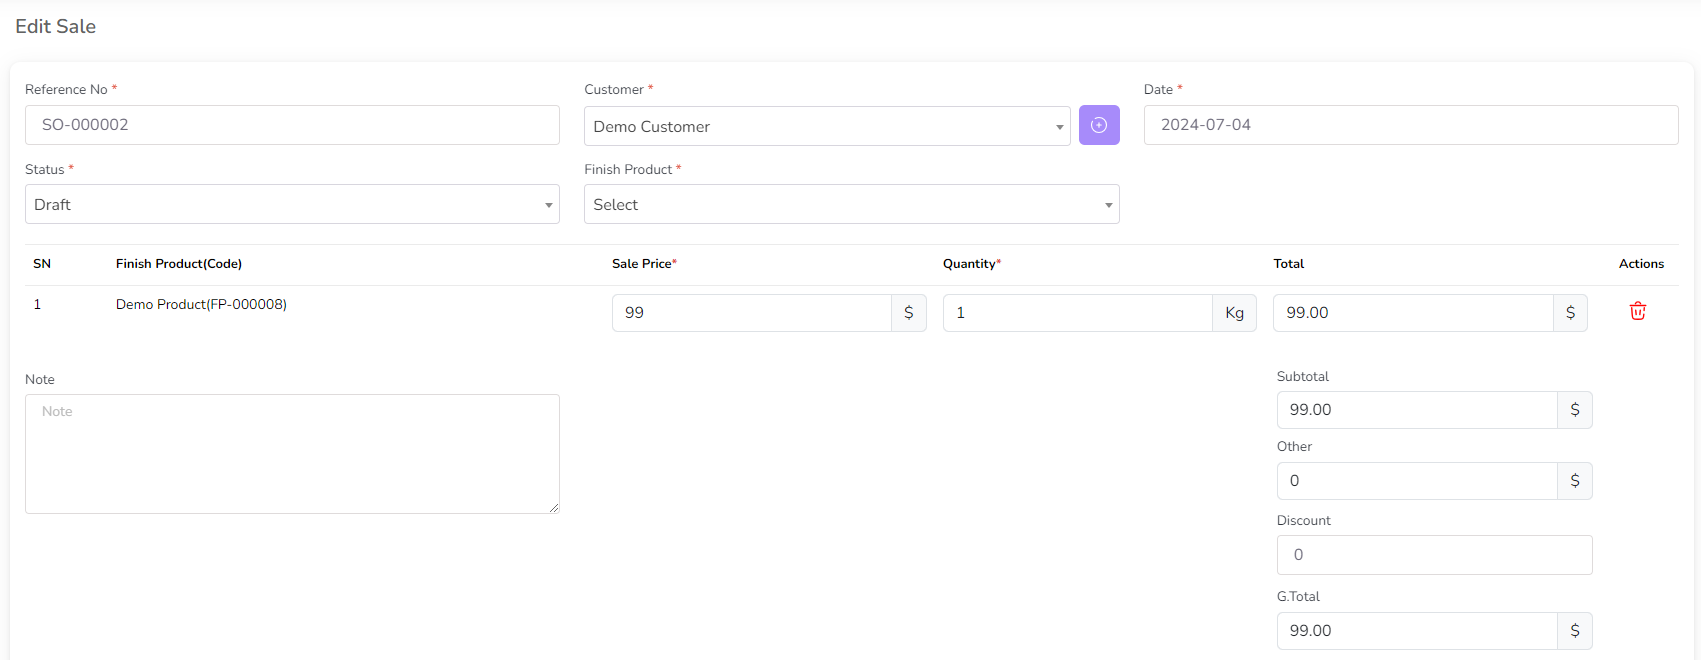
For Edit Sales click on the "Edit" icon from the action column. Edit Icon not show if sale status is Final

After click edit button a form will be shown with product and product rate. Change if you want and click on the "Submit" button.
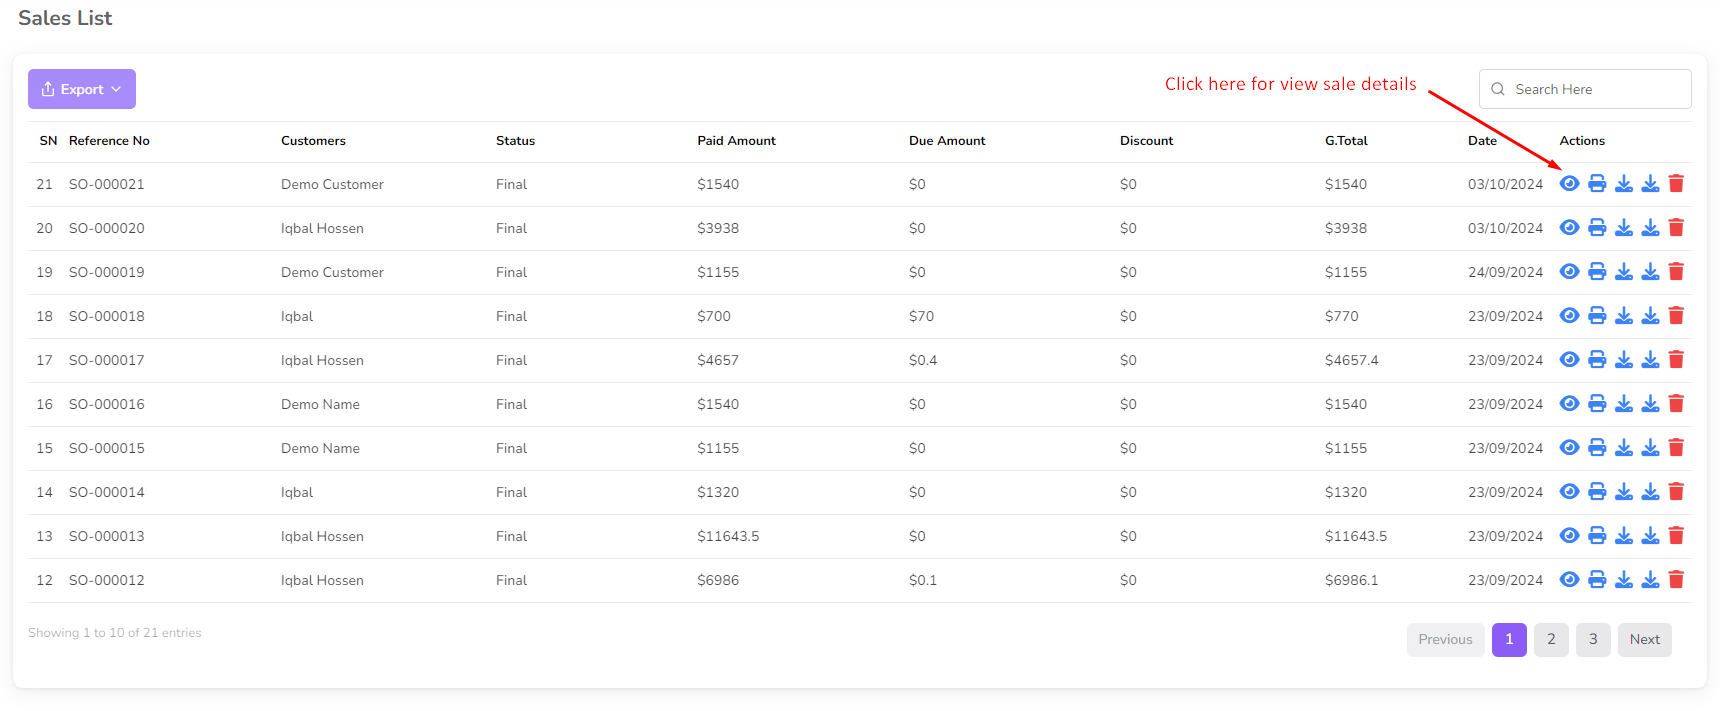
For view sales details click on the "View" icon from the action column.
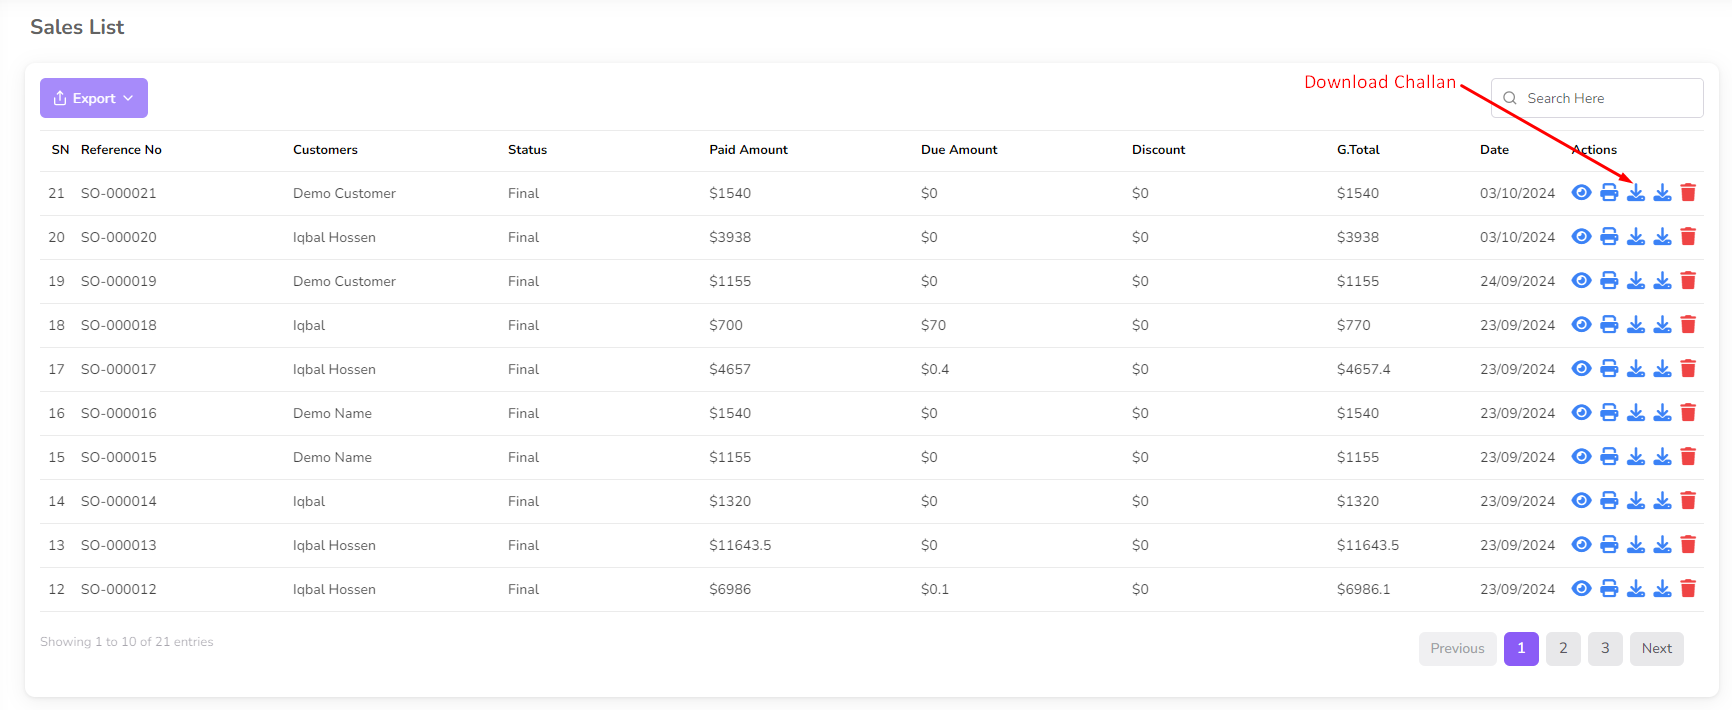
For Print Note click on the "Print" icon from the action column.

For Download Note click on the "Download" icon from the action column.
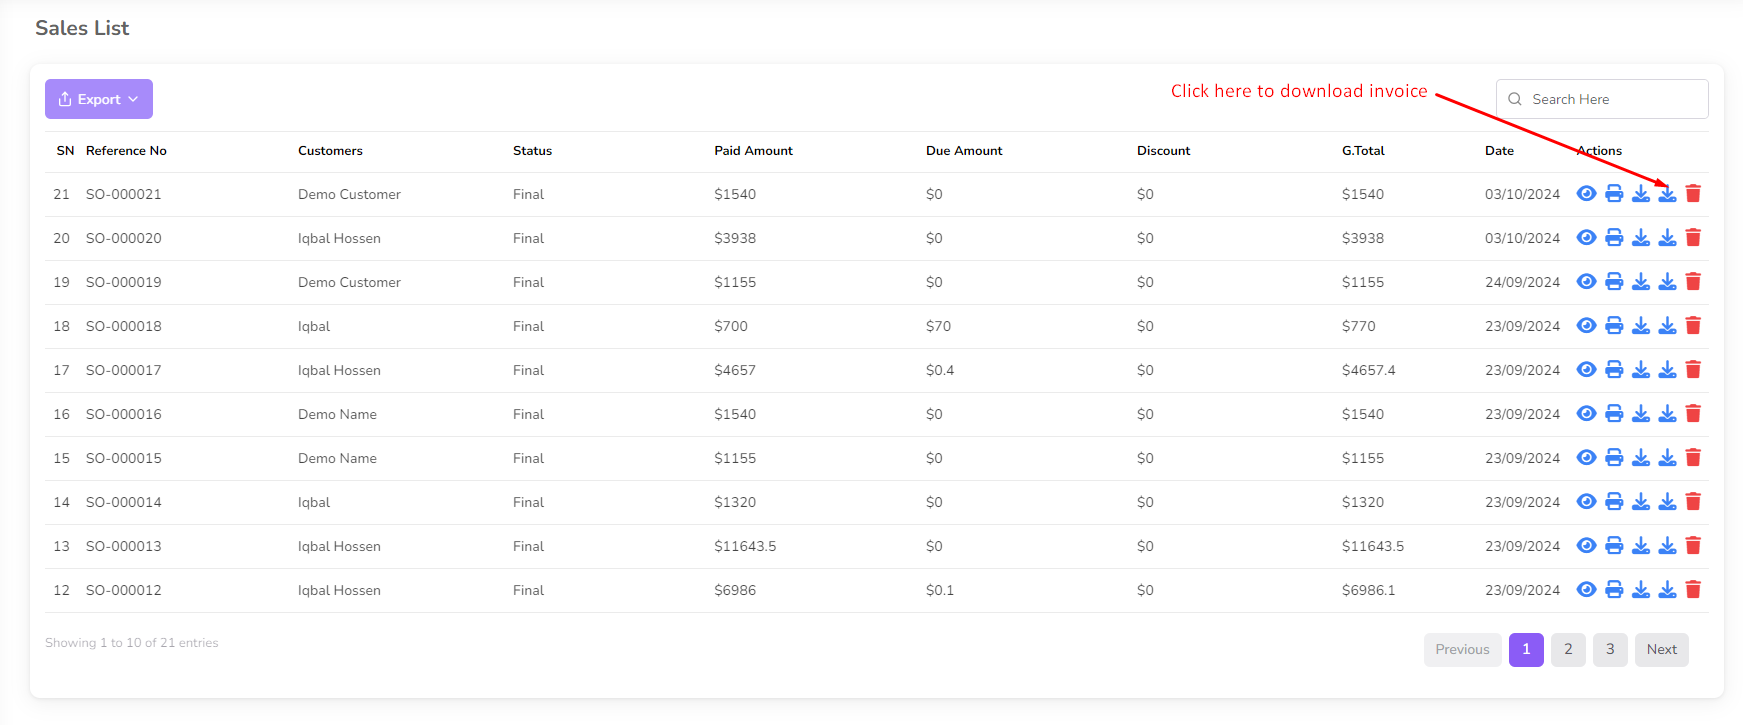
For Download Invoice click on the "Download" icon from the action column.
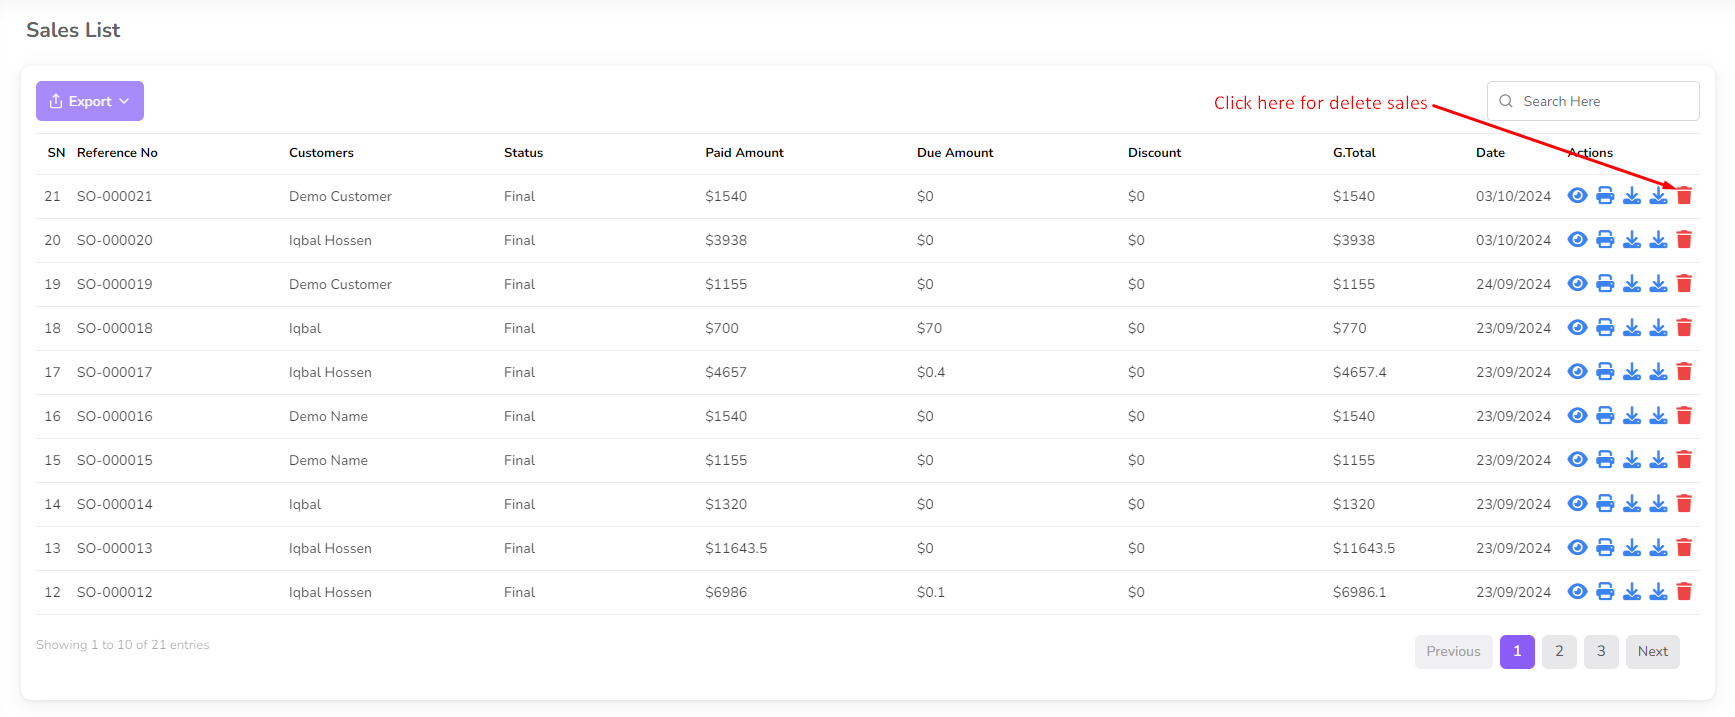
For Delete Sales click on the "Delete" icon from the action column. Delete Icon not show if sale status is Final
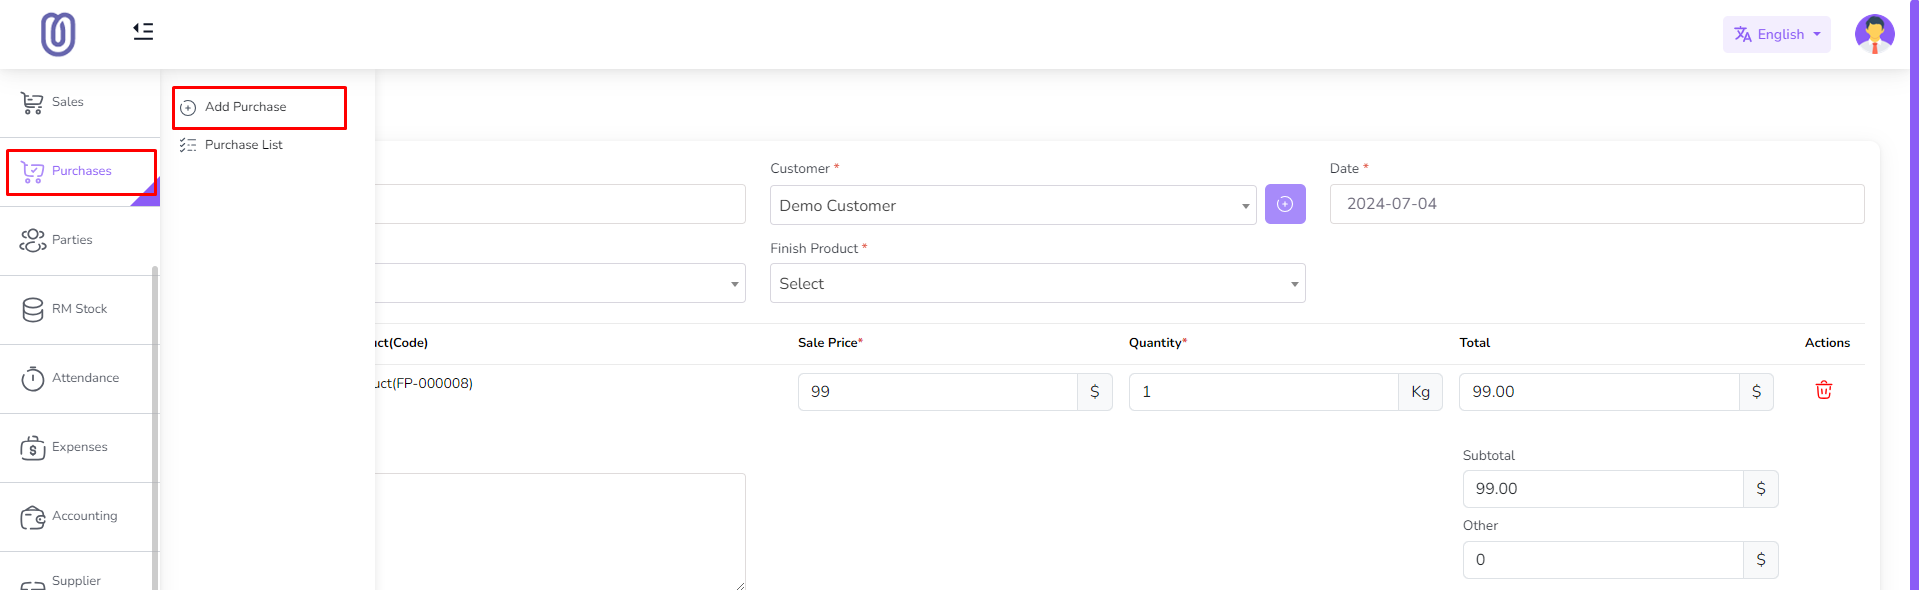
To add purchase go to the Purchase menu from the left sidebar and click on "Add Purchase".
Note: Purchase has two type one is purchase another is Purchase order. If you select purchase order this raw material cannot effect in stock.
But if you select purchase then raw material will be effect in stock.
Select a raw material from the dropdown then modal will be shown with raw material rate.
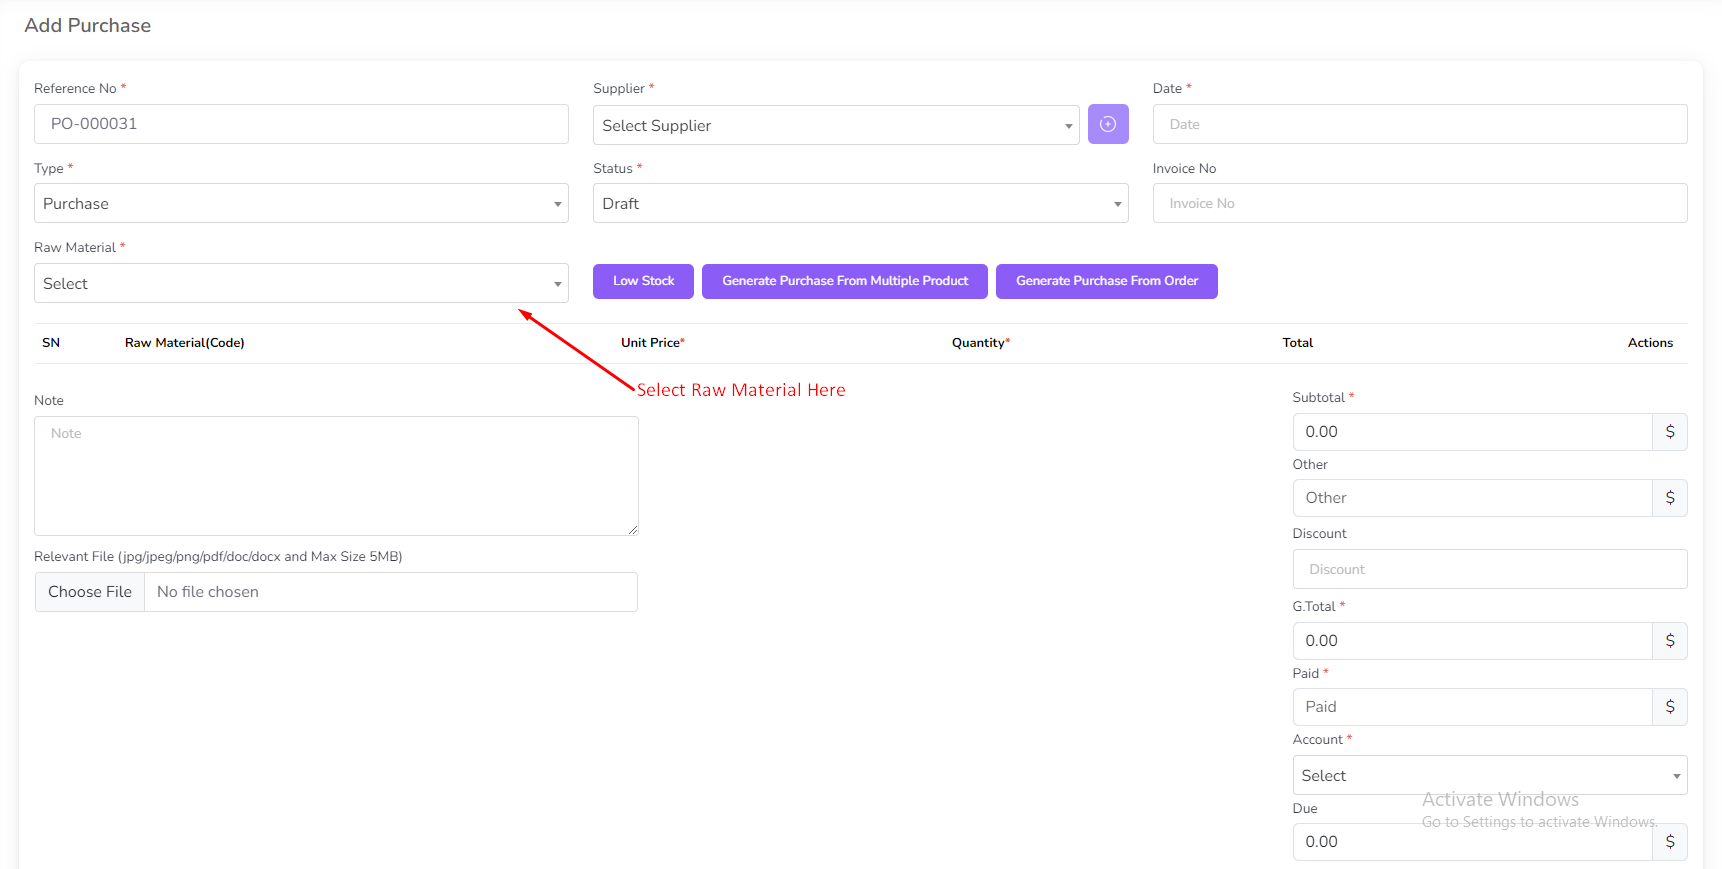
Enter quantity and click on the "Add to Cart" button.

After click add to cart button a form will be shown unit price, quantity, total of raw material.

For Low Stock material automatically added to the cart. Click on the "Low Stock" button.

After click low stock button you will see low stock material in the cart.

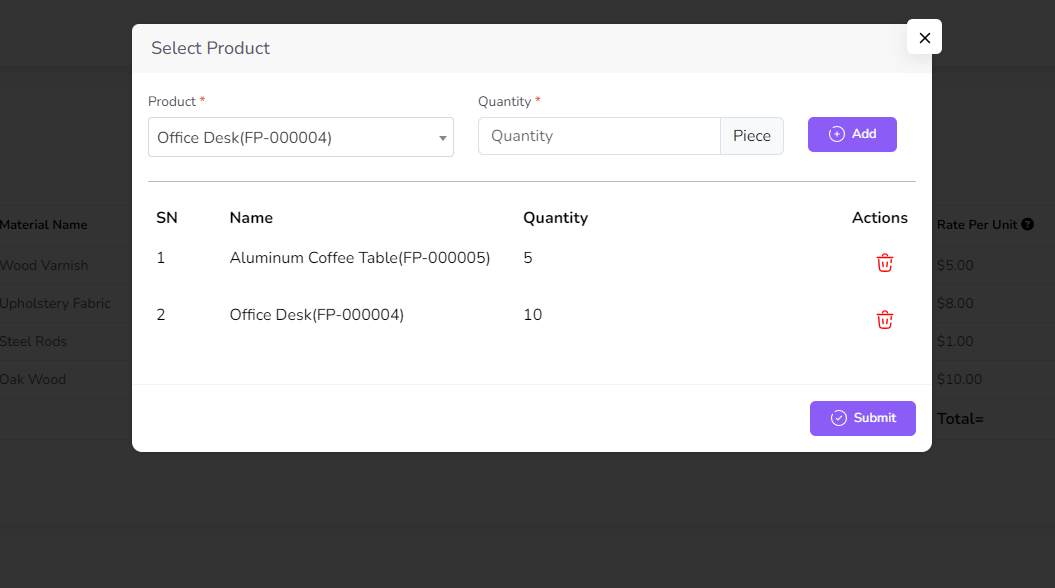
For generate purchase from multiple product click on the "Generate Purchase From Multiple Product" button.
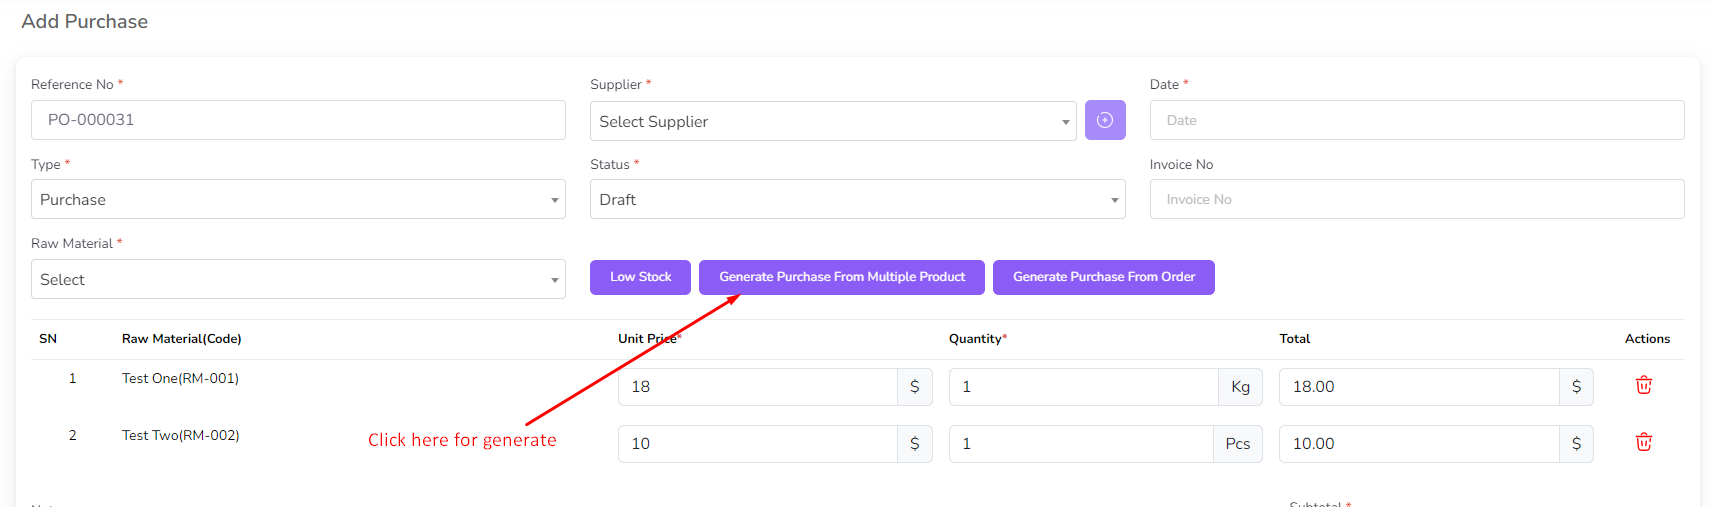
After click generate purchase from multiple product button a modal will be shown with product.
You can select product and quantity and click on the "Add" button.
You can add multiple product to the purchase.
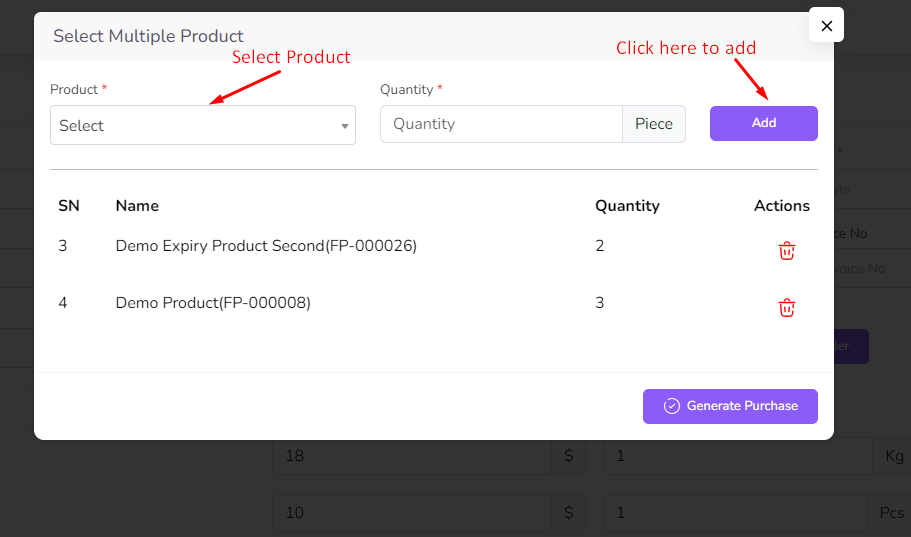
After that click on the "Generate Purchase" button. Then raw material will be added to the cart.

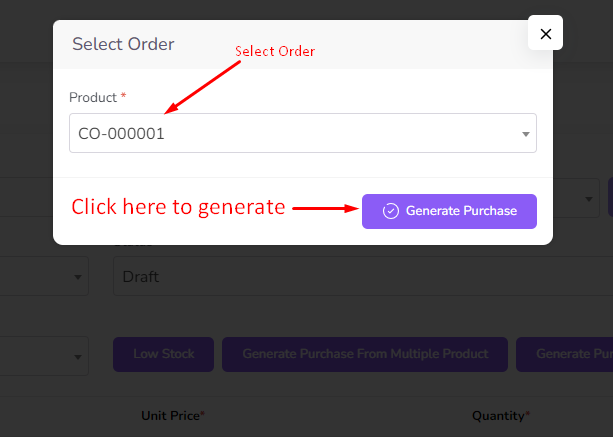
You can generate purchase from Order. Click on the "Generate Purchase From Order" button.

After click generate purchase from order button a modal will be shown with order.
Select Order and click on the "Generate Purchase" button. Then raw material will be added to the cart.
After add all raw material click on the "Submit" button. Then you will be redirected to the purchase list page.
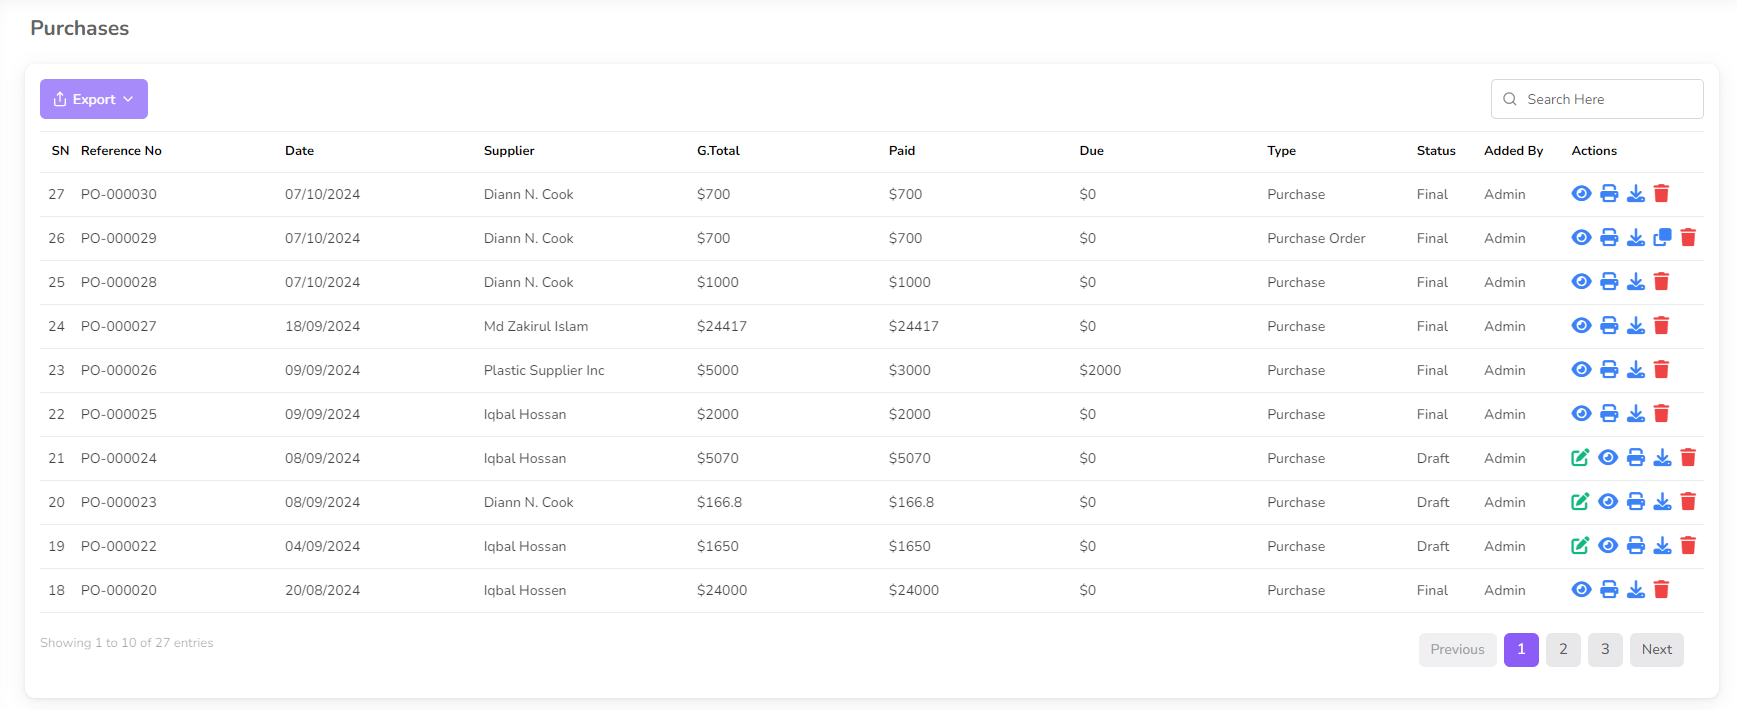
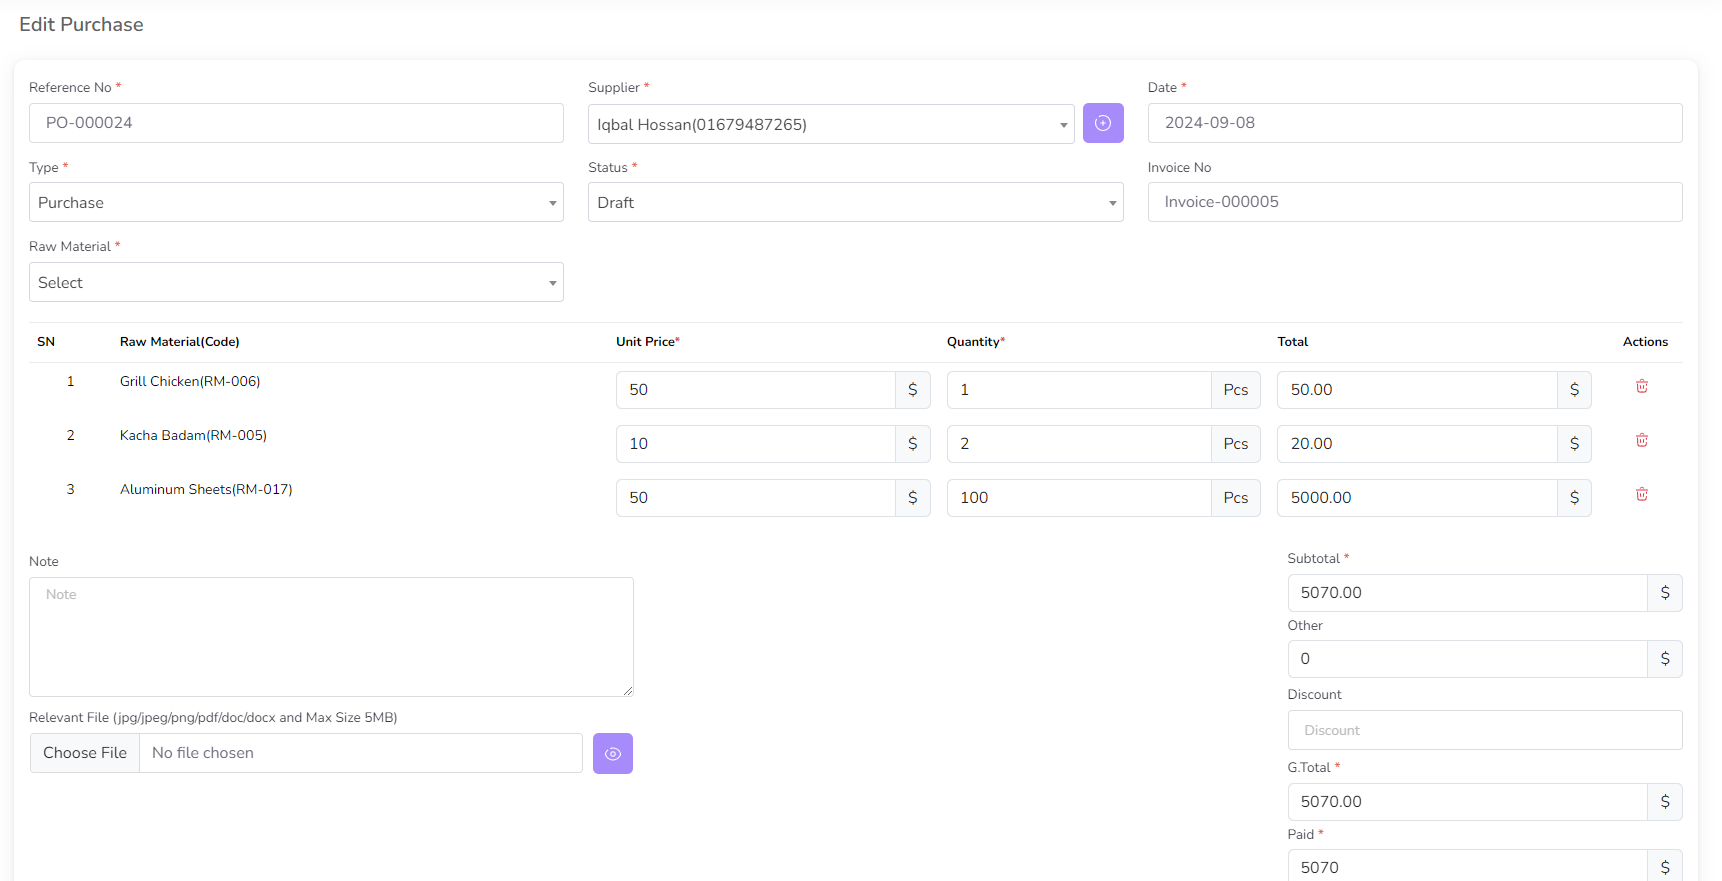
For Edit Purchase click on the "Edit" icon from the action column. Edit Icon not show if purchase status is Final
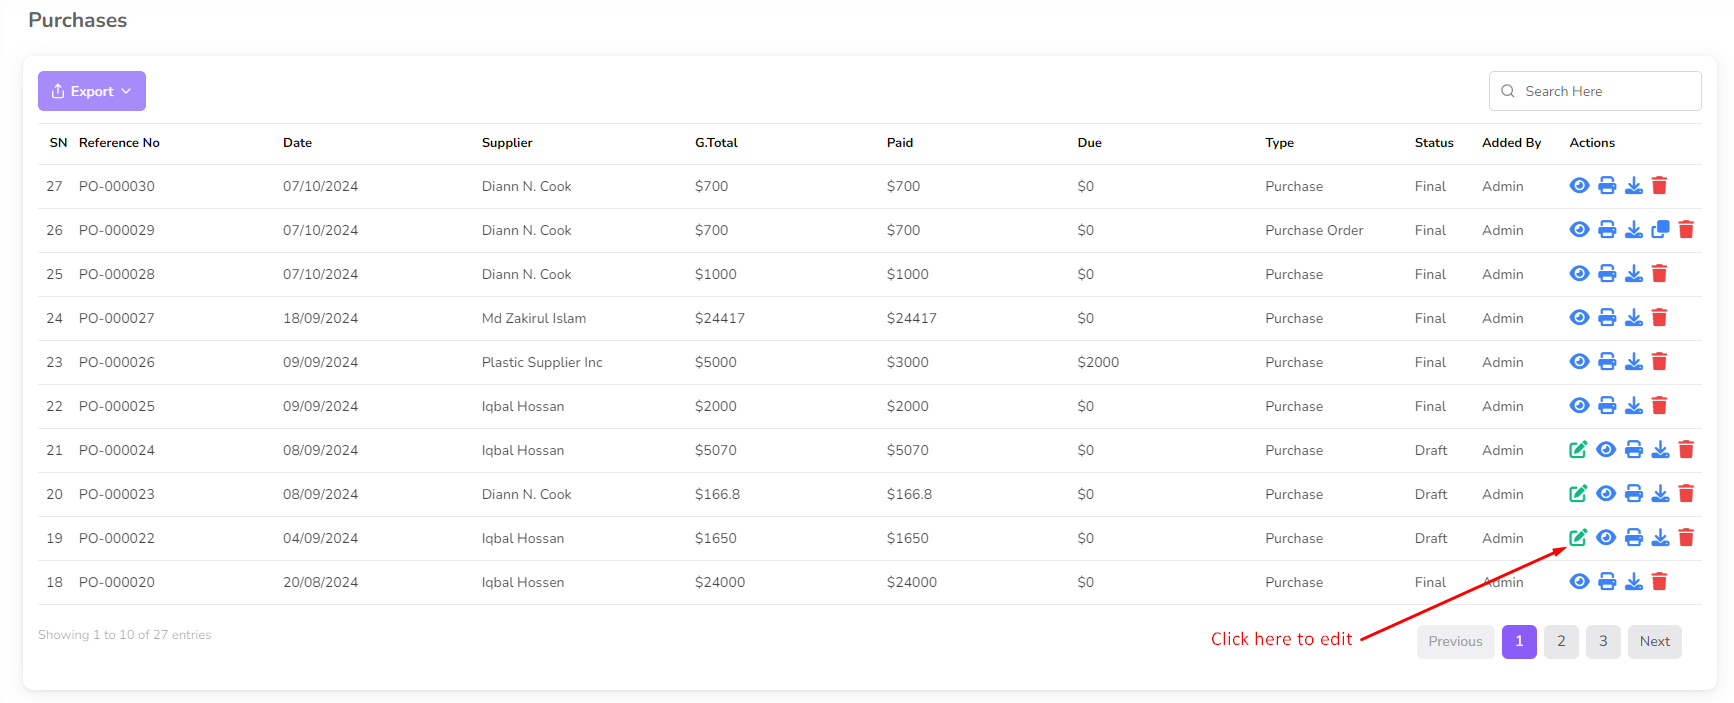
After click edit button a form will be shown with product and product rate. Change if you want and click on the "Submit" button.
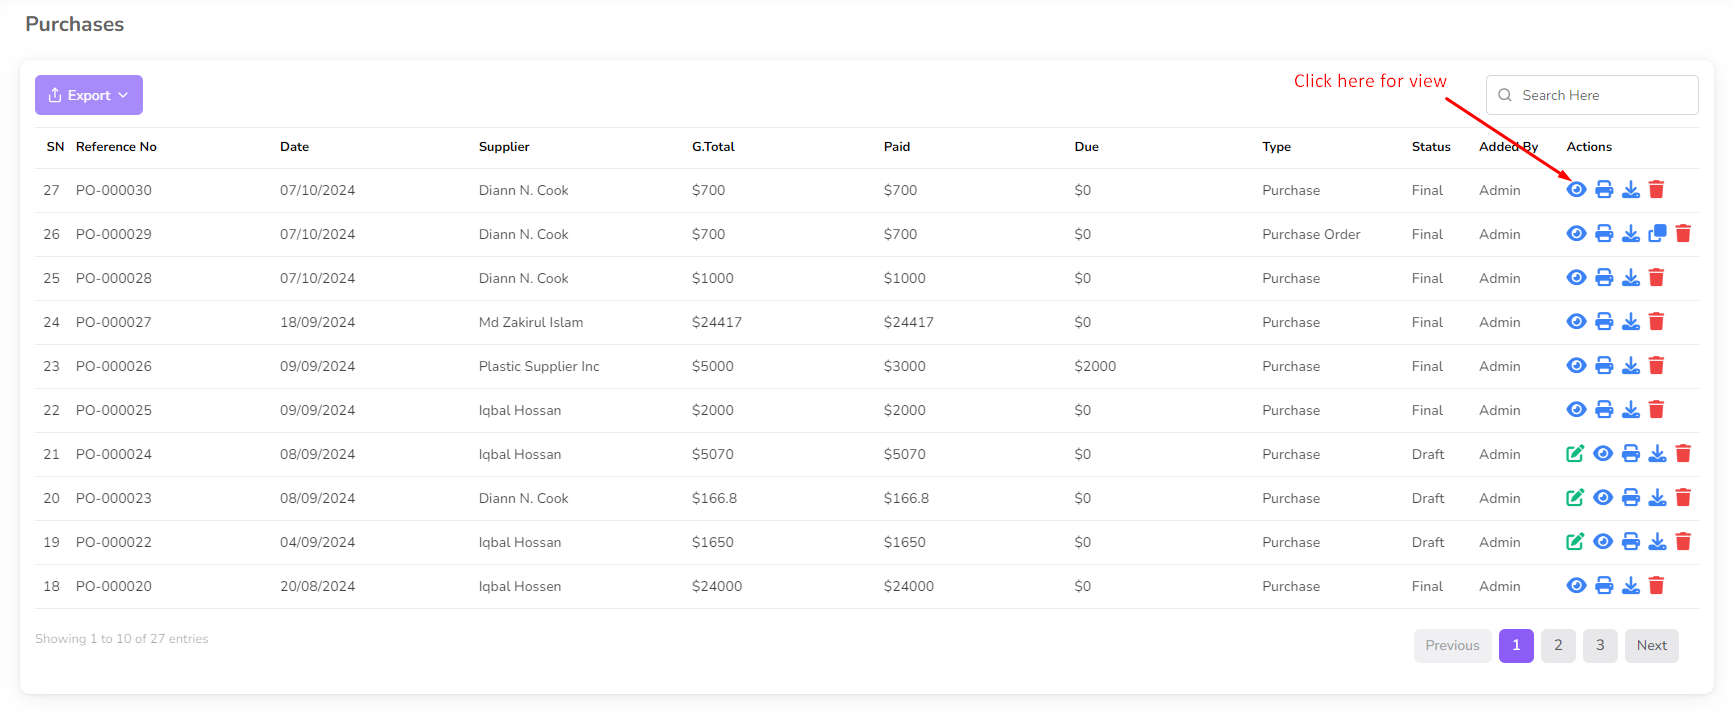
For view purchase details click on the "View" icon from the action column.
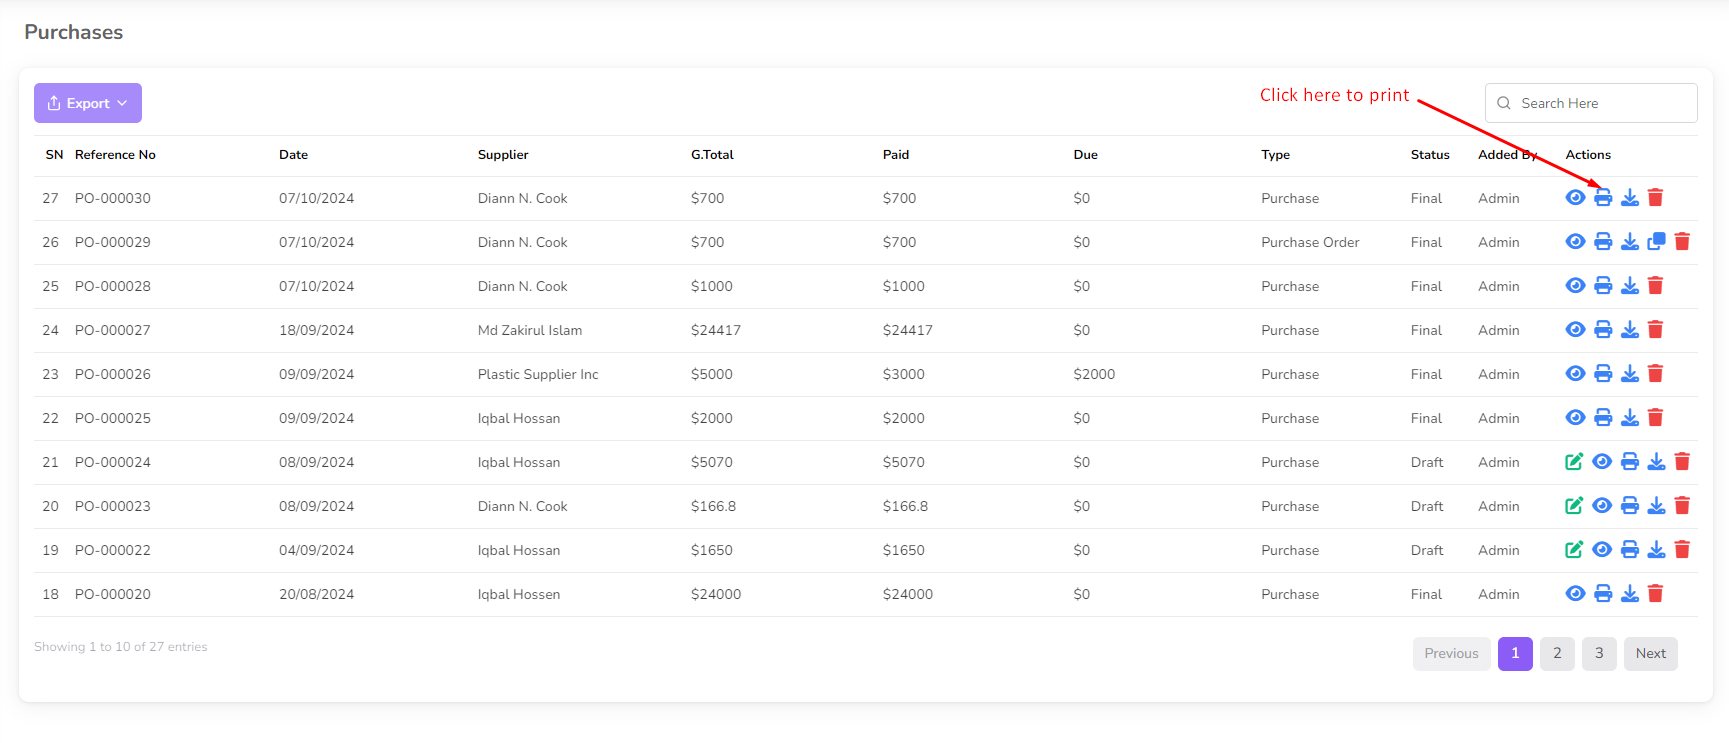
For Print Invoice click on the "Print" icon from the action column.
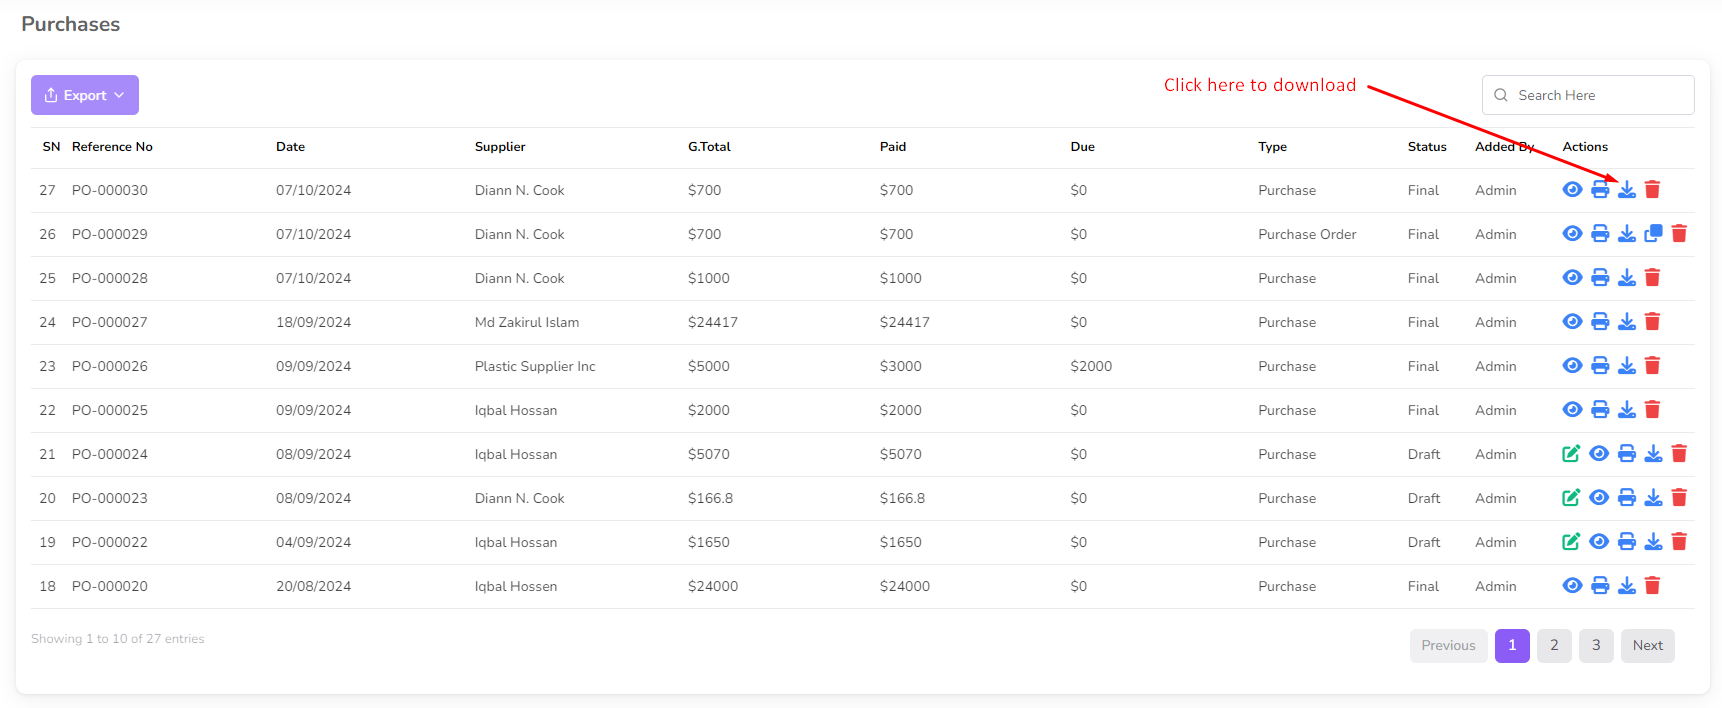
 For Download Invoice click on the "Download" icon from the action column.
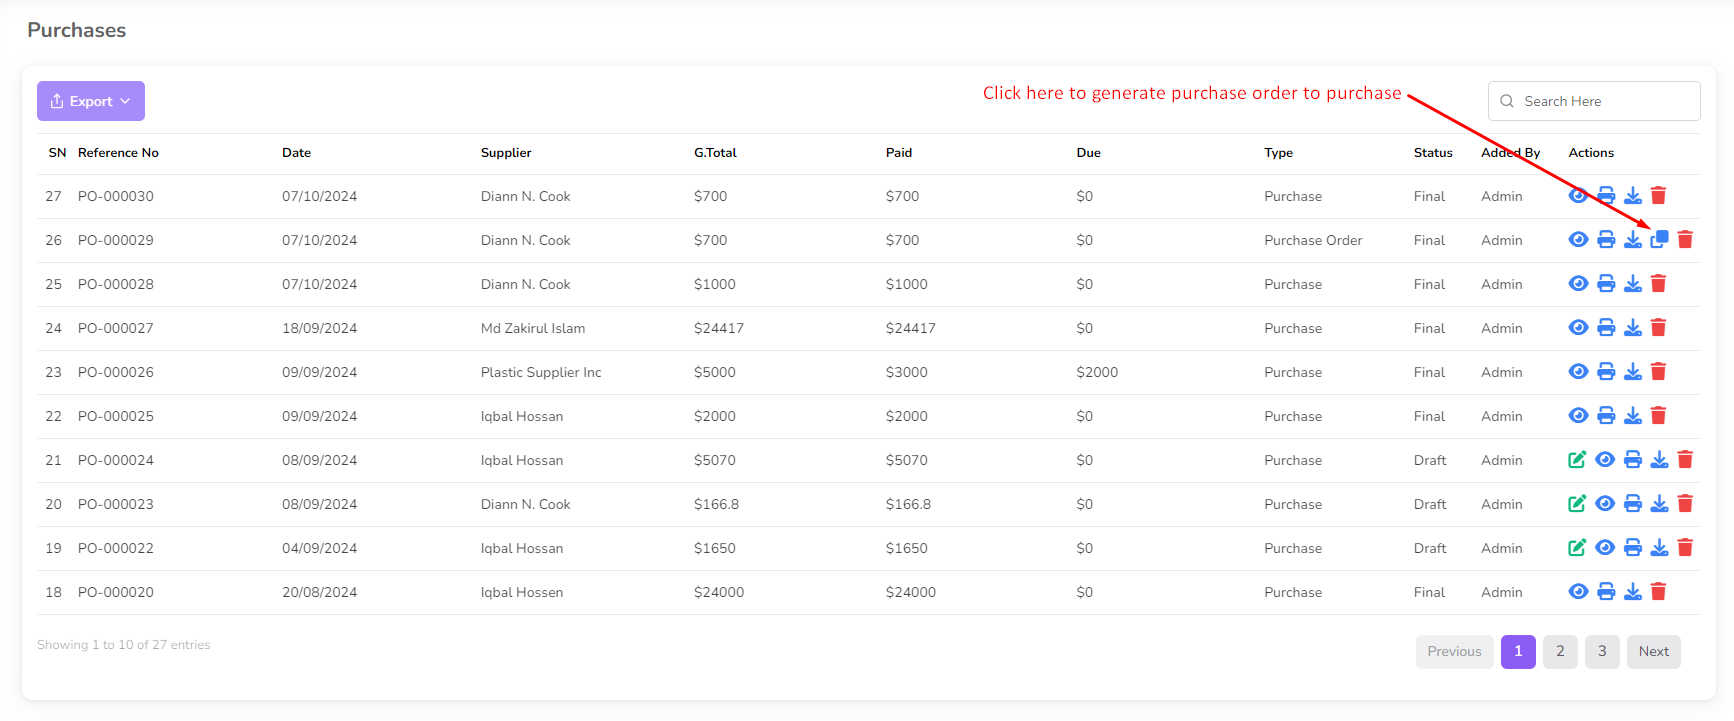
If your purchase type is purchase order then you can convert purchase order to purchase. Click on the "Convert to Purchase" button.
For Delete Purchase click on the "Delete" icon from the action column.

Customer
To manage customers, navigate to the "Parties" section from the left sidebar. Here you can
see two menu "Customer" and "Add Customer"
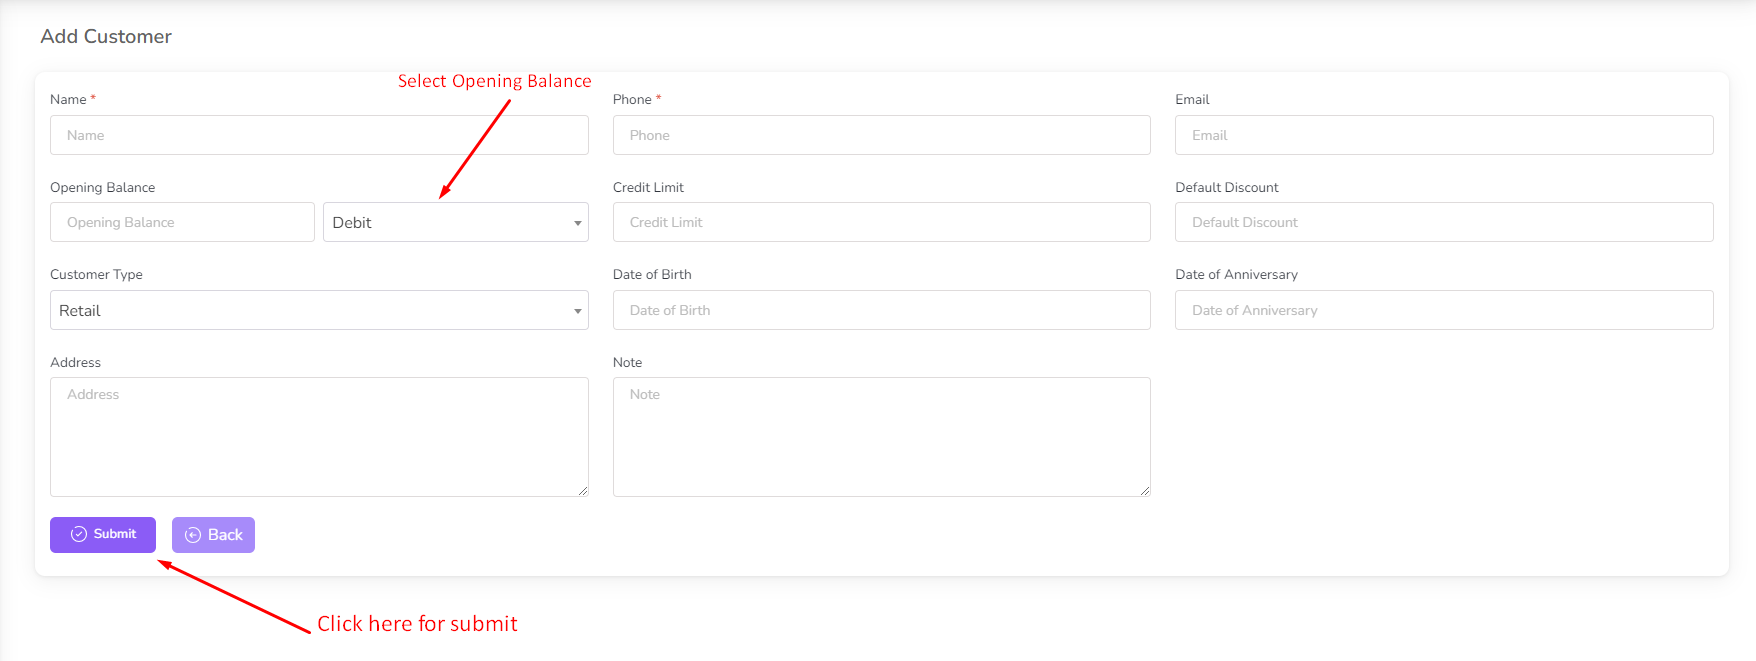
To add a new customer, click on the "Add Customer" menu.

Fill in the required customer details and click on the "Submit" button.
You need to select opening balance for the customer. Opening Balanc type is debit or credit.
Debit Balance: Debit balance means you are giving some amount of money to
the customer at the time of adding customer.
Credit Balance: Credit balance means customer will give some amount of
money to you at the time of adding customer.
Here Credit Limit is optional. If you enable credit limit then customer will not be allowed
to exceed the credit limit.
After successfully adding a customer, the customer list will be updated.
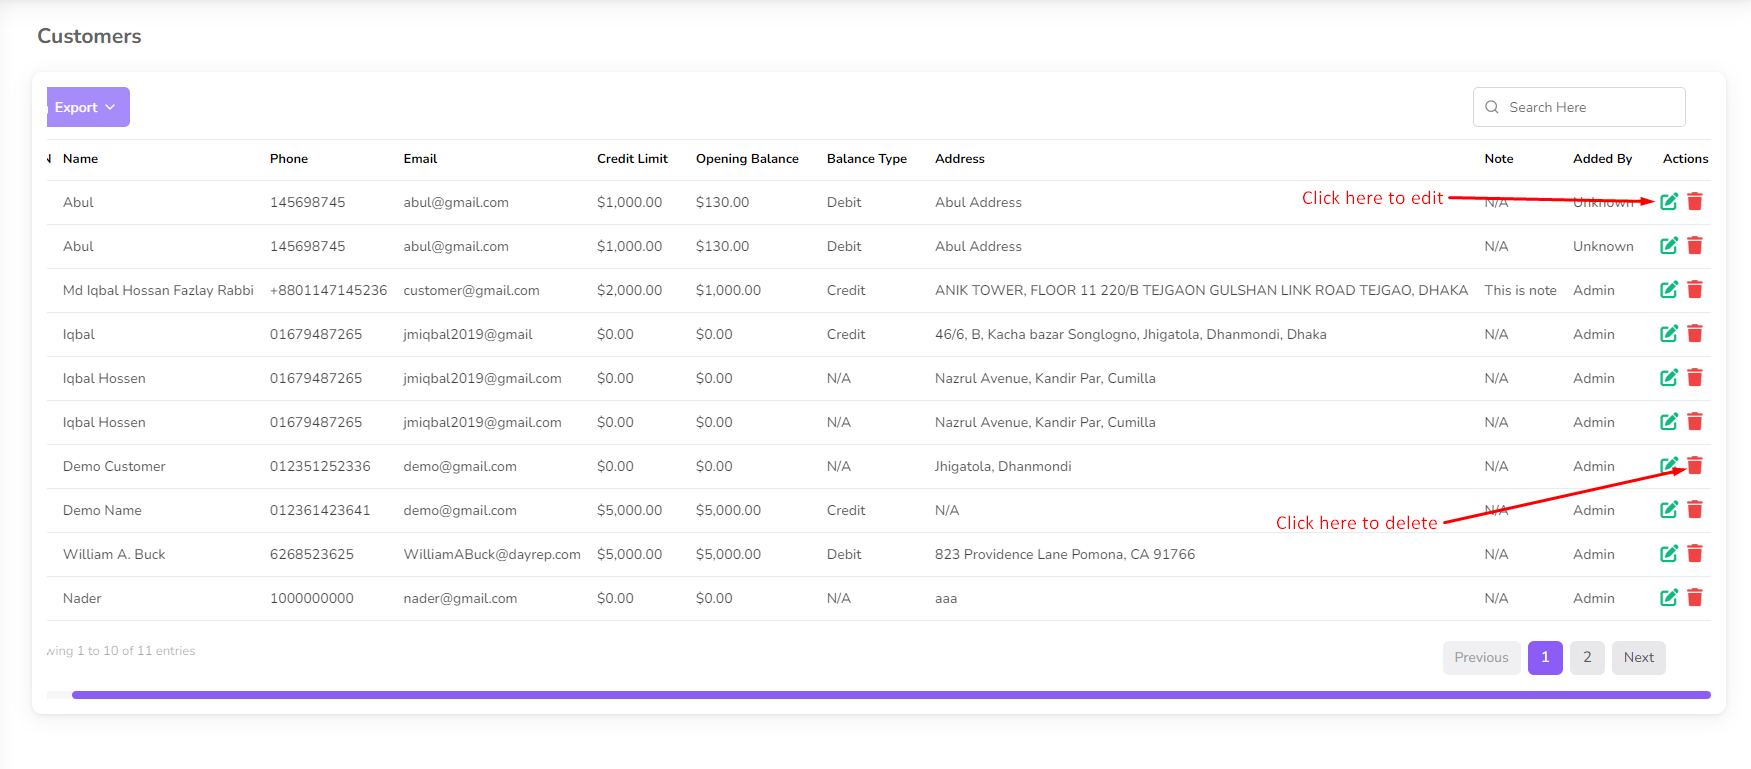
To edit customer details, click on the customer's name from the list.
Customer details will be displayed, allowing you to view or modify their information.
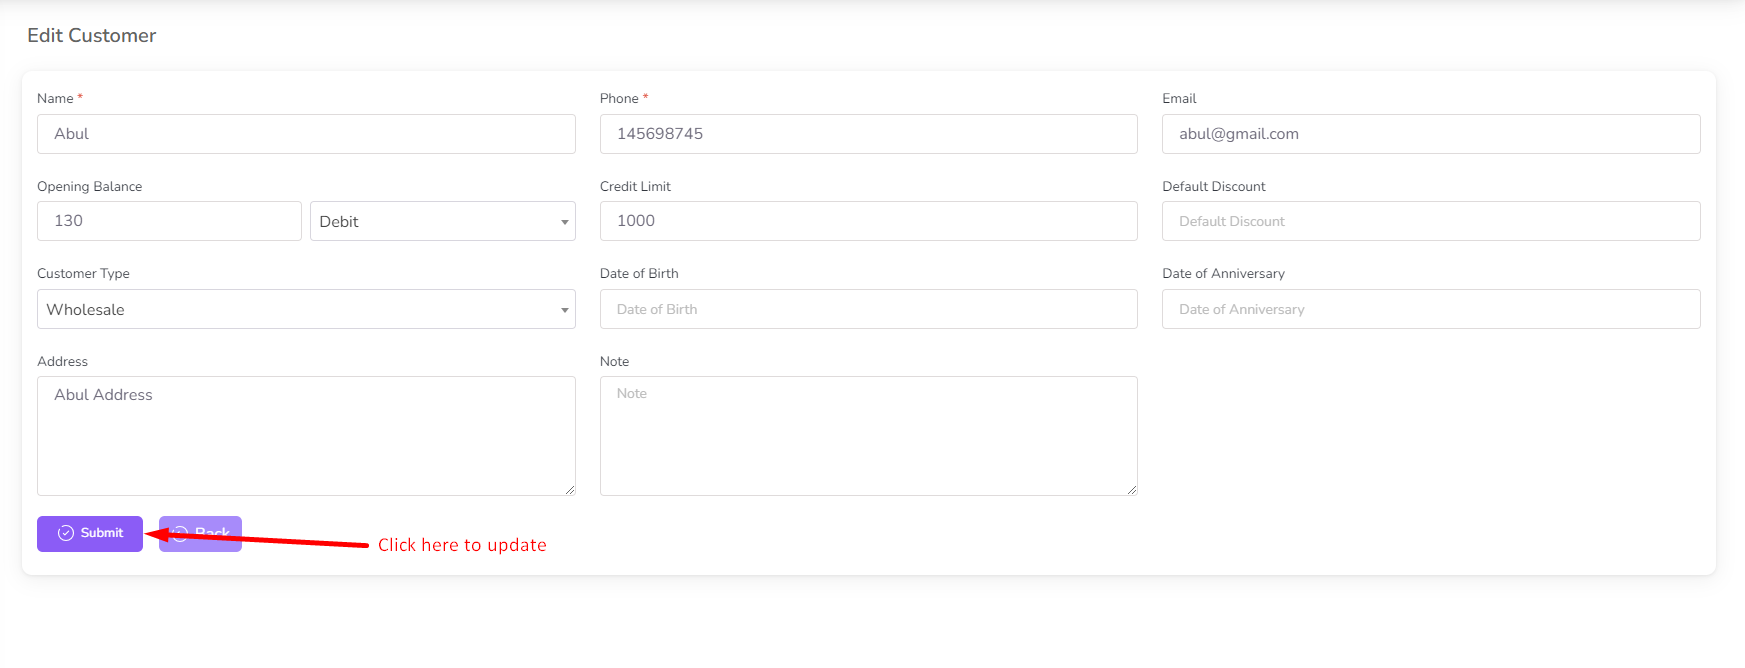
Make any necessary changes and click on the "Update" button to save the changes.
To delete a customer, click on the "Delete" button next to their name.

Supplier
Supplier management is a feature that allows you to manage your suppliers effectively. You
can add, edit, and delete supplier information.
To add a new supplier, navigate to the "Parties" section from the left sidebar and click on
"Add Supplier".

Fill in the required supplier details and click on the "Submit" button.
When adding a supplier, you need to specify their opening balance, which can be either a
debit or credit.
Debit Balance: A debit balance indicates that you owe the supplier money at
the time of adding them.
Credit Balance: A credit balance means the supplier owes you money at the
time of adding them.
The Credit Limit is an optional feature. If enabled, it sets a maximum amount that the
supplier can charge without exceeding the limit.

You can view the list of all suppliers by clicking on the "Supplier List" menu.
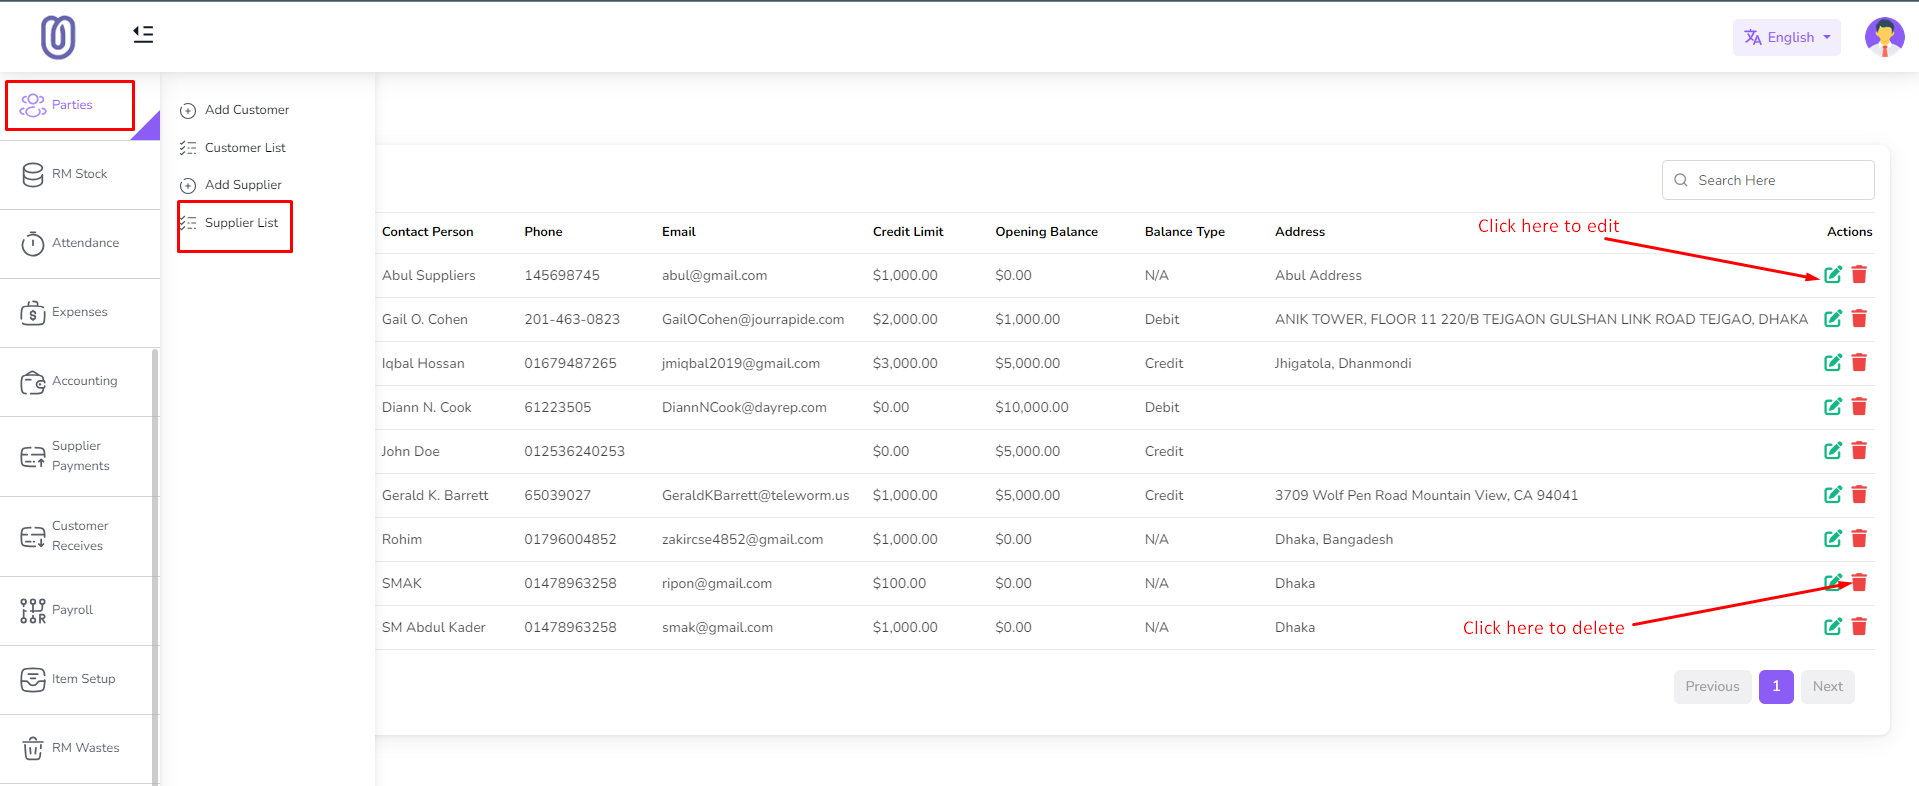
To edit supplier details, click on the supplier's name from the list.
Supplier details will be displayed, allowing you to view or modify their information.

Make any necessary changes and click on the "Update" button to save the changes.
To delete a supplier, click on the "Delete" button next to their name.

Rm Stock
In this section, you will learn how to manage your RM stock list, including filtering and
other essential operations.
What is Floting Stock?
Floating Stock refers to the stock that is assigned in production and production is in
progress.
To access the RM stock list, navigate to the "RM Stock" section from the left sidebar and
click on "RM Stock".

The RM stock list page displays all your raw materials, including their available Quantity,
Floting Stock, Rate per unit, and total values.

To filter the list, click on the "Filter" button. Then a filter modal will be opened.

You can filter by product, manufacture and Manufacture Requirement
For product filter, select a product from the dropdown menu. and click on submit. Then the
list will be filtered by the selected product.

For Manufacture filter, select a Manufacture from the dropdown menu. and click on submit.
Then the list will be filtered by the selected Manufacture.

For Manufacture Requirement filter, click 'By Manufacture Requirement' button. Then a modal
will be opened.

you can select multiple product and quantity from the dropdown menu. and click on submit.
Then the list will be filtered by the selected product and quantity.
In List you will show every product raw material available in stock. and required quantity
for production. also need to purchase quantity

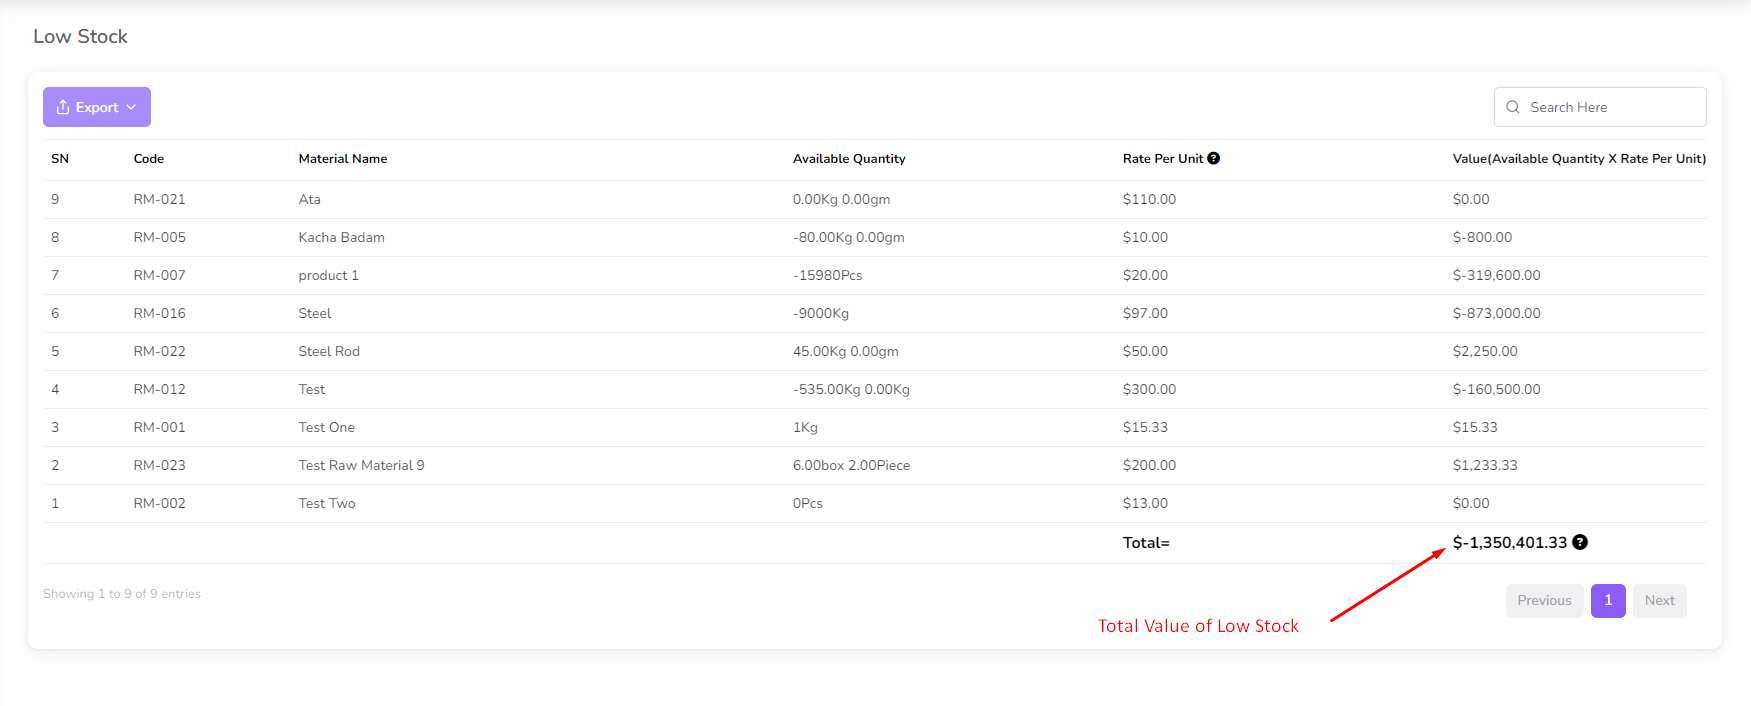
Low Stock
To view low stock, navigate to the "RM Stock" section from the left sidebar and click on
"Low Stock".
The low stock page displays all the raw materials that have a quantity less than the minimum
stock level set by the user.

Stock Adjustment
Stock Adjustment is a feature that allows you to adjust the stock quantity of raw material.
To perform add stock adjustment, navigate to the "RM Stock" section from the left sidebar
and click on "Add Stock Adjustment".
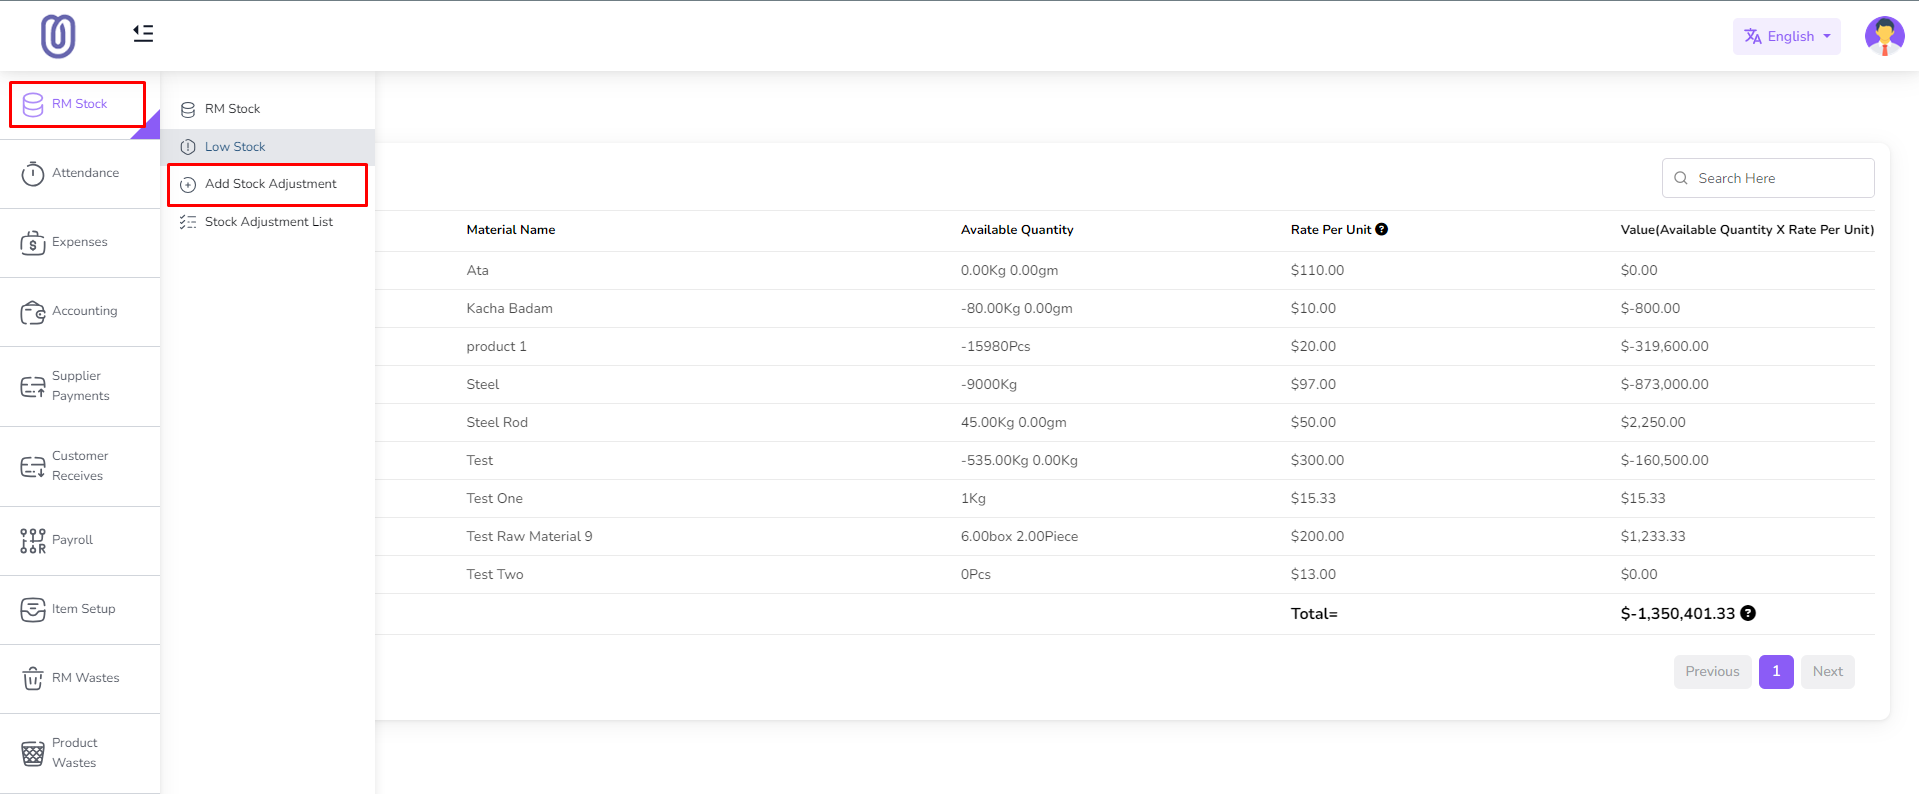
After that a form will be opened. and select raw material and quantity and type of
adjustment.

Click on submit button. and stock will be adjusted. also you will see the adjustment in
adjustment list.

Click the "Edit" icon to edit the adjustment. and a form will be opened with previous data.
you can change the quantity and type of adjustment.
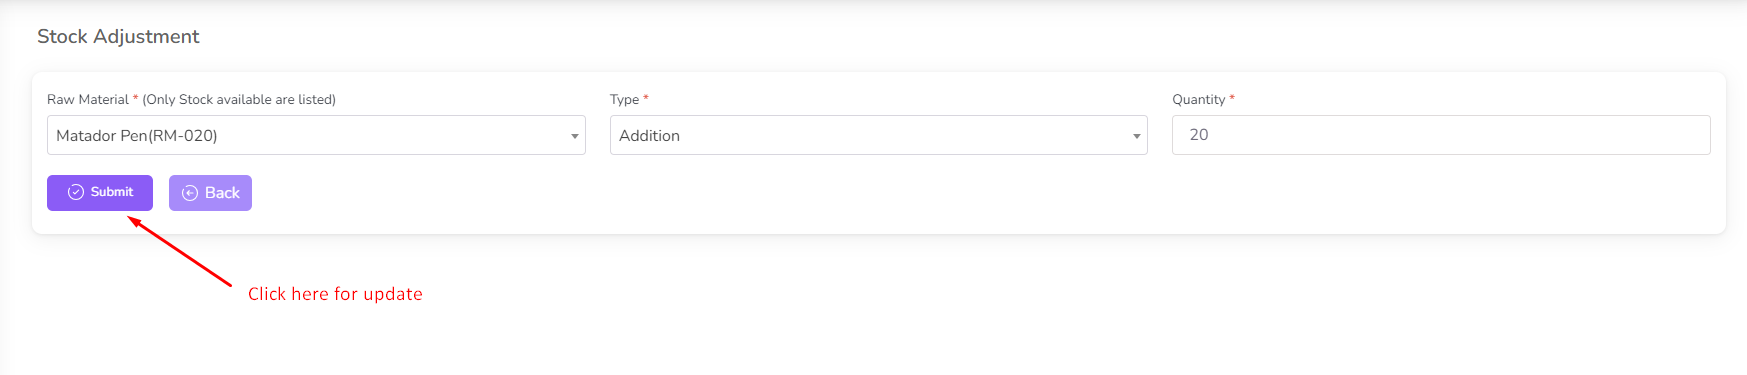
After the adjustment, the updated stock quantity will be reflected in the RM Stock.
Attendance Management
The Attendance Management feature allows you to effectively manage employee attendance. You
can track attendance, view attendance history, and generate attendance reports.
To access Attendance Management, navigate to the “Attendance” menu from the left sidebar.
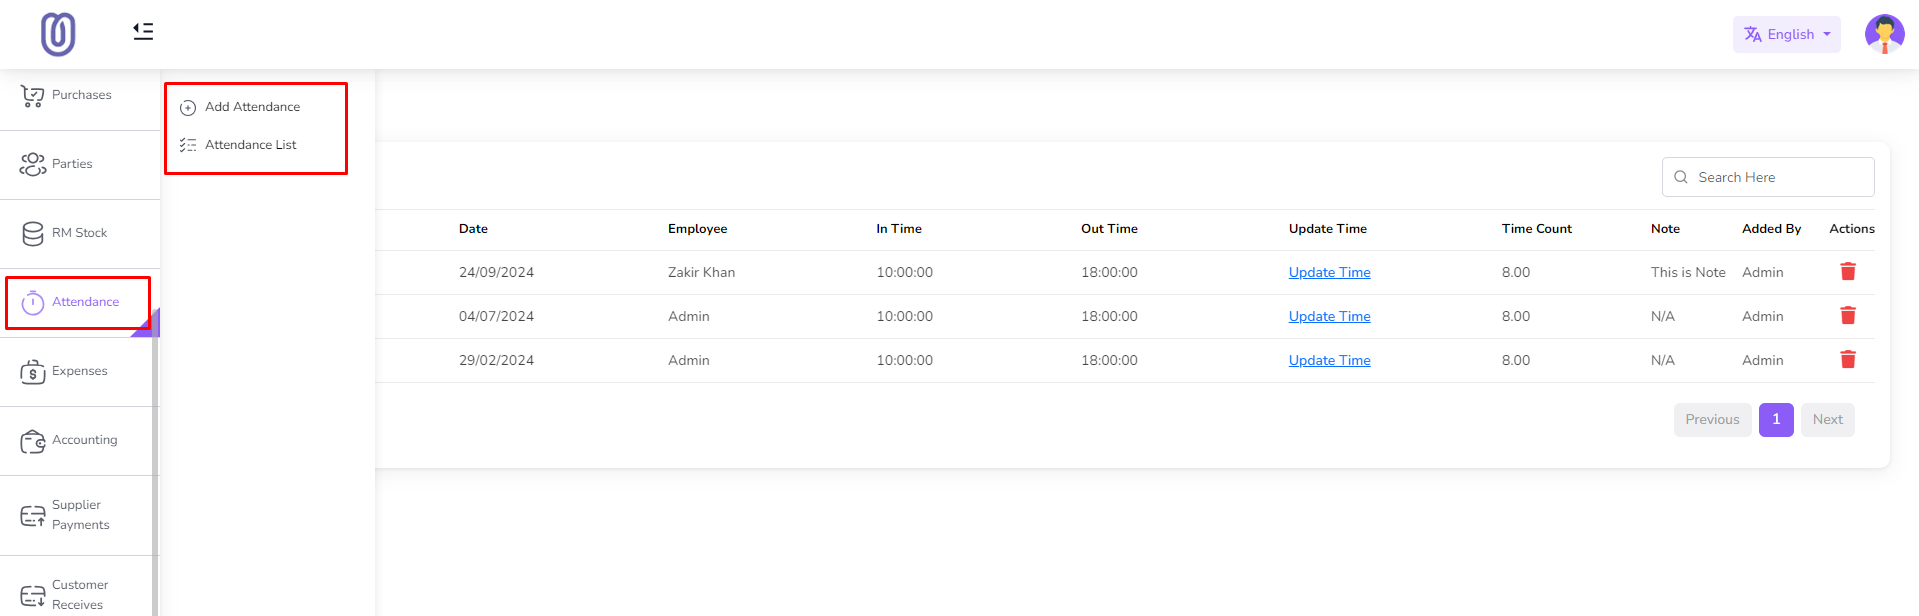
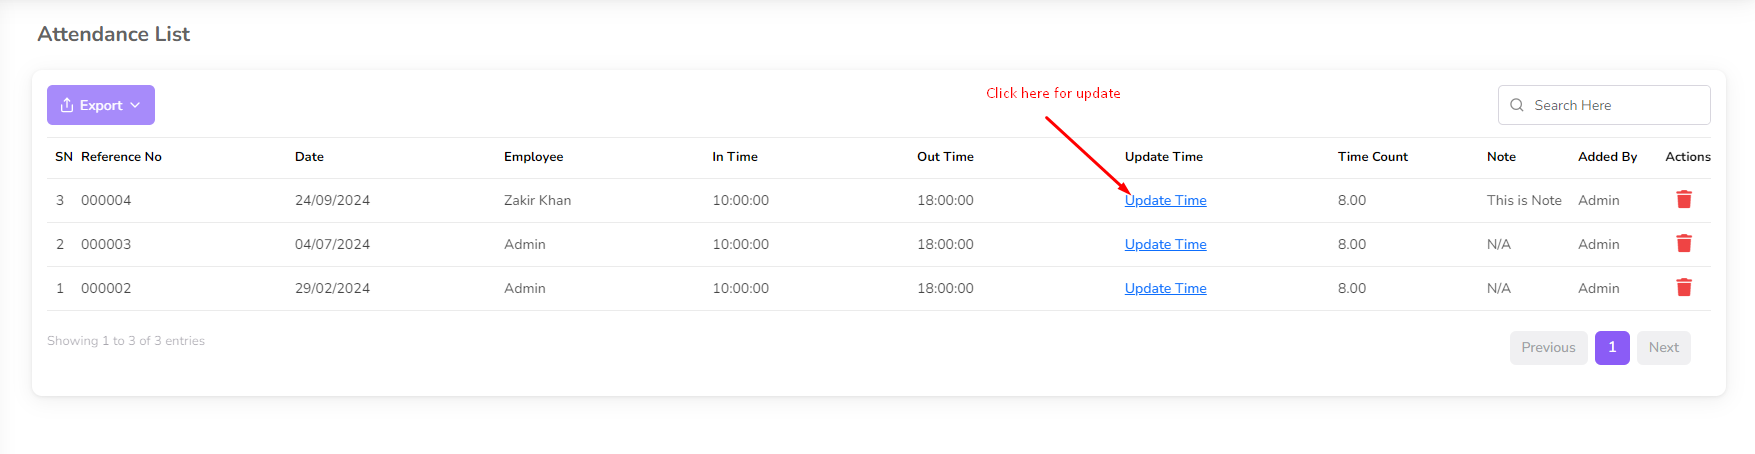
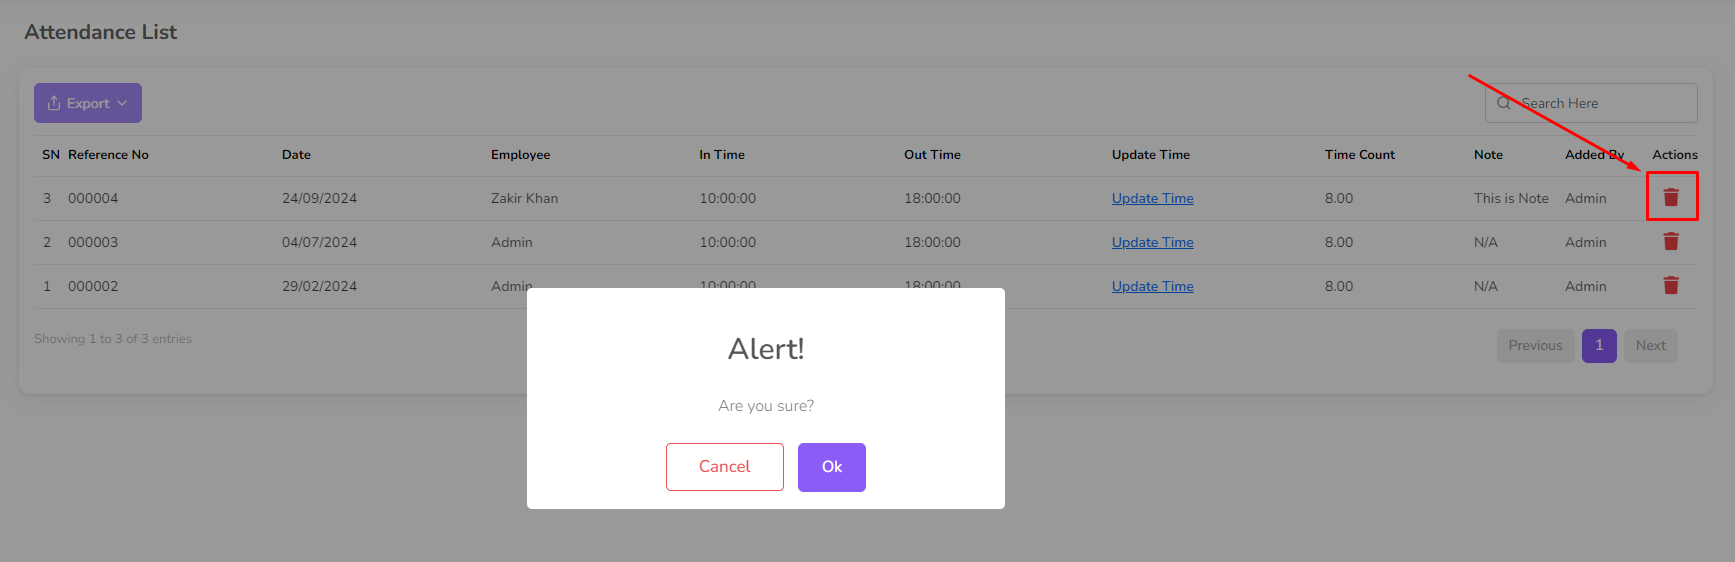
For attendance list click on the "Attendance List" menu.
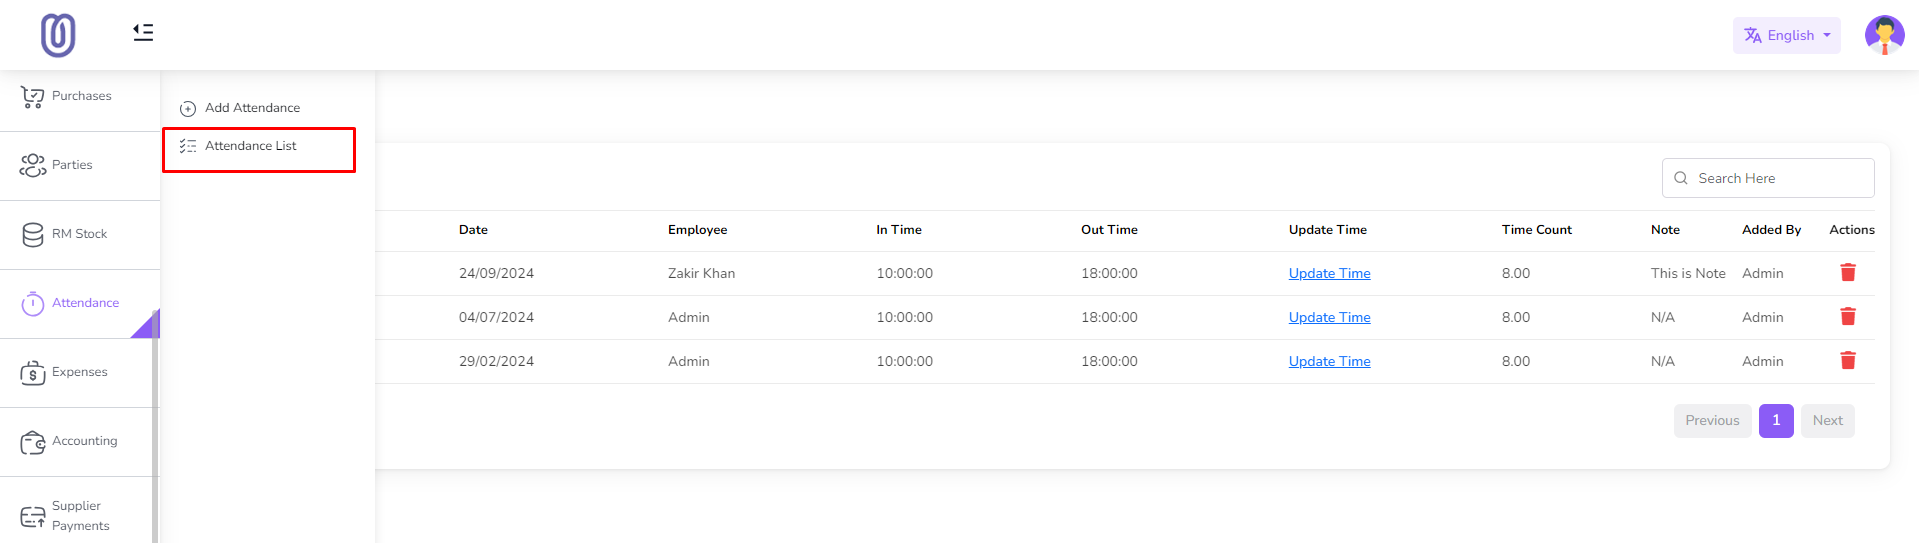
In list you can see attendance of all employee. In time, Out time, Total hours.
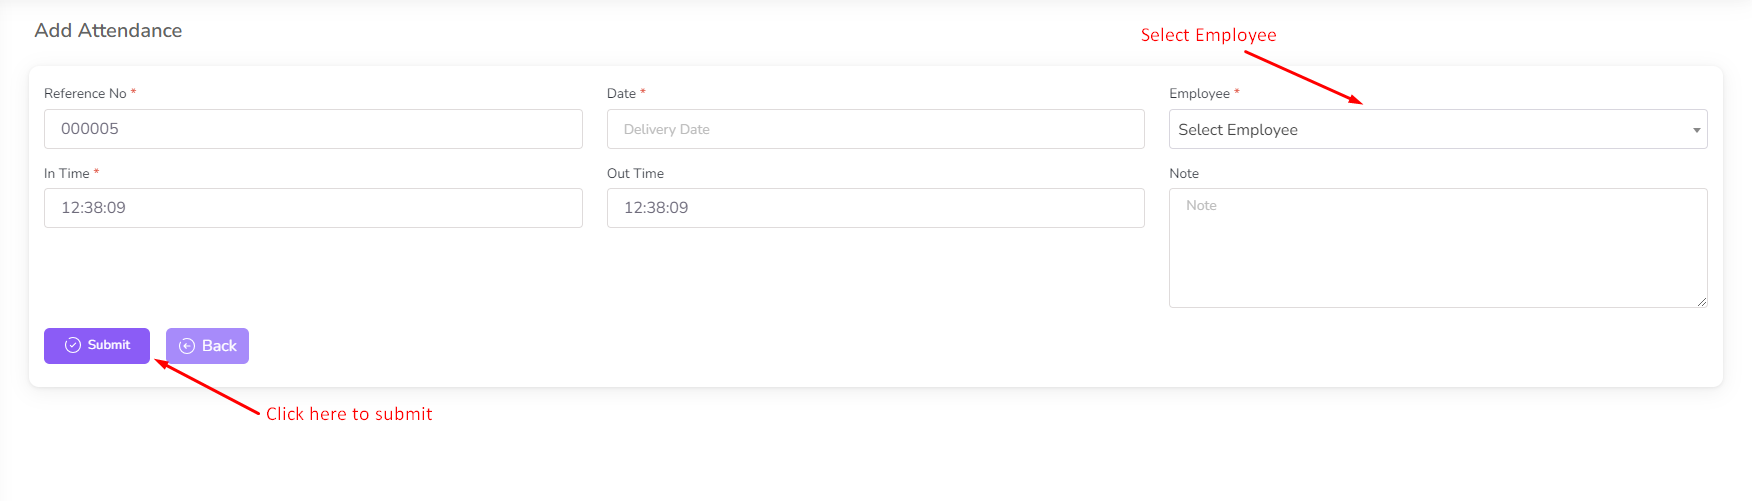
For Add attendance click on the "Add Attendance" menu.
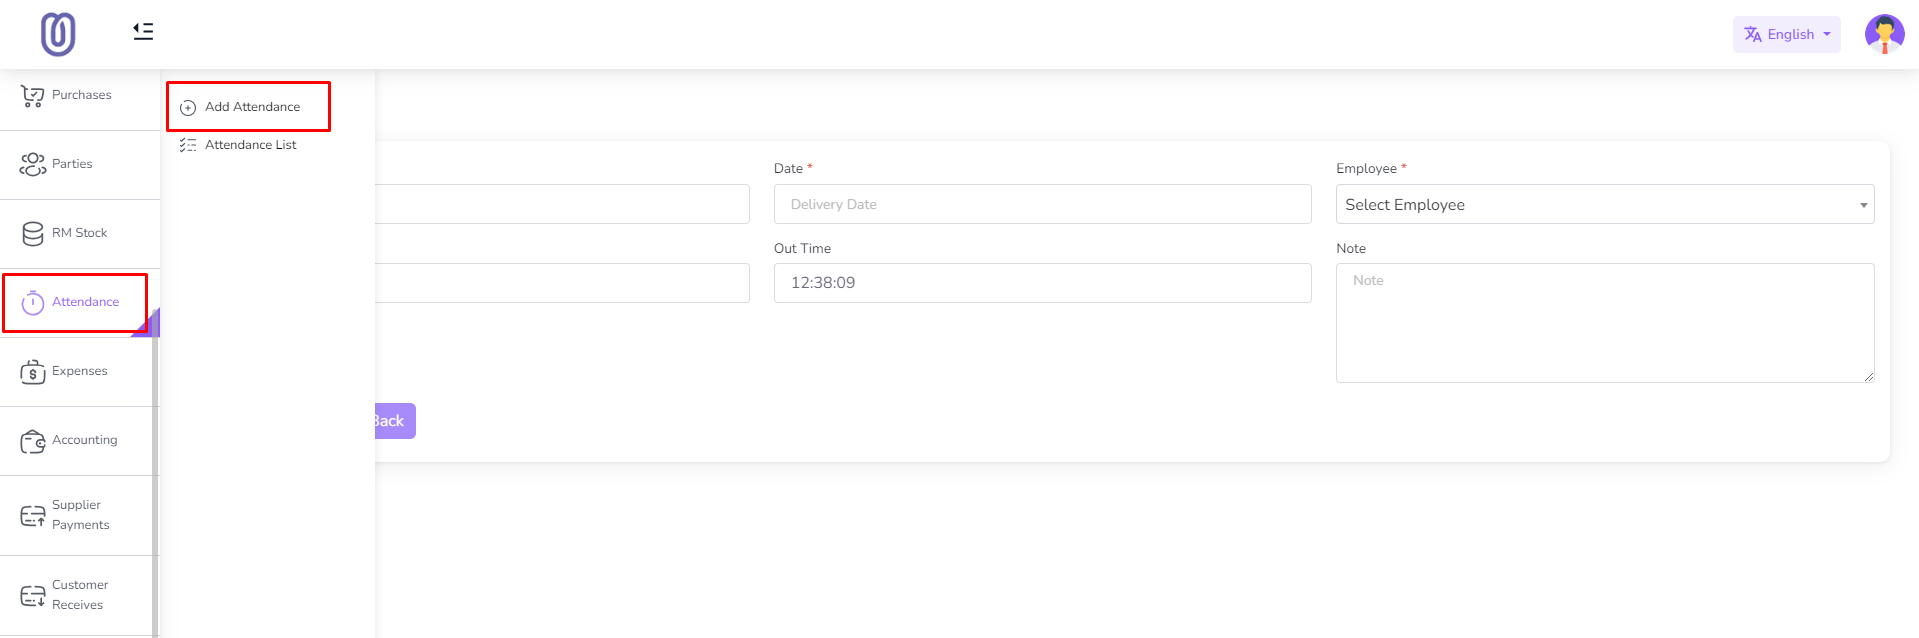
Select employee, date and time and click on the "Submit" button.
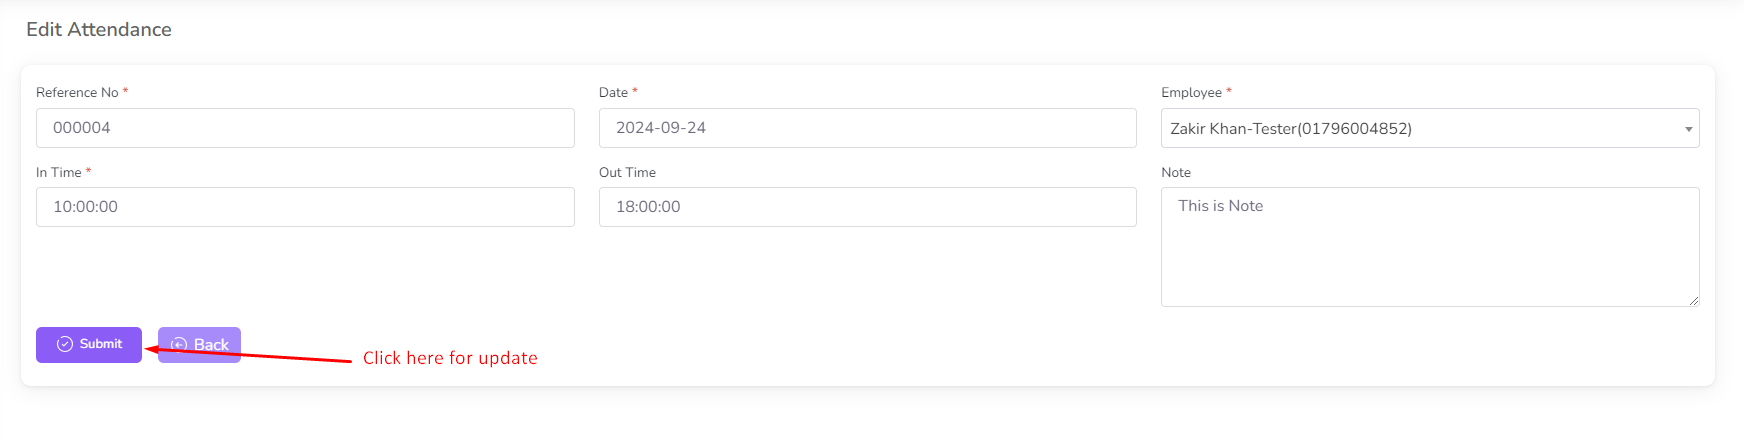
For Edit attendance click on the "Update Time" link. and a form will be opened with previous
data. you can change the time and click on the "Update" button to save the changes.
To delete attendance click on the "Delete" Icon.
Expense Category
In this section you can manage your expense type. Which is used to categorize your expense.
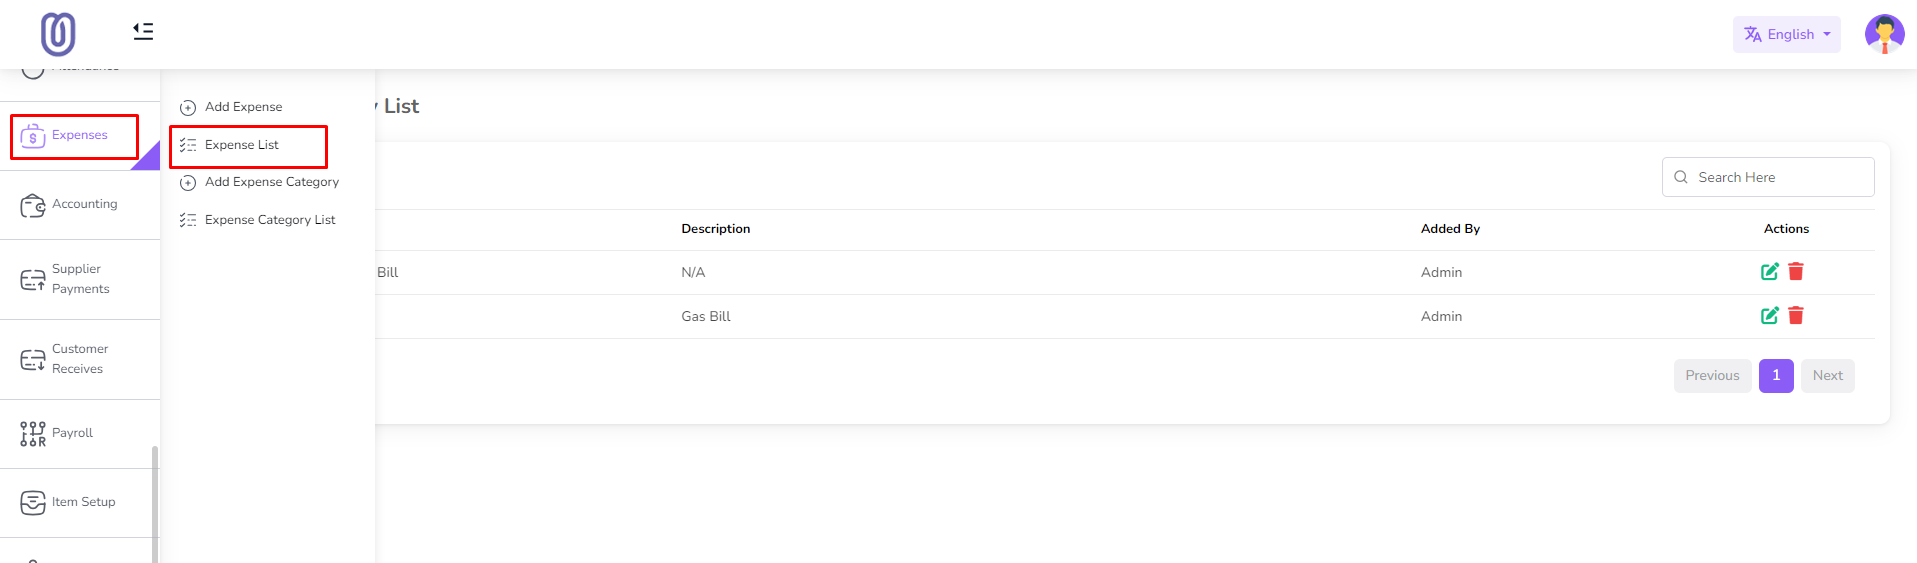
To manage your expense Category, navigate to the "Expense" section from the left sidebar and
click on "Expense Category List".
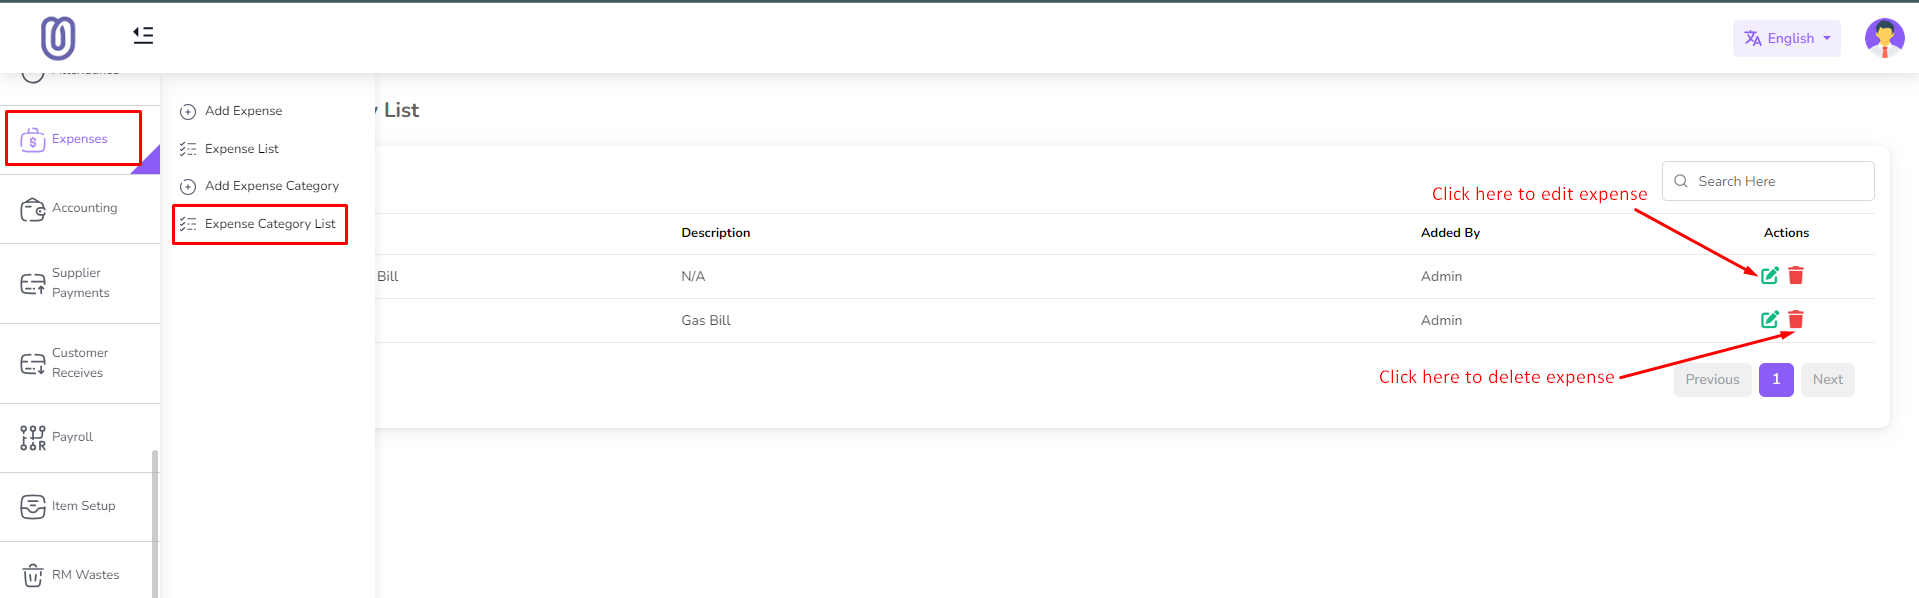
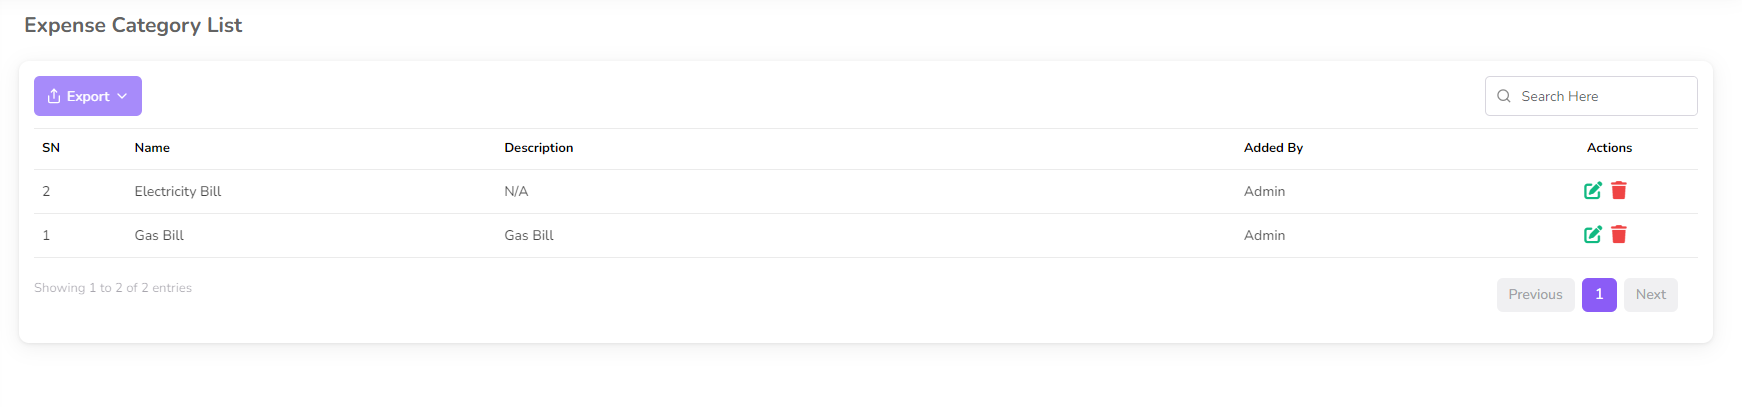
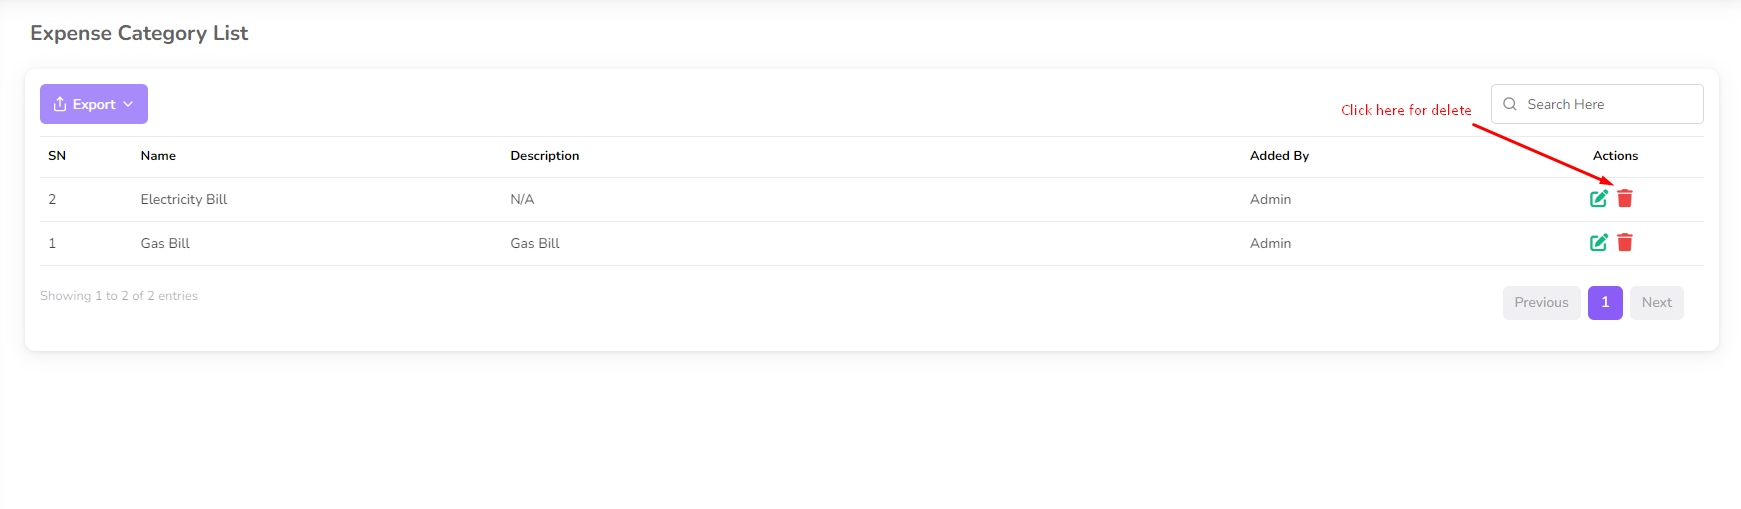
The Expense Category Management page displays all your expense types, including their names
and descriptions.
To add a new expense type, click on the "Add Expense Category" From the left sub menu. Then
a form will be opened.
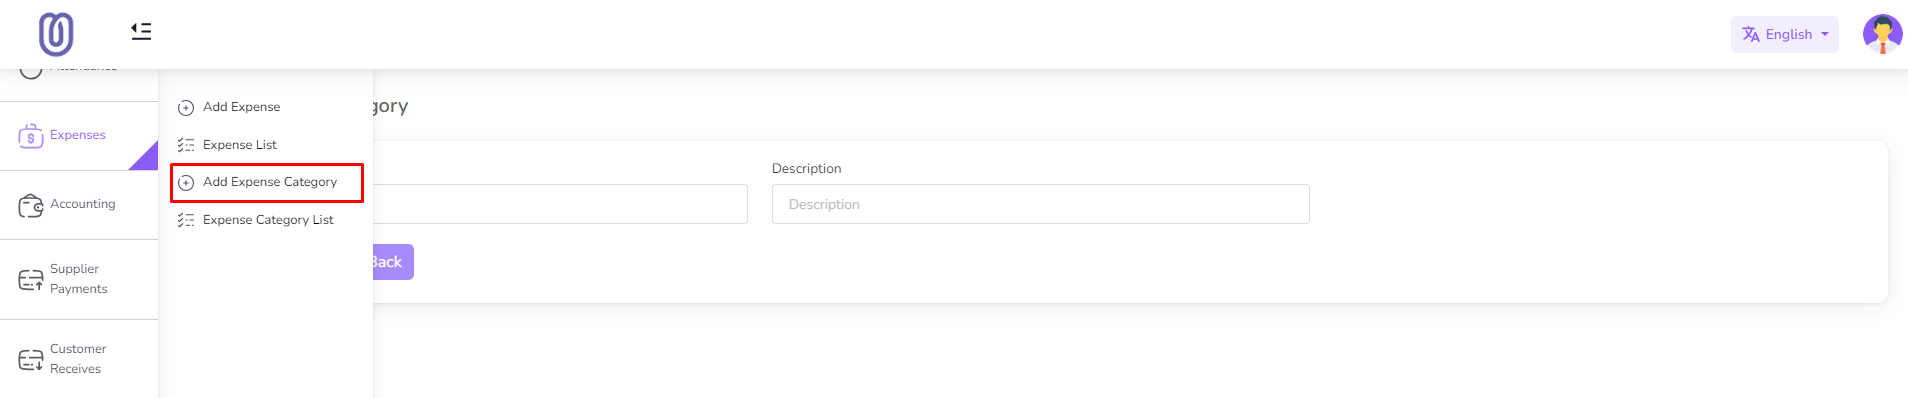
Fill in the details of the new expense category and click on the "Save" button to add it to
the list.

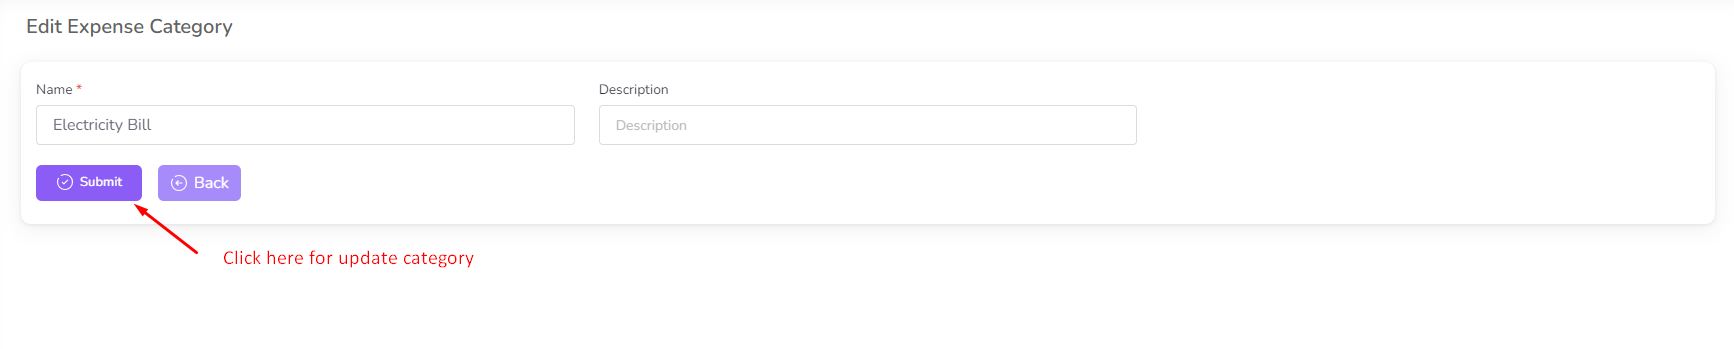
To edit an existing expense category, click on the "Edit" button next to the type you want
to edit. Then a form will be opened with the current details.
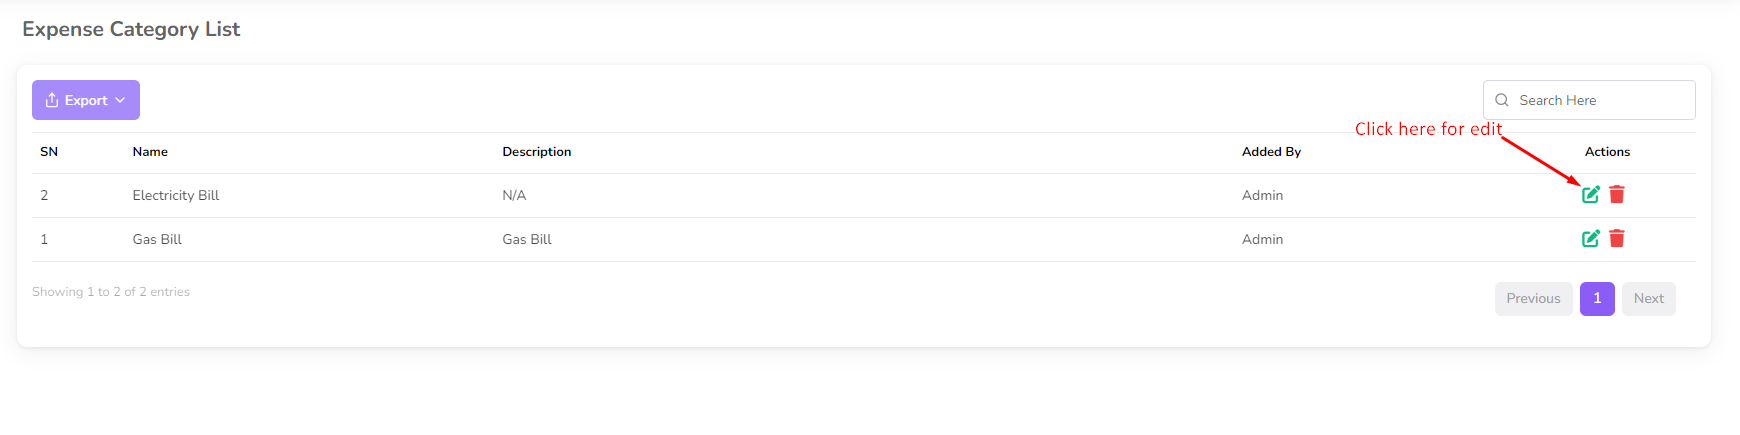
Make the necessary changes and click on the "Submit" button to save the changes.
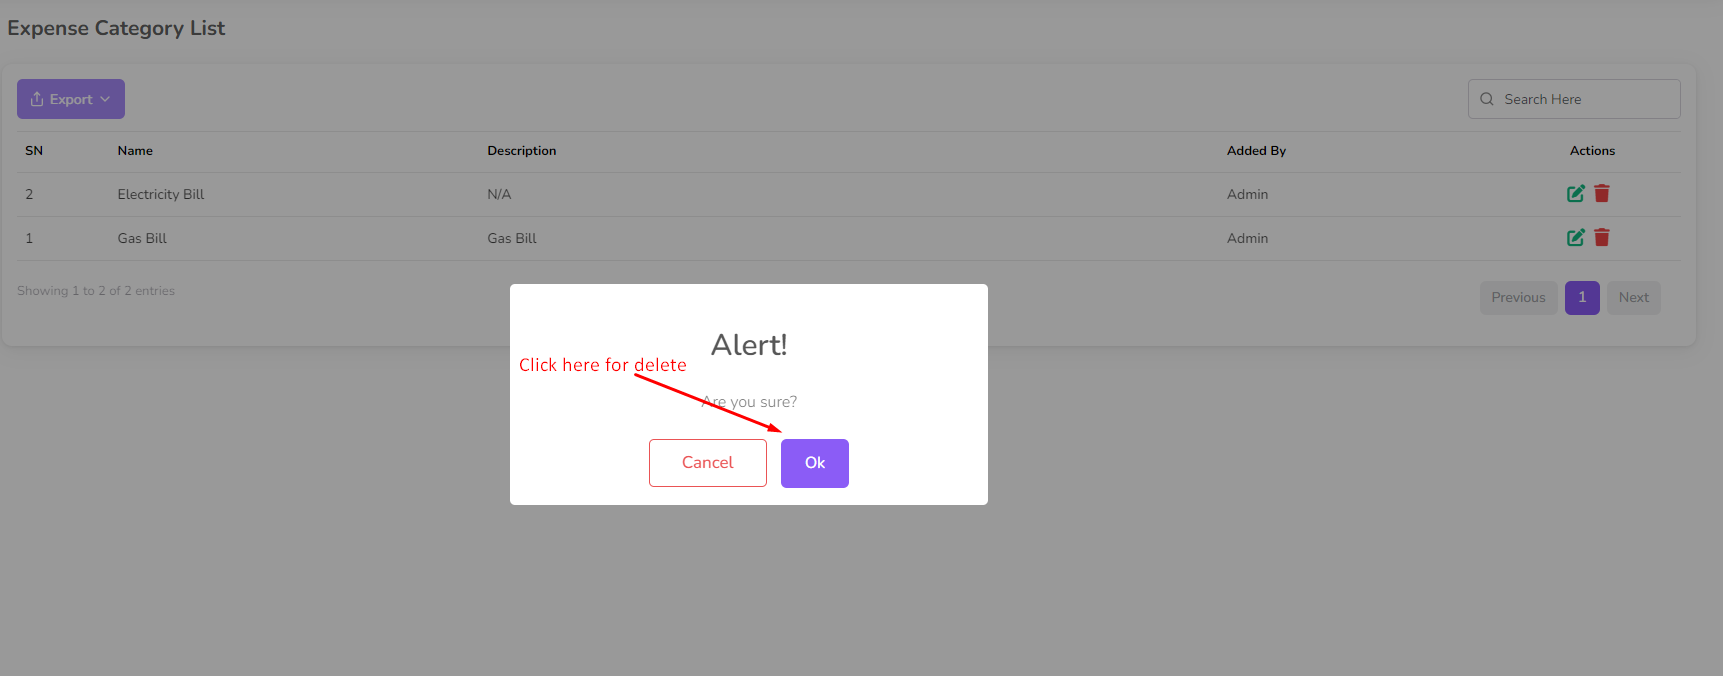
To delete an expense category, click on the "Delete" button next to the type you want to
delete. Then a confirmation dialog will be opened.
Confirm the deletion and the expense category will be removed from the list.
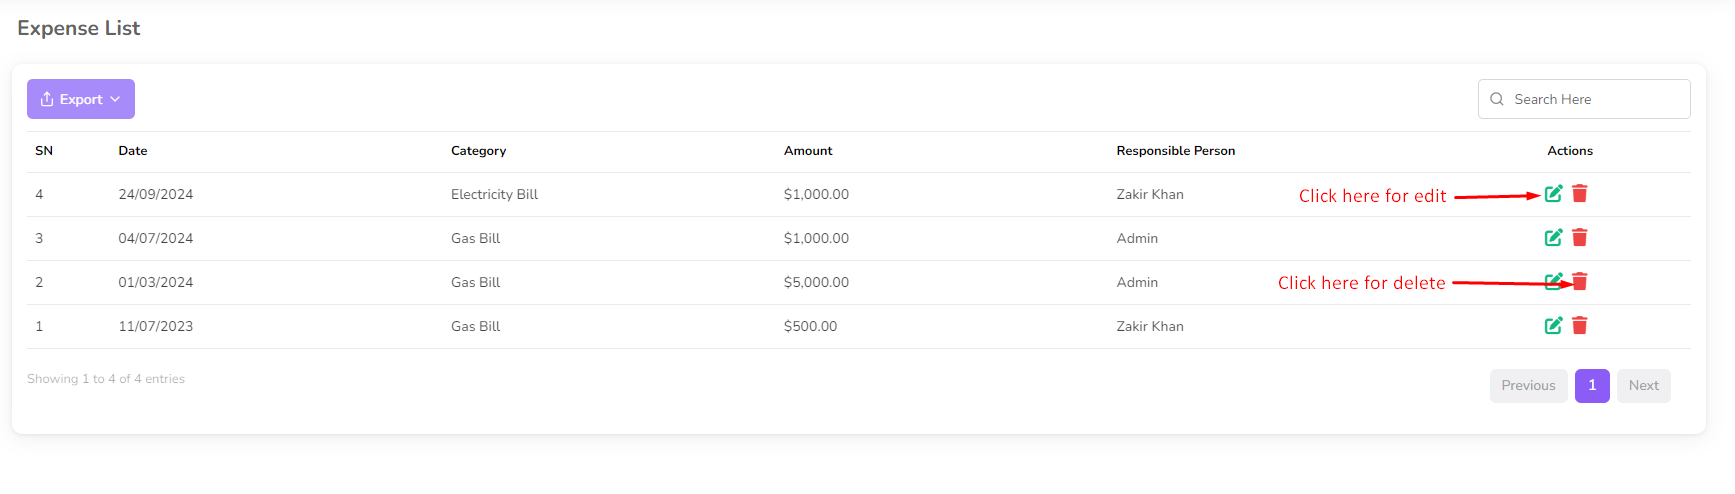
Expense
In this section you can manage your expense, add, edit and delete expense.
To access the Expense Management page, navigate to the "Expense" section from the left
sidebar and click on "Expense List".
The Expense Management page displays all your expenses, including their dates, categories,
descriptions, and amounts.
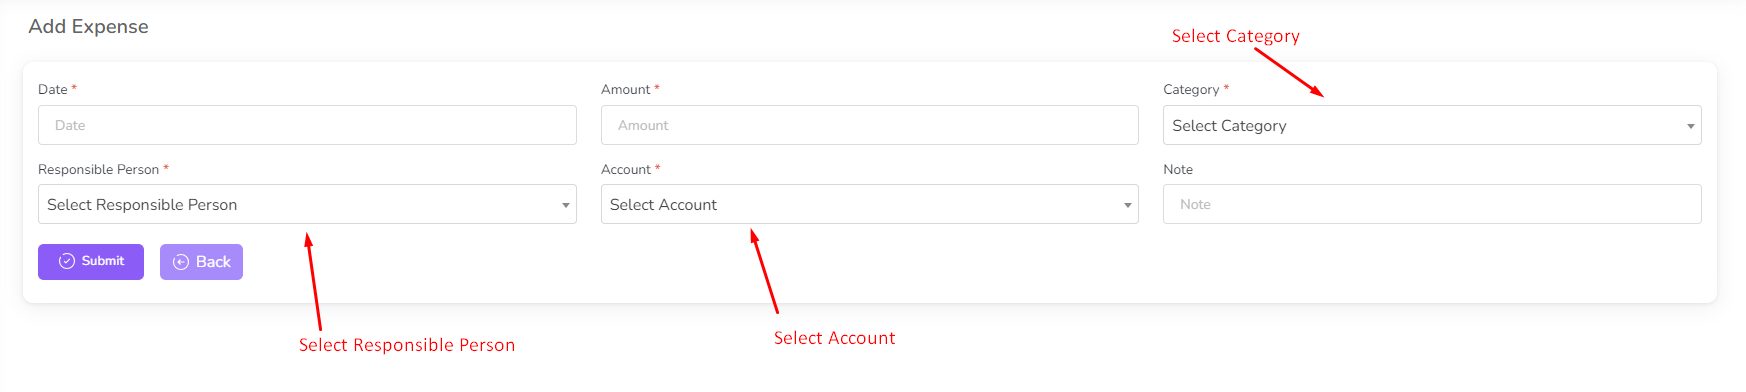
To add a new expense, click on the "Add Expense" From the left sub menu. Then a form will be
opened.
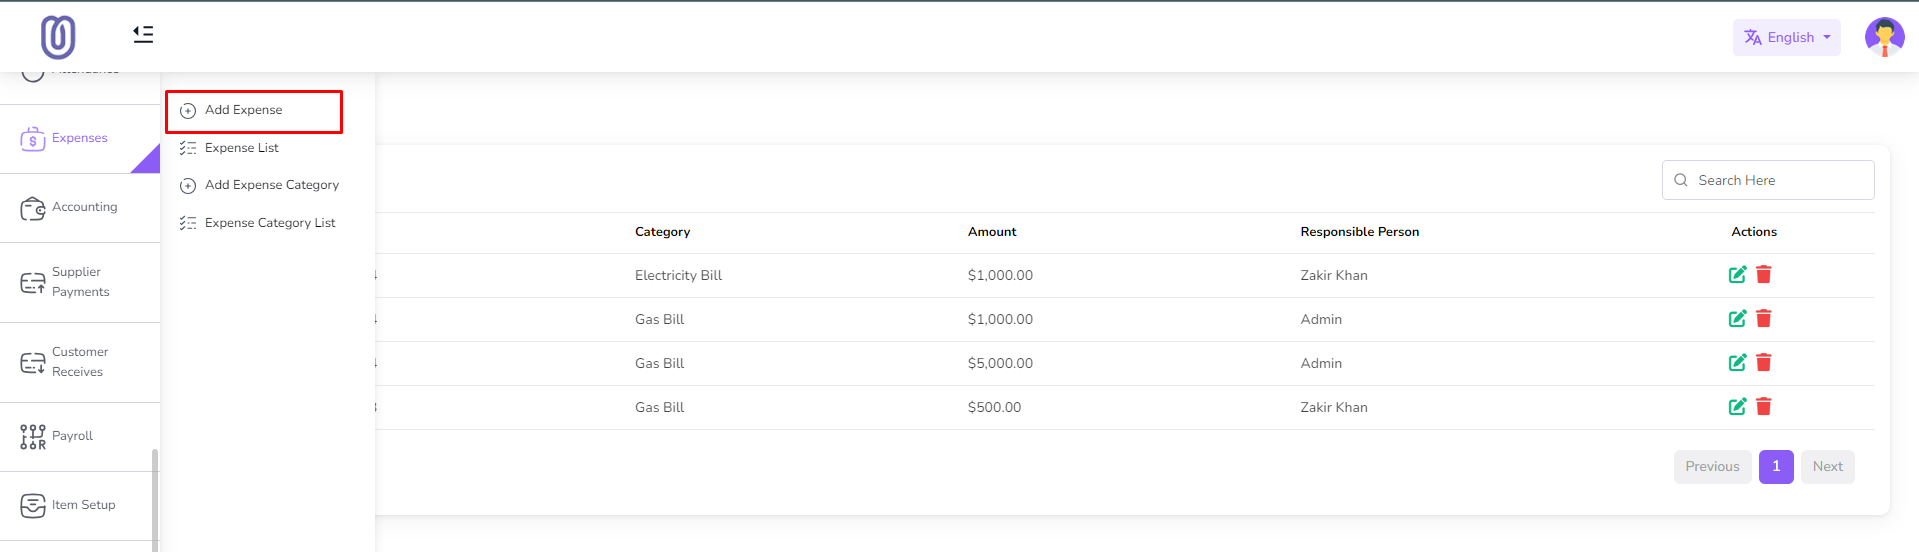
Fill in the details of the new expense and click on the "Submit" button to add it to the
list.
To edit an existing expense, click on the "Edit" button next to the expense you want to
edit. Then a form will be opened with the current details.

Make the necessary changes and click on the "Submit" button to save the changes.

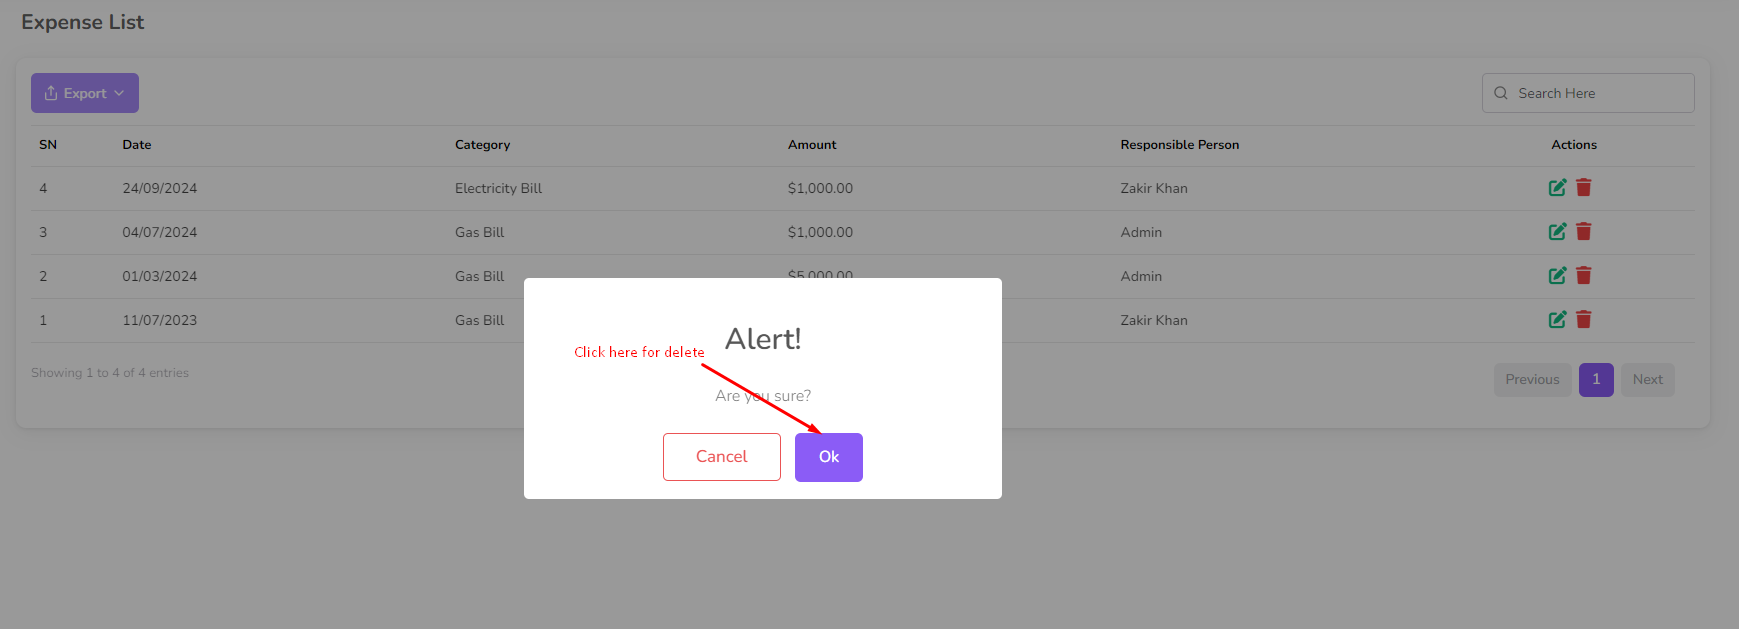
To delete an expense, click on the "Delete" button next to the expense you want to delete.
Then a confirmation dialog will be opened.

Confirm the deletion and the expense will be removed from the list.
Account
In this section you can manage your account, add, edit and delete account.
To manage your account, navigate to the "Accounting" section from the left sidebar and click
on "Account List".
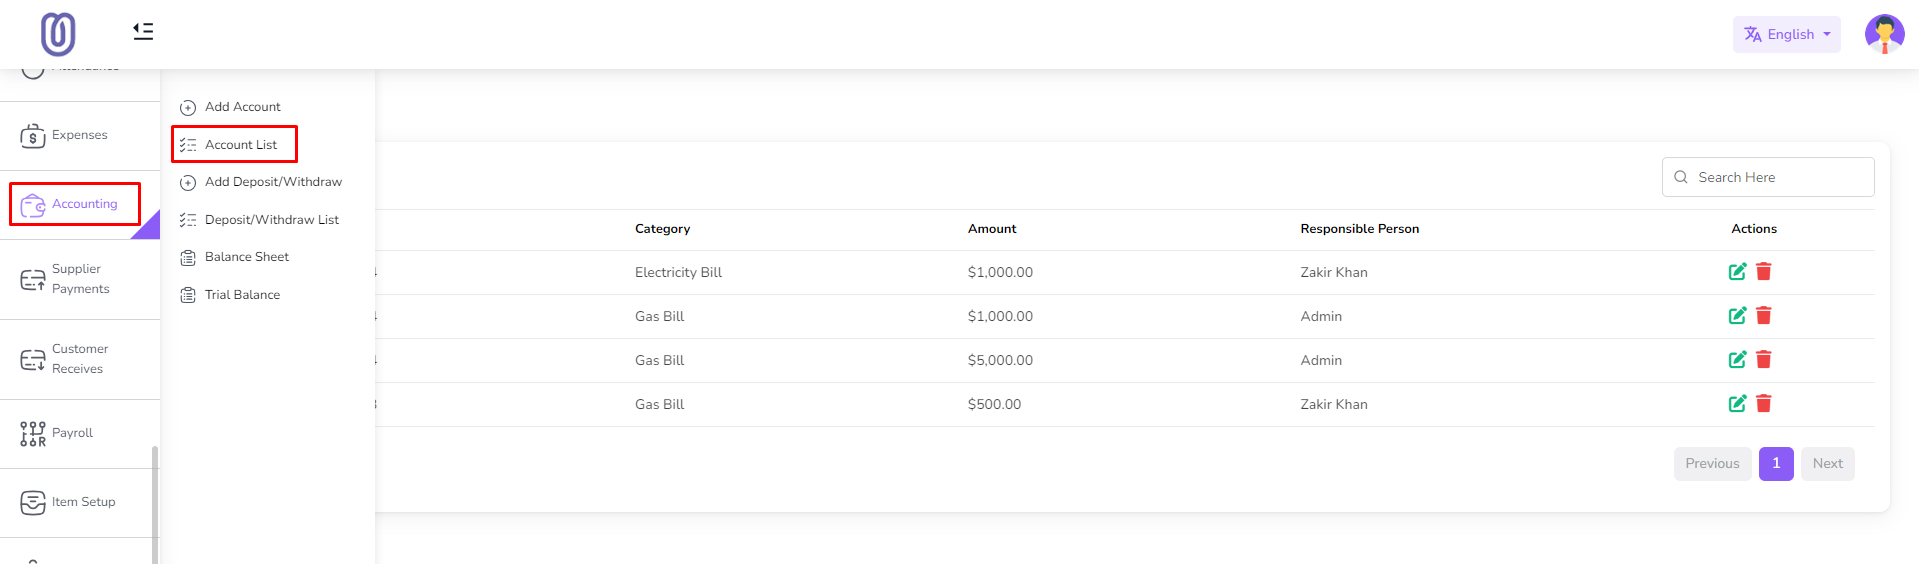
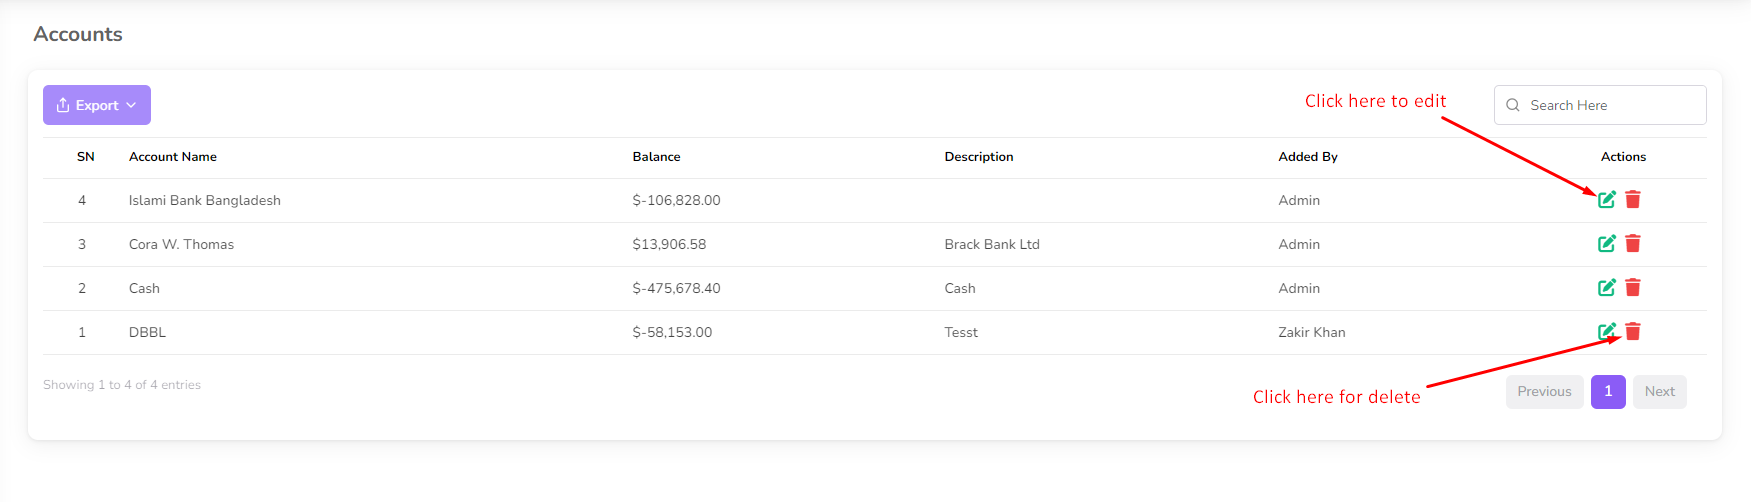
The Account Management page displays all your accounts, including their names and
descriptions.
To add a new account, click on the "Add Account" From the left sub menu. Then a form will be
opened.
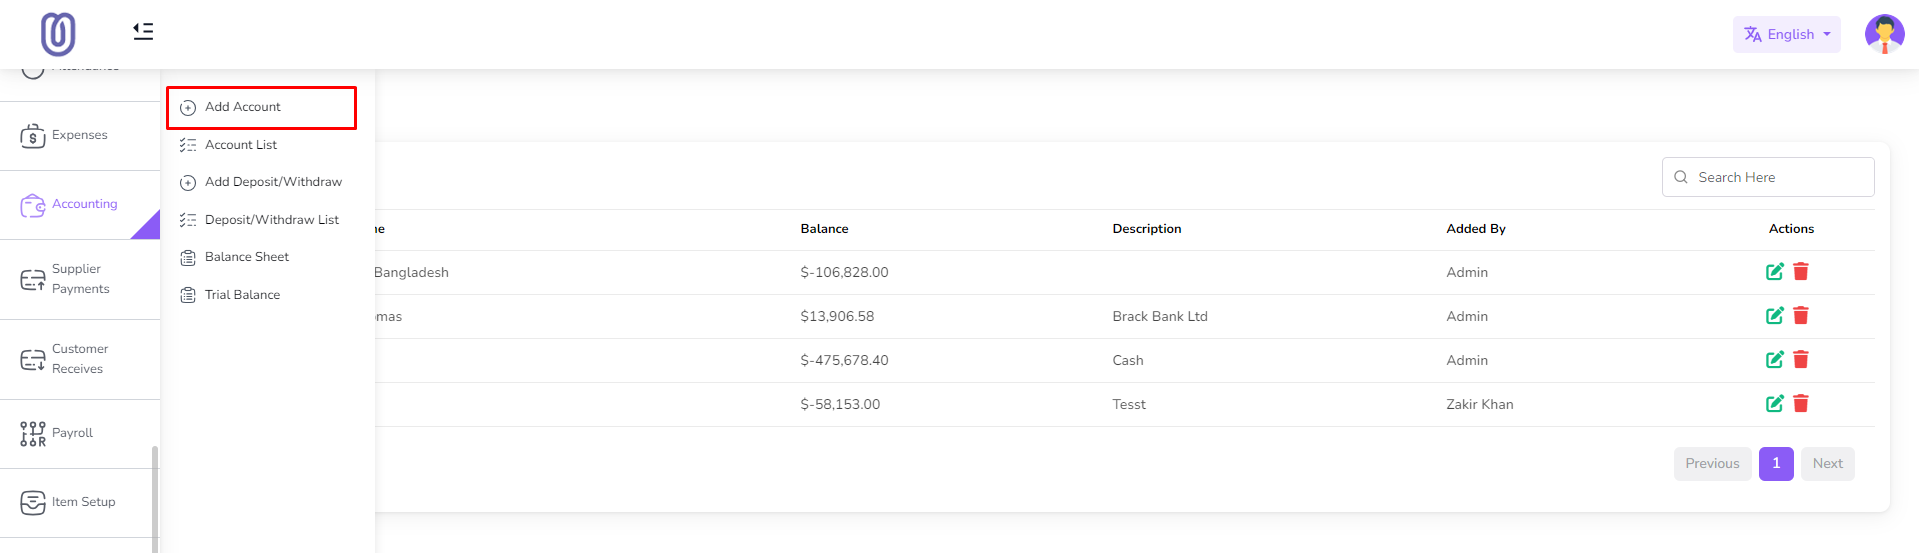
Fill in the details of the new account and click on the "Save" button to add it to the list.

To edit an existing account, click on the "Edit" button next to the account you want to
edit. Then a form will be opened with the current details.

Make the necessary changes and click on the "Submit" button to save the changes.

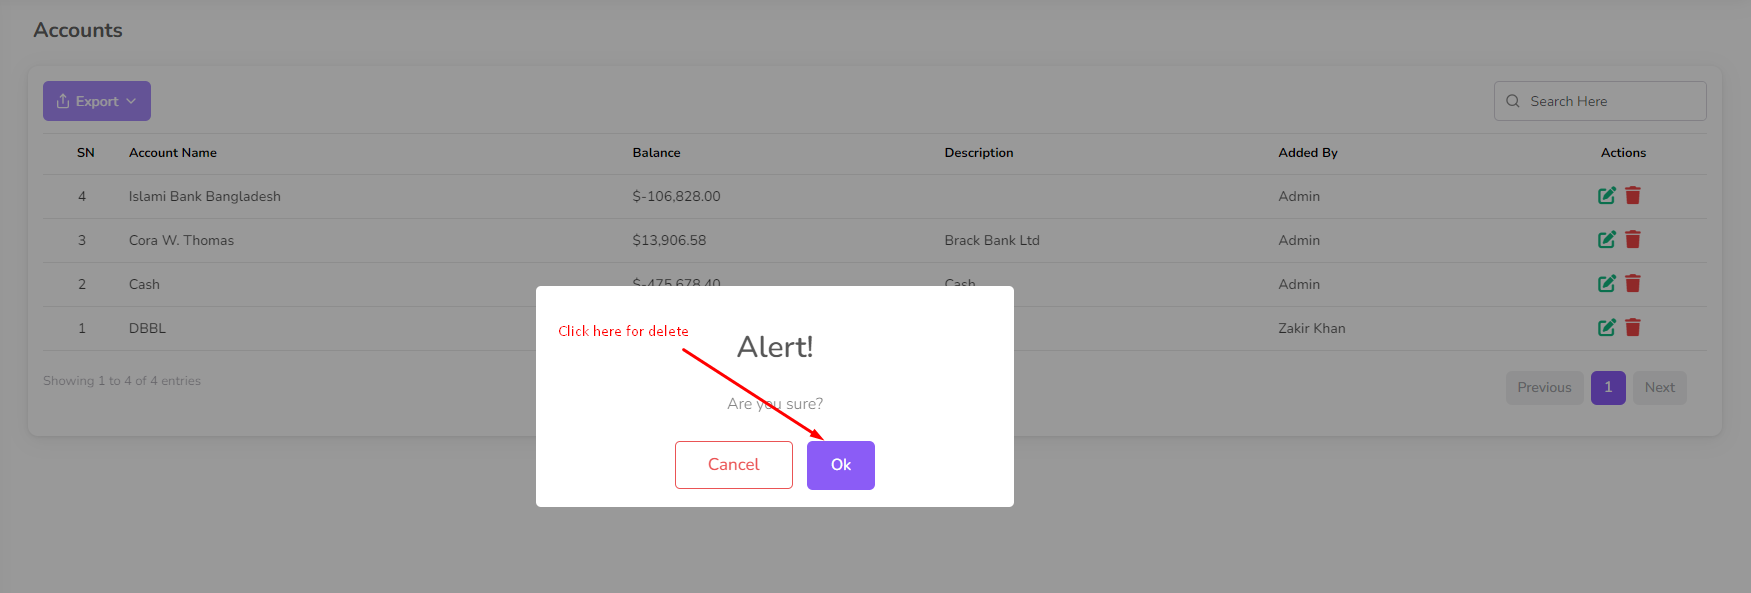
To delete an account, click on the "Delete" button next to the account you want to delete.
Then a confirmation dialog will be opened.
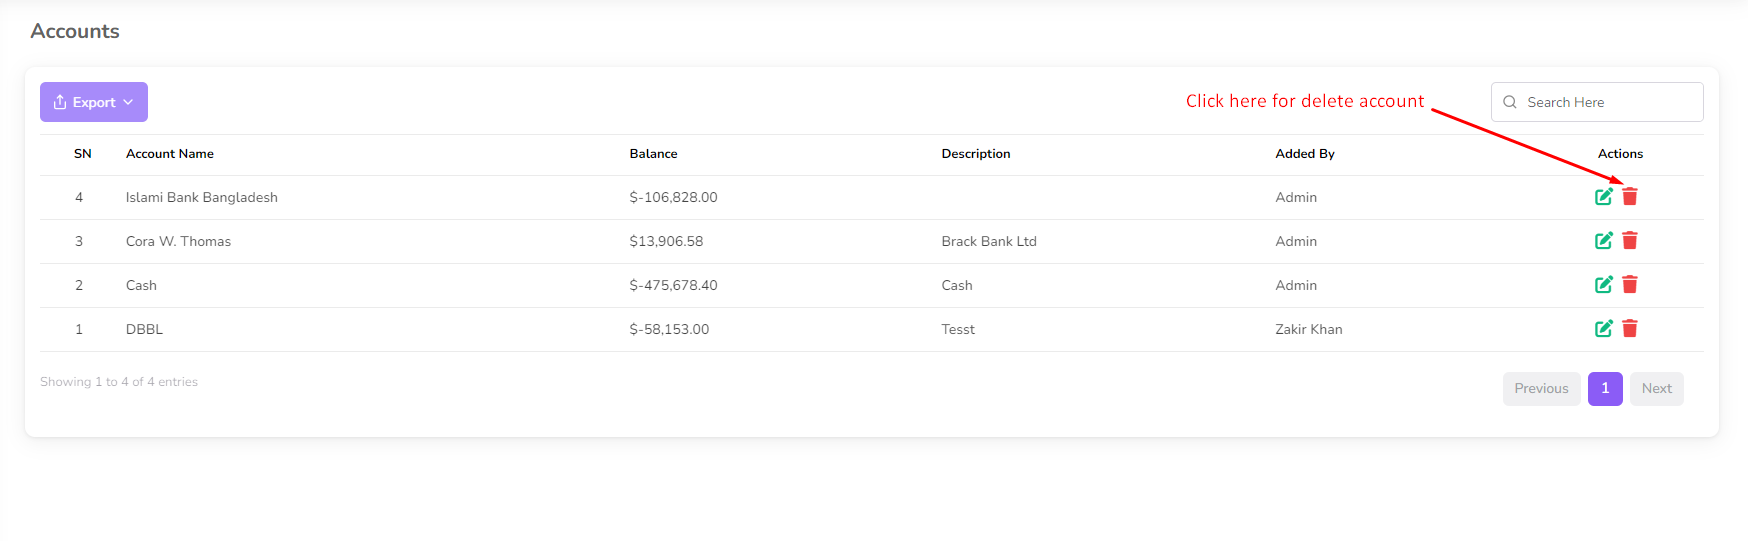
Confirm the deletion and the account will be removed from the list.
Withdraw/Deposit
In this section you can manage withdraw and deposit of your account.
To access the Withdraw/Deposit Management page, navigate to the "Accounting" section from
the left sidebar and click on "Withdraw/Deposit List".
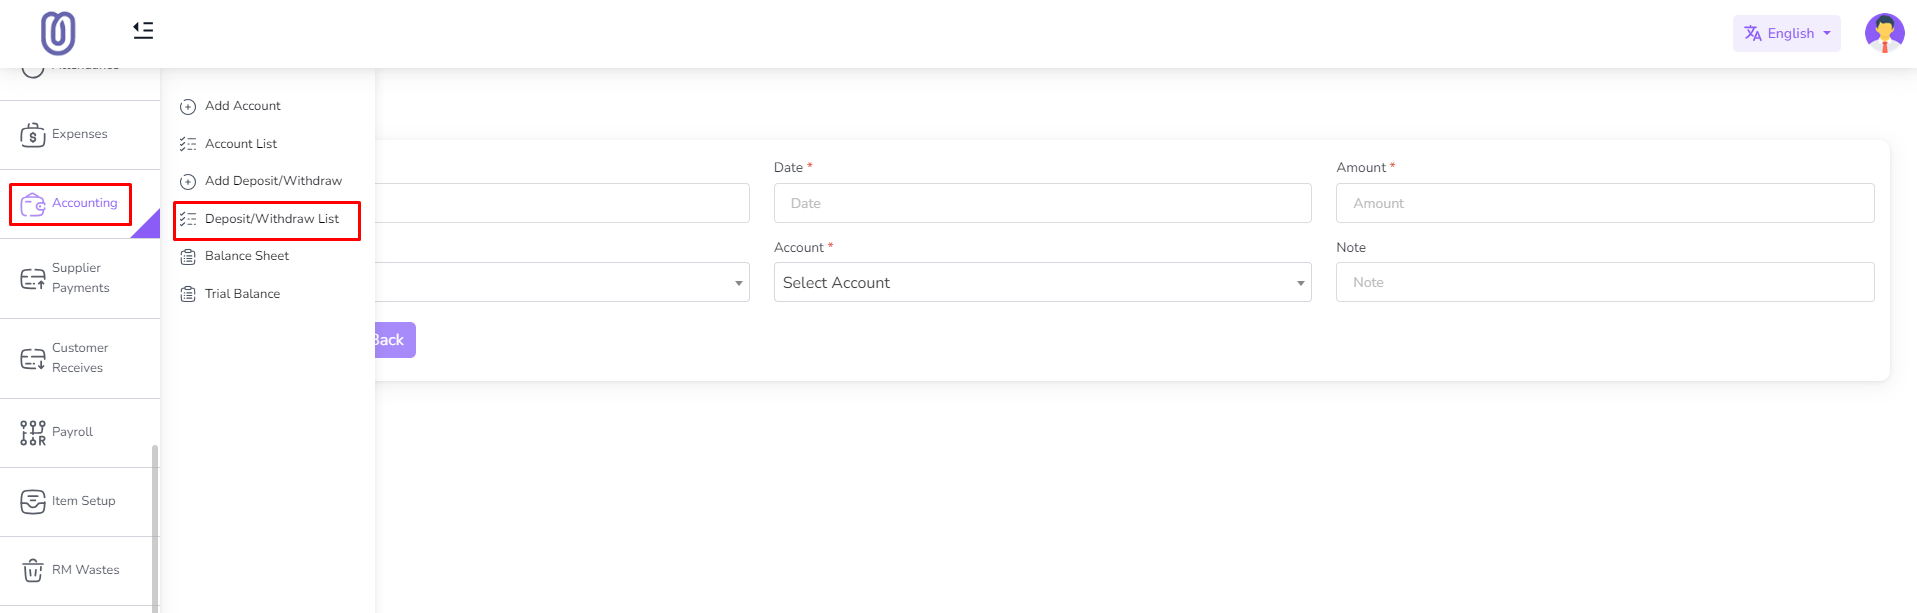
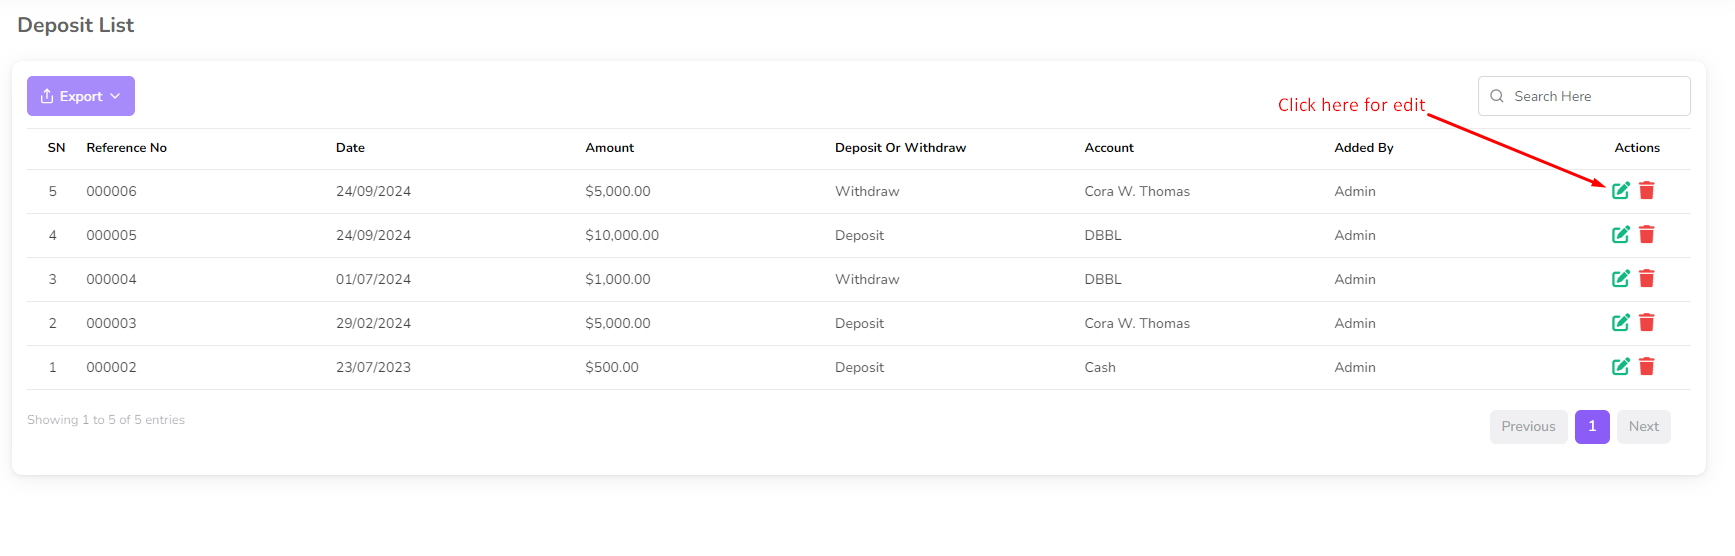
The Withdraw/Deposit Management page displays all your transactions, including their dates,
type, account, and amounts.

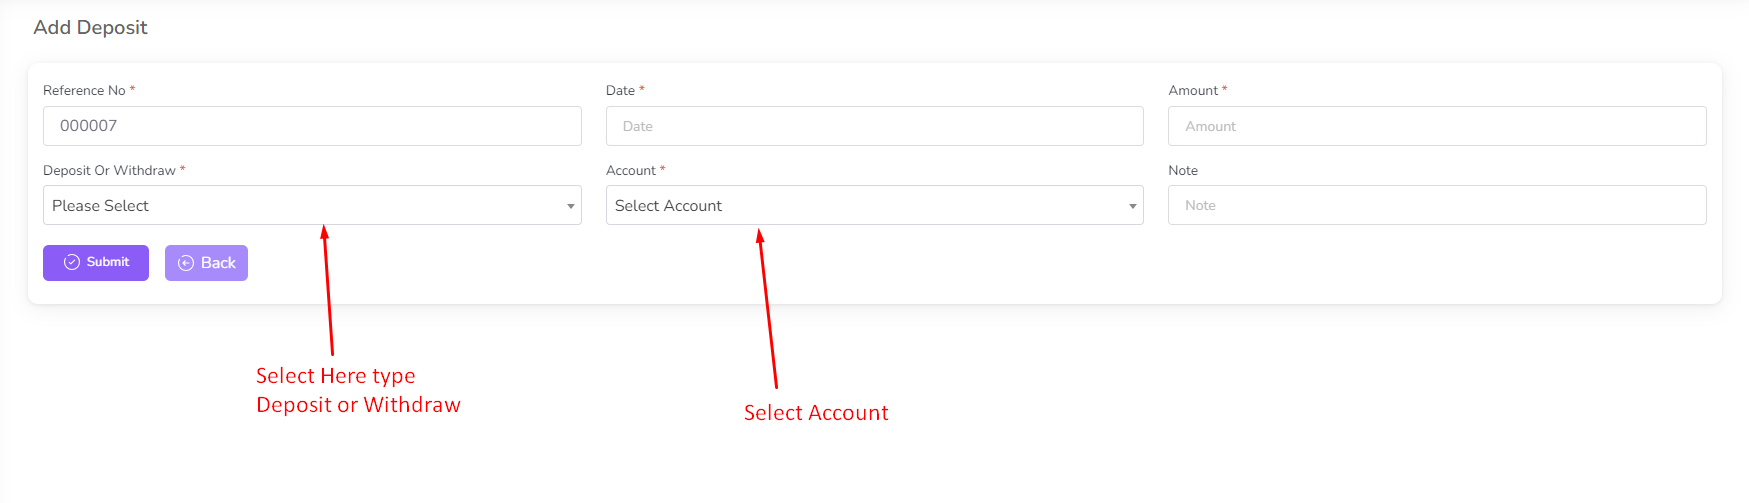
To add a new Deposit/Withdraw, click on the "Add Deposit/Withdraw" From the left sub menu.
Then a form will be opened.
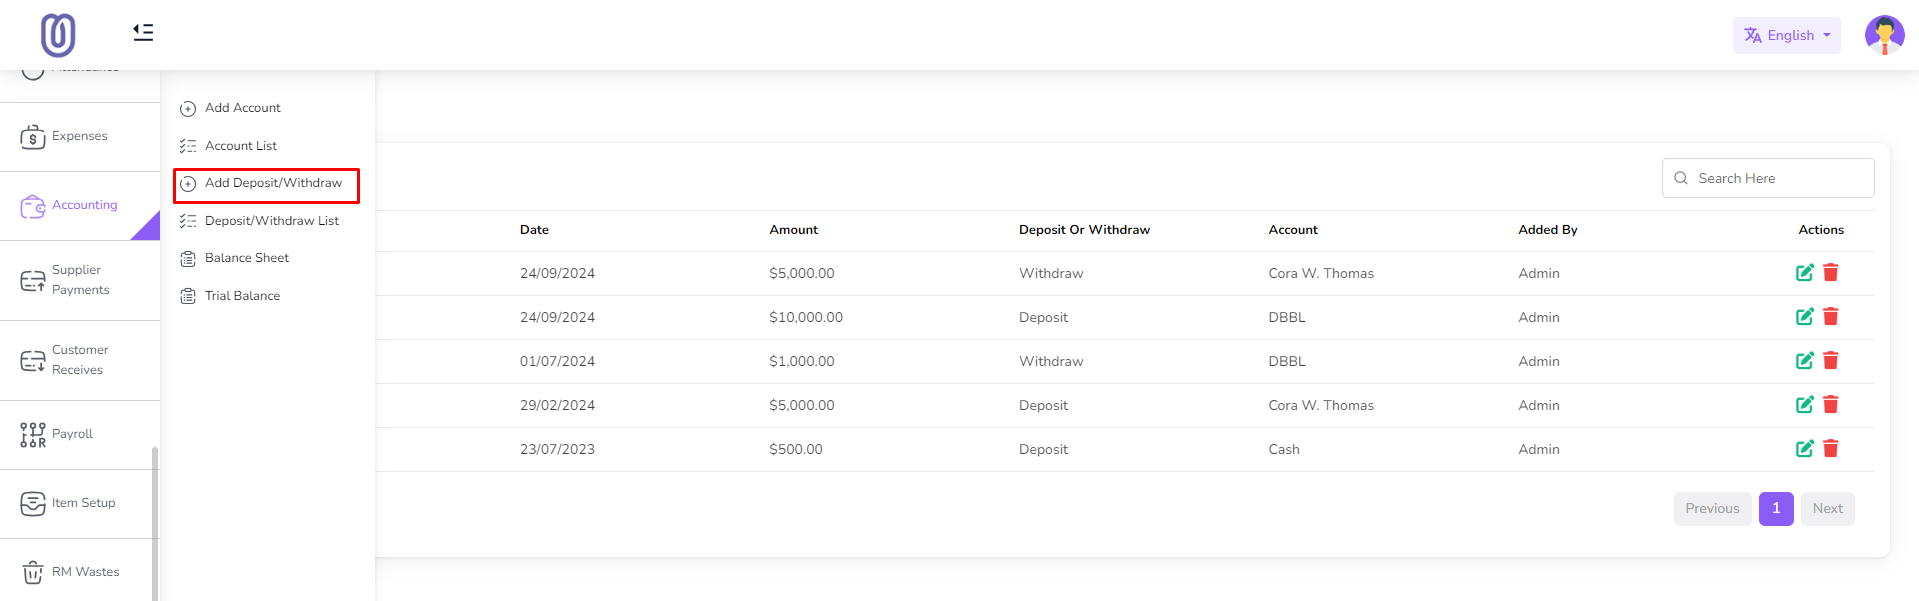
Fill in the details of the new Deposit/Withdraw and click on the "Submit" button to add it
to the list.
To edit an existing Deposit/Withdraw, click on the "Edit" button next to the
Deposit/Withdraw you want to edit. Then a form will be opened with the current details.
Make the necessary changes and click on the "Submit" button to save the changes.

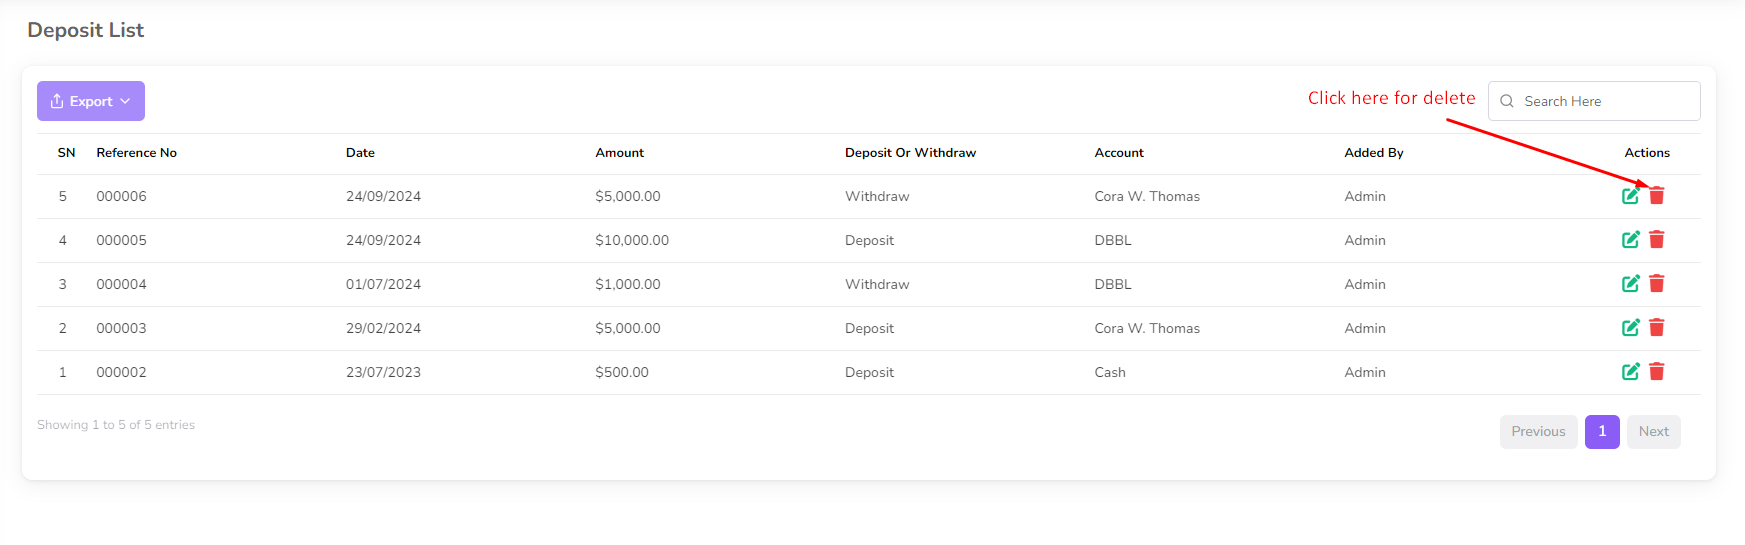
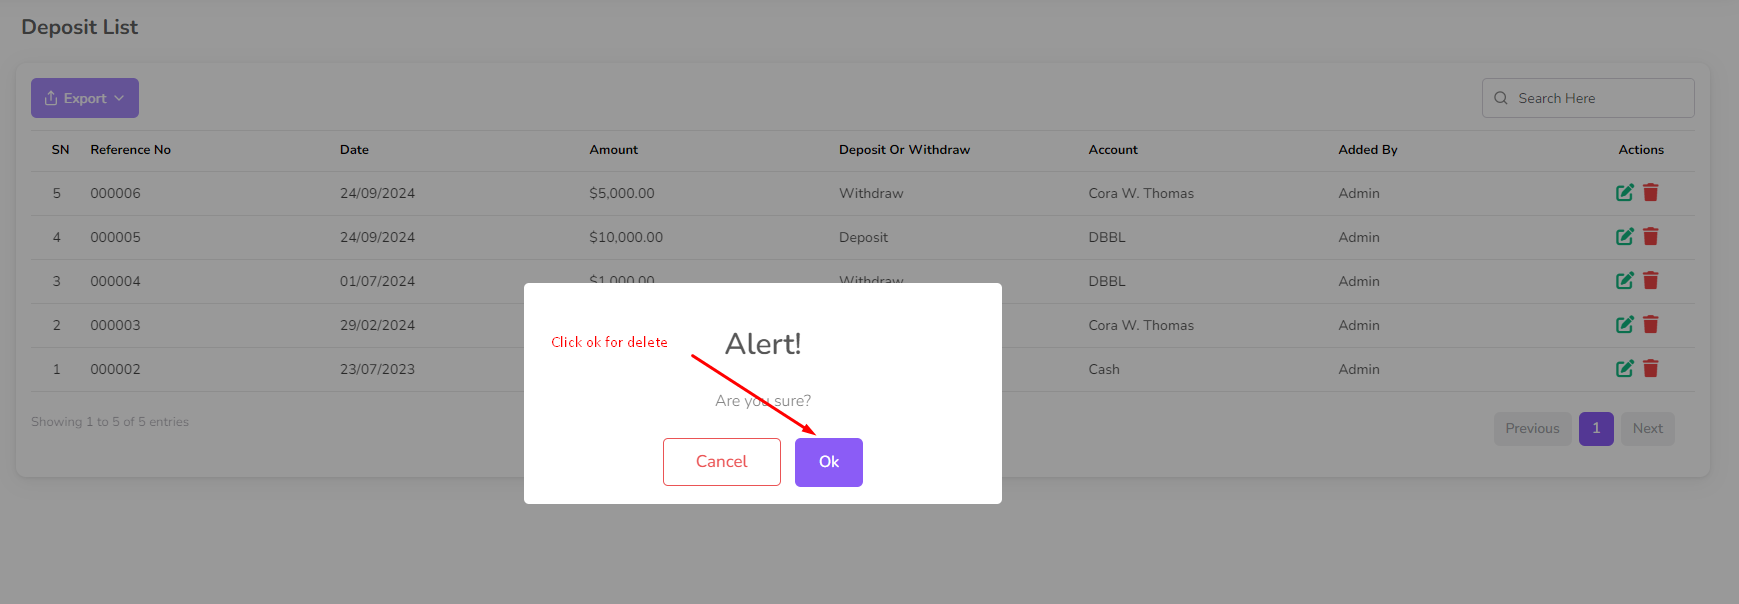
To delete a Deposit/Withdraw, click on the "Delete" button next to the Deposit/Withdraw you
want to delete. Then a confirmation dialog will be opened.
Confirm the deletion and the transaction will be removed from the list.
Balance Sheet
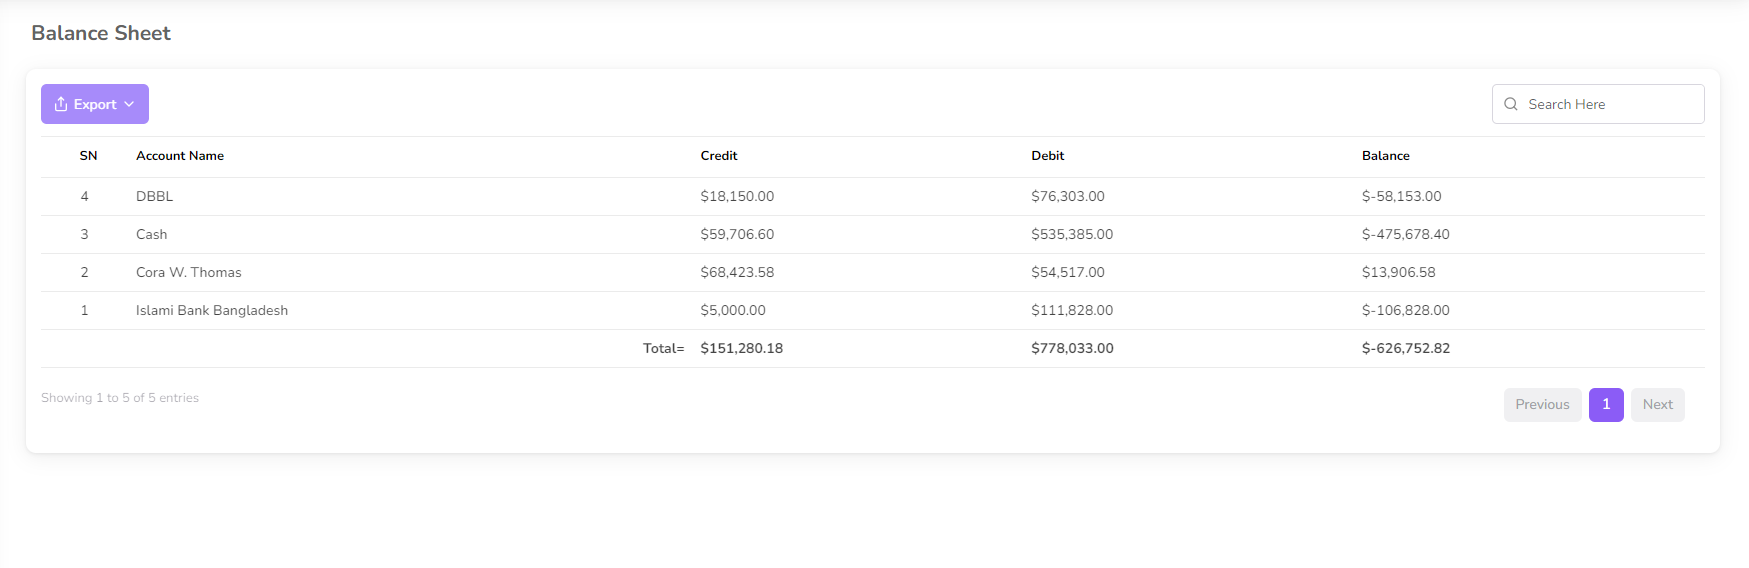
In this section you see the balance of your account.
To access the Balance Sheet page, navigate to the "Accounting" section from the left sidebar
and click on "Balance Sheet".

The Balance Sheet page displays the balance of your account.
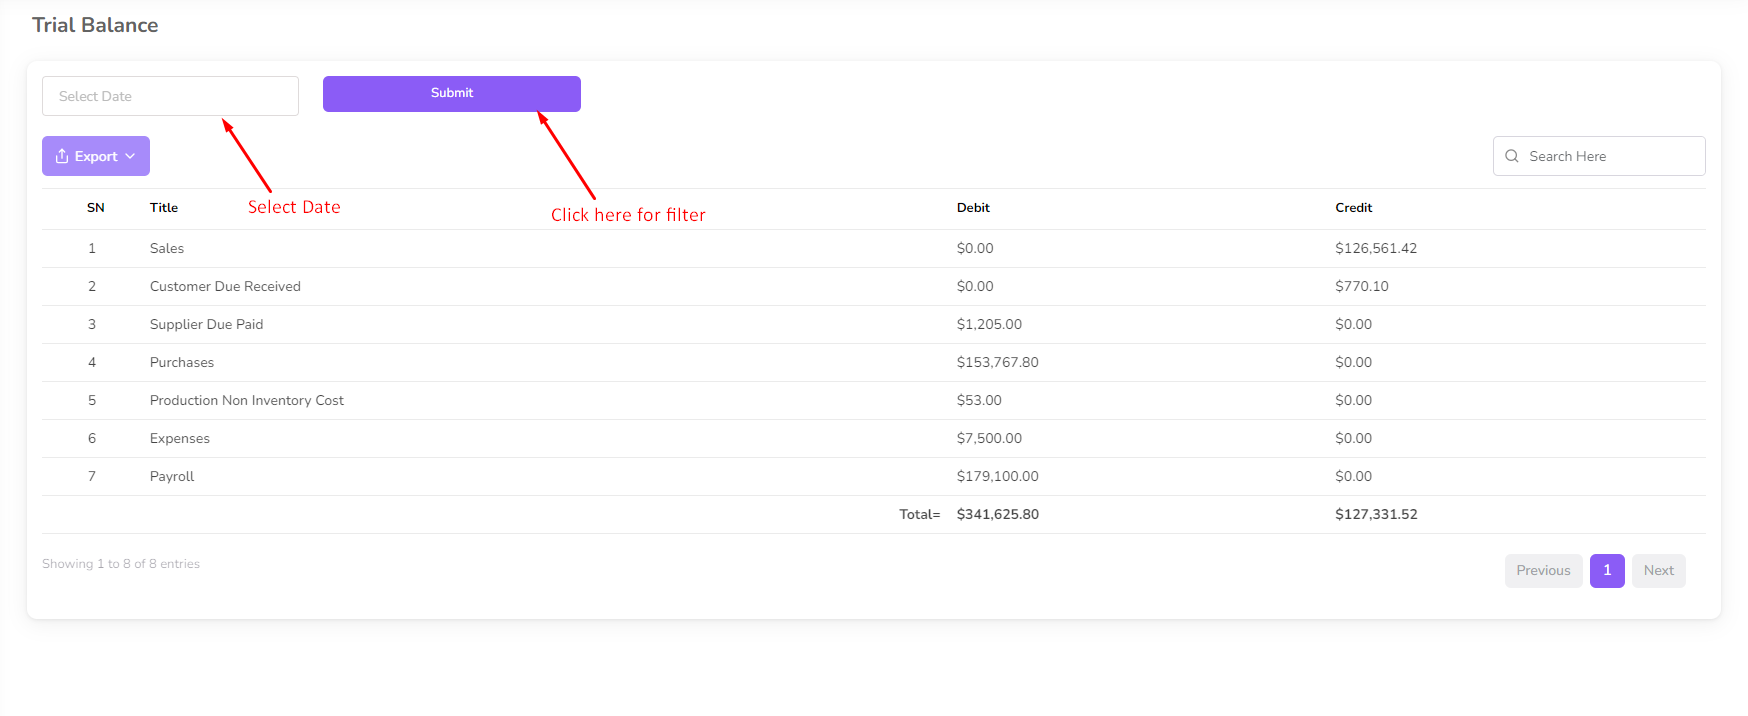
Trial Balance
In this section you see the trial balance for your business.
To access the Trial Balance page, navigate to the "Accounting" section from the left sidebar
and click on "Trial Balance".
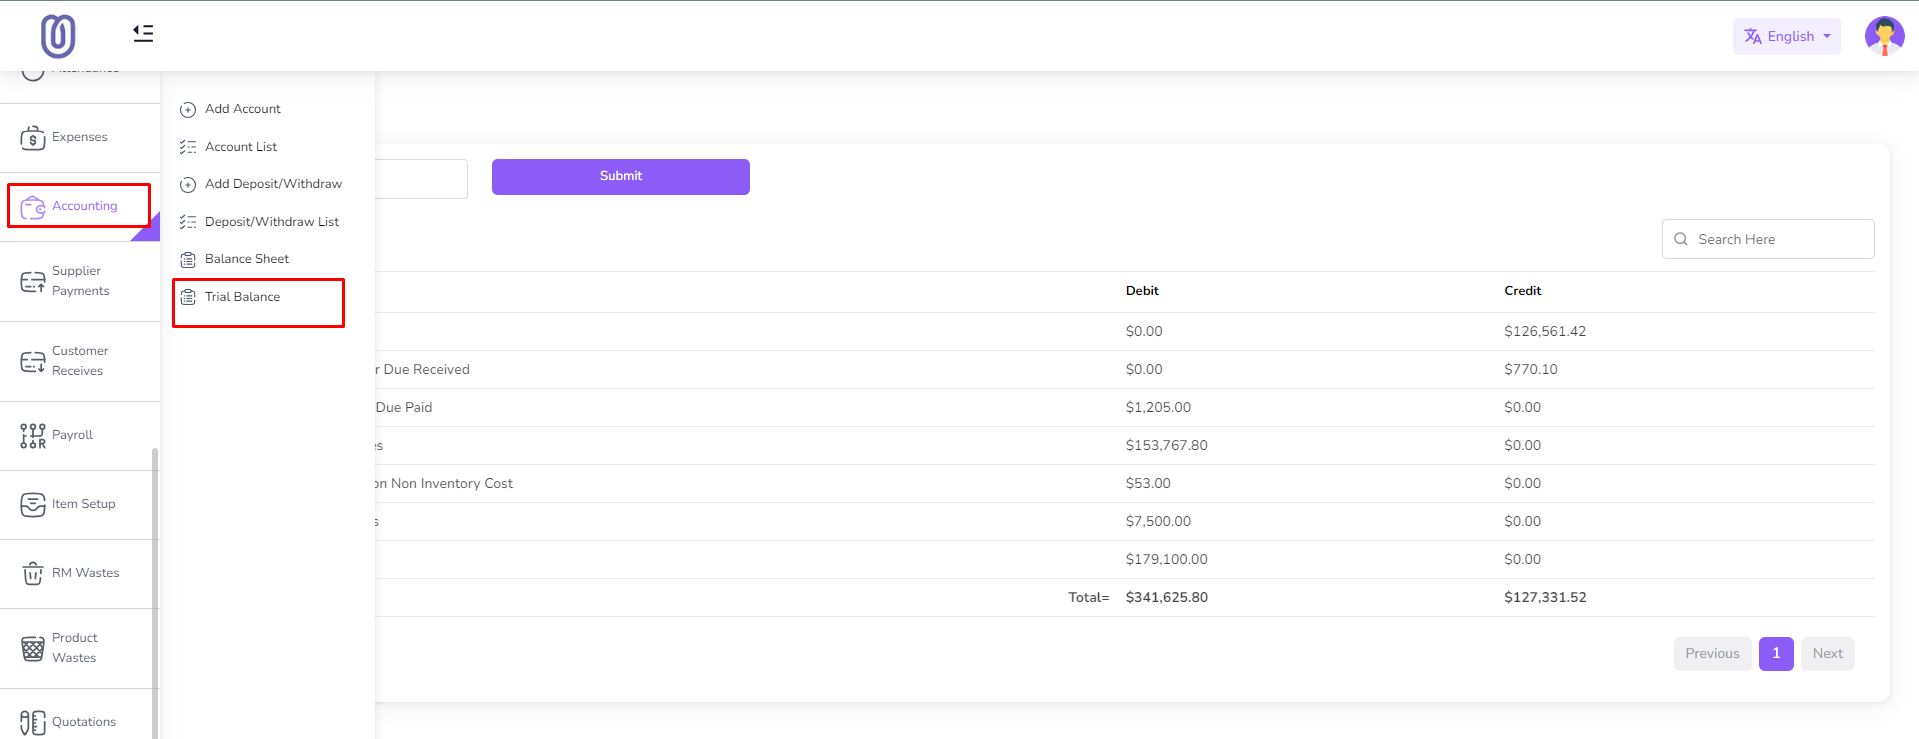
The Trial Balance page displays the trial balance for your business.

You can Filter by date. First select date and click on the "Submit" button.
Supplier Payment
The Supplier Payment feature allows you to effectively manage payment to your supplier. You
can track payment, view payment history, and generate payment reports.
To access Supplier Payment, navigate to the “Supplier Payment” menu from the left sidebar.

Once you access the Supplier Payment page, you can view date, supplier name, amount, note.

To add a payment, select the supplier and click on the "Add Supplier Payment" from the left
sub menu.

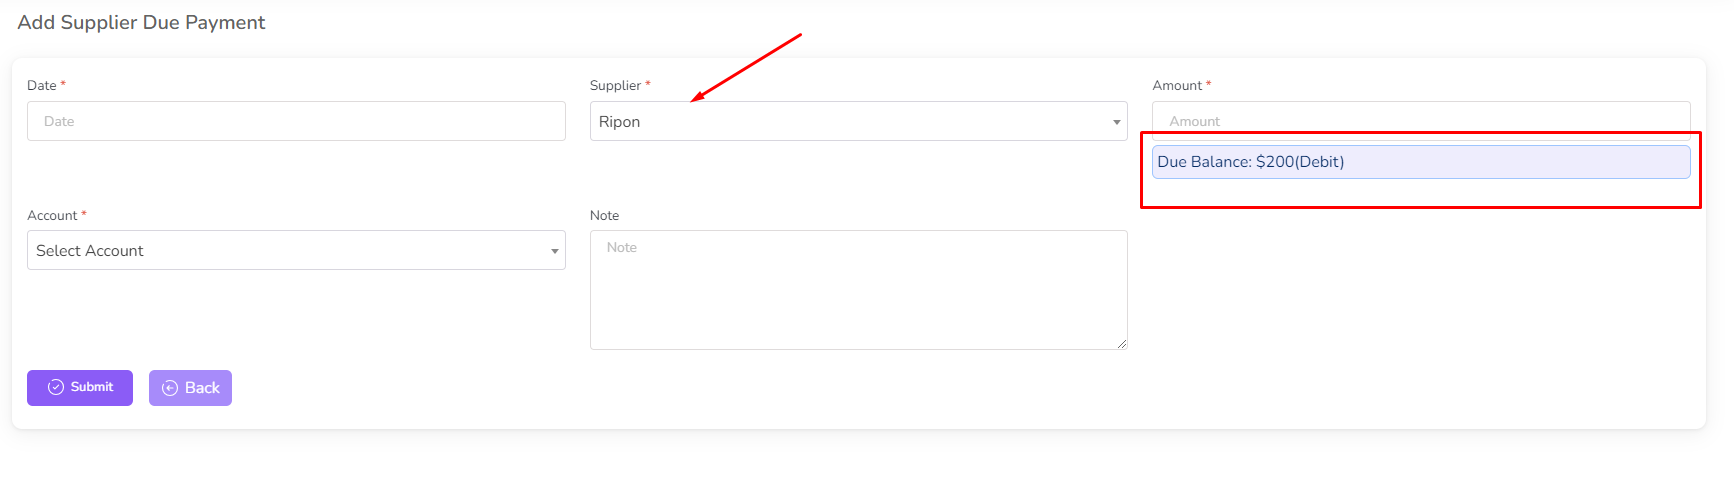
Enter the payment details, including the amount and payment date, and click on the "Submit"
button.
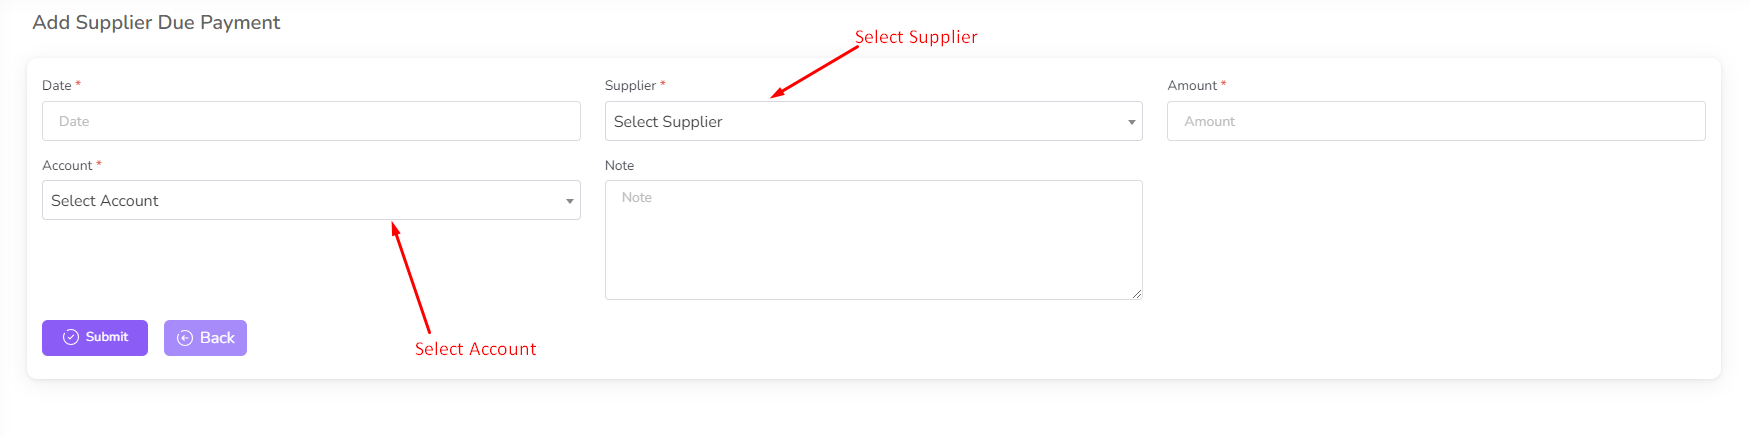
When select supplier from dropdown, you can see due balance of that supplier.
For edit payment click on the "Edit" Icon.

Make the necessary changes and click on the "Submit" button to save the changes.

To delete a payment, click on the "Delete" button next to the payment you want to delete.
Then a confirmation dialog will be opened.

Confirm the deletion and the payment will be removed from the list.

Customer Received
The Customer Received feature allows you to effectively manage received payment from your
customer. You can track received payment, view received payment history, and generate
received payment reports.
To access Customer Received, navigate to the “Customer Received” menu from the left sidebar.

Once you access the Customer Received page, you can view date, customer name, amount, note.

To add a received payment "Add Customer Received" from the left sub menu.

Enter the received payment details, including the amount and payment date, and click on the
"Submit" button.

When select customer from dropdown, you can see due balance of that customer.

For edit received payment click on the "Edit" Icon.

Make the necessary changes and click on the "Submit" button to save the changes.

To delete a received payment, click on the "Delete" button next to the payment you want to
delete. Then a confirmation dialog will be opened.

Confirm the deletion and the payment will be removed from the list.

Payroll Management
The Payroll Management feature allows you to effectively manage employee salaries, bonuses,
and deductions. You can track payroll history, and generate payroll reports.
To access Payroll Management, navigate to the “Payroll” menu from the left sidebar.
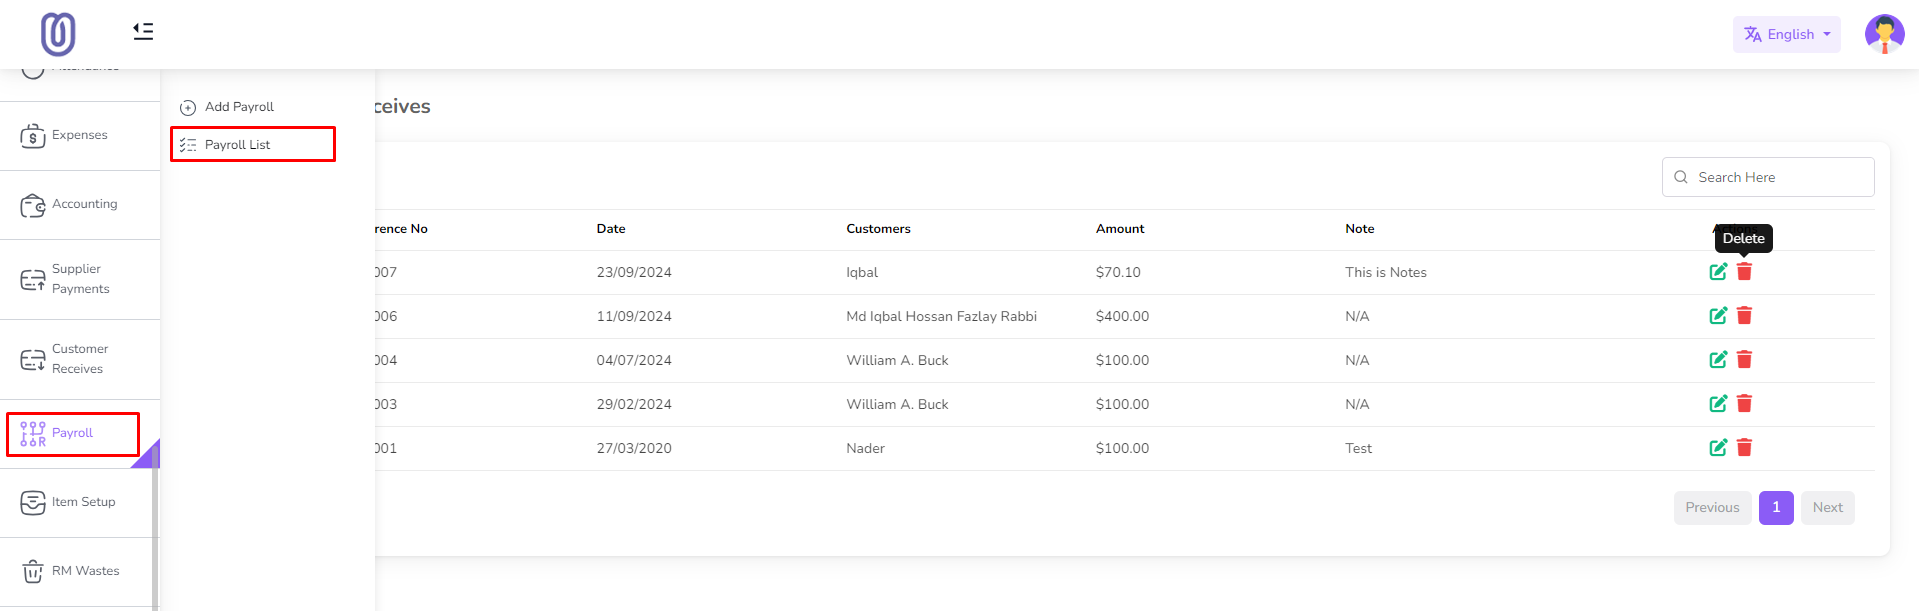
Once you access the Payroll Management page, you can view employee name, salary, Account.

To process payroll "Add Payroll" from the left sub menu.

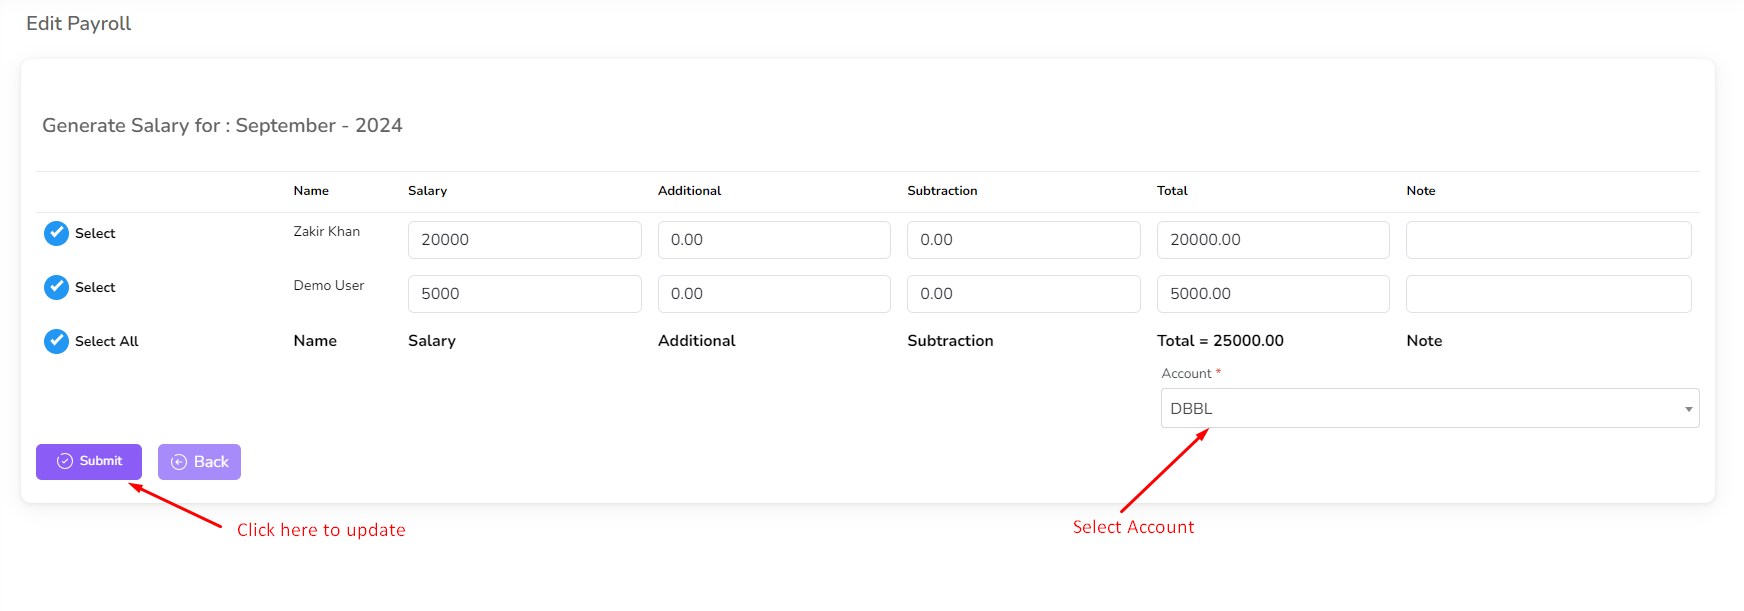
Enter the Month and Year and click on the "Submit" button.

After add payroll you will be redirected to the payroll edit page. Also you can click on the
"Edit" Icon to edit the payroll.

Make the necessary changes and click on the "Submit" button to save the changes.
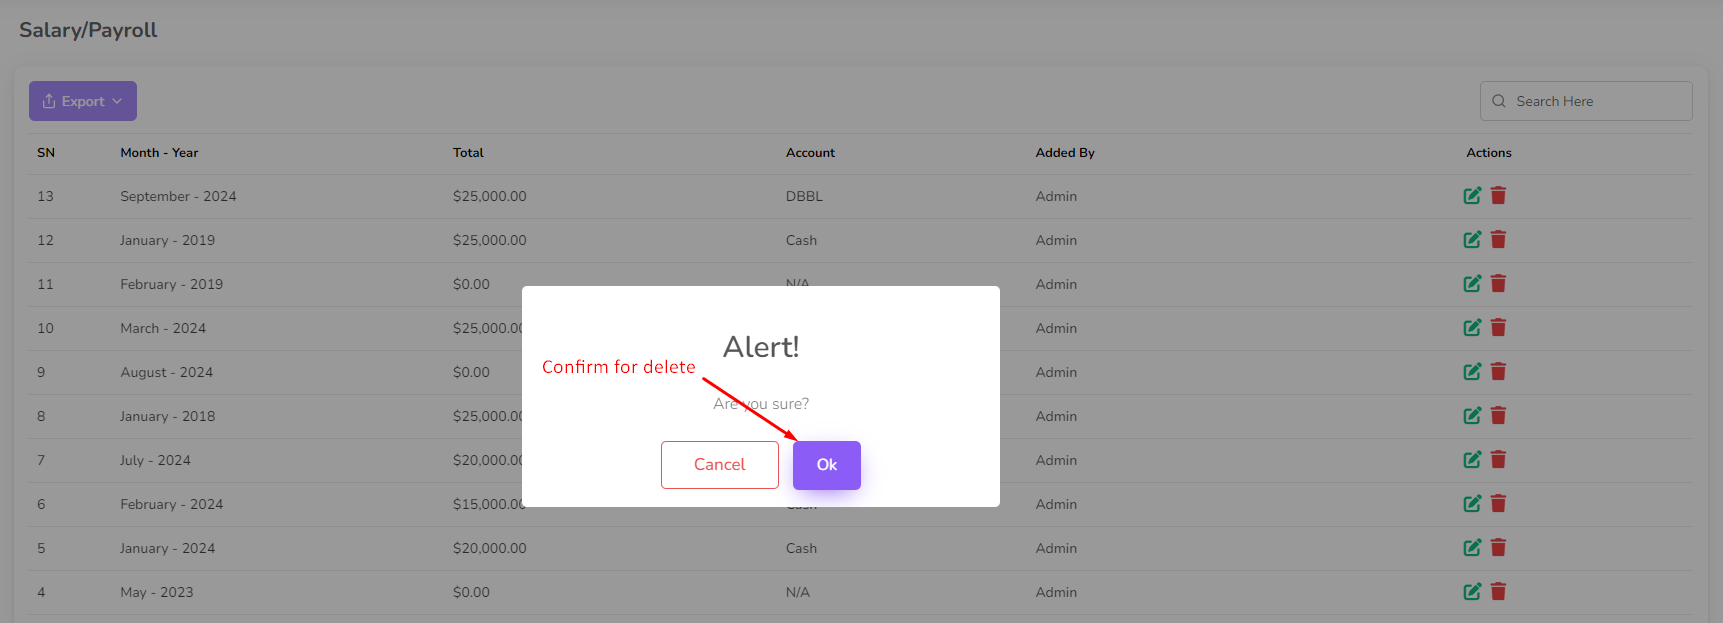
To delete a payroll, click on the "Delete" button next to the payroll you want to delete.
Then a confirmation dialog will be opened.
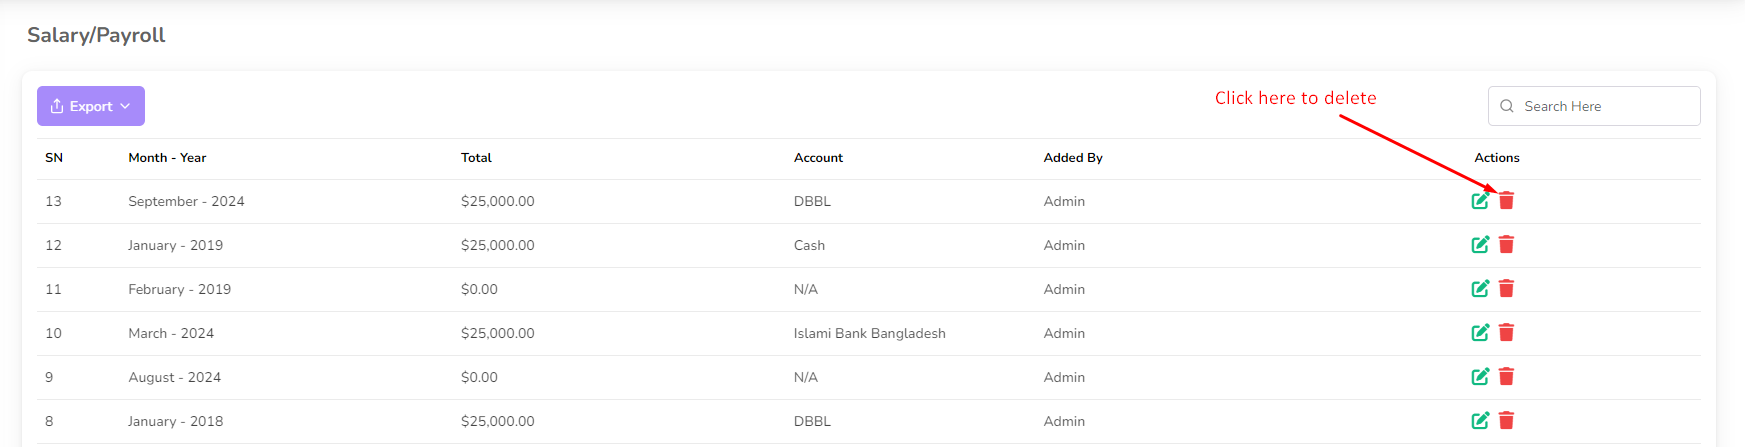
Confirm the deletion and the payroll will be removed from the list.
Raw Material Category
In this section you can manage the Raw Material Category. You can add, edit and delete the
Raw Material Category.
To access Raw Material Category List, navigate to the “Item Setup” section from the left
sidebar and click on
"RM Category List".
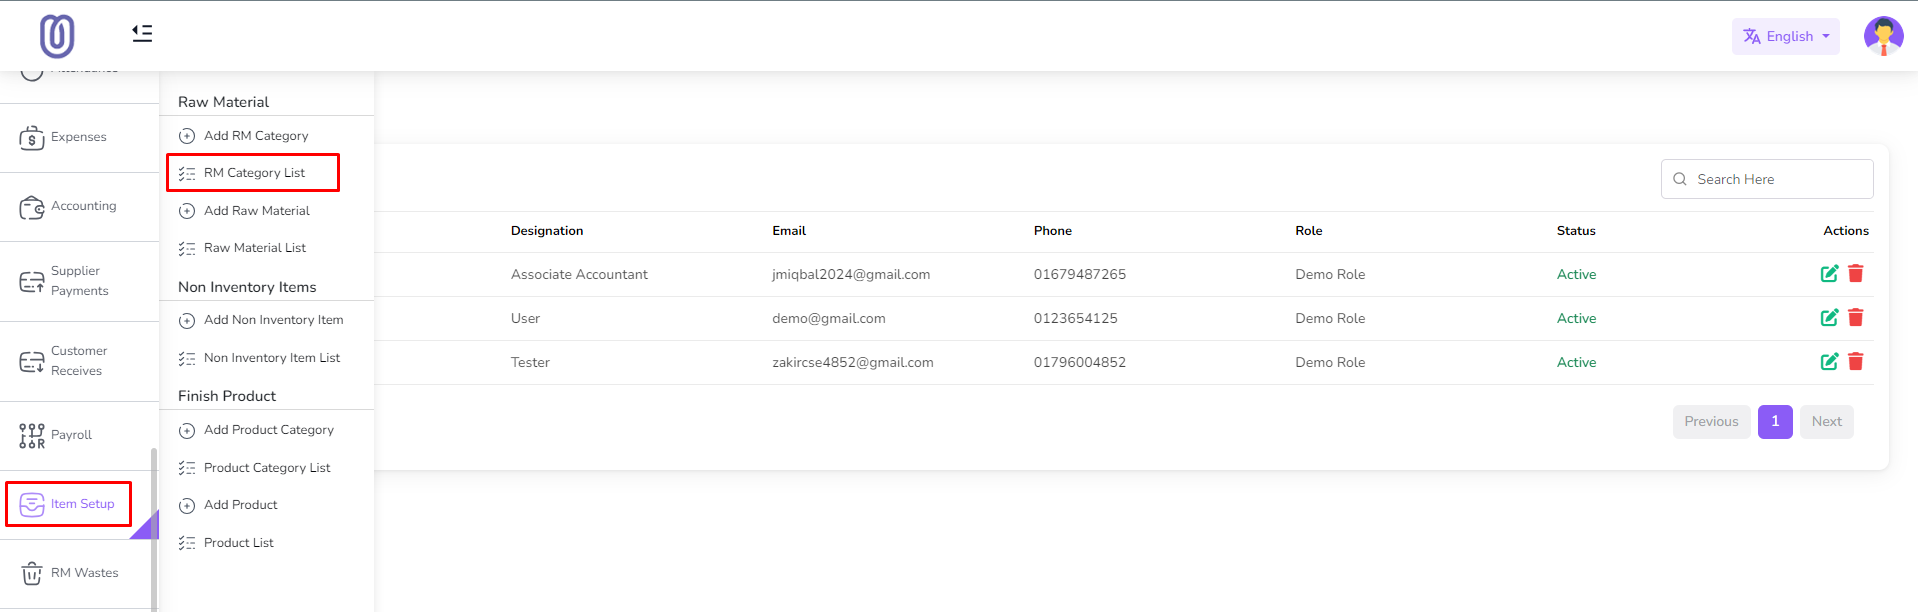
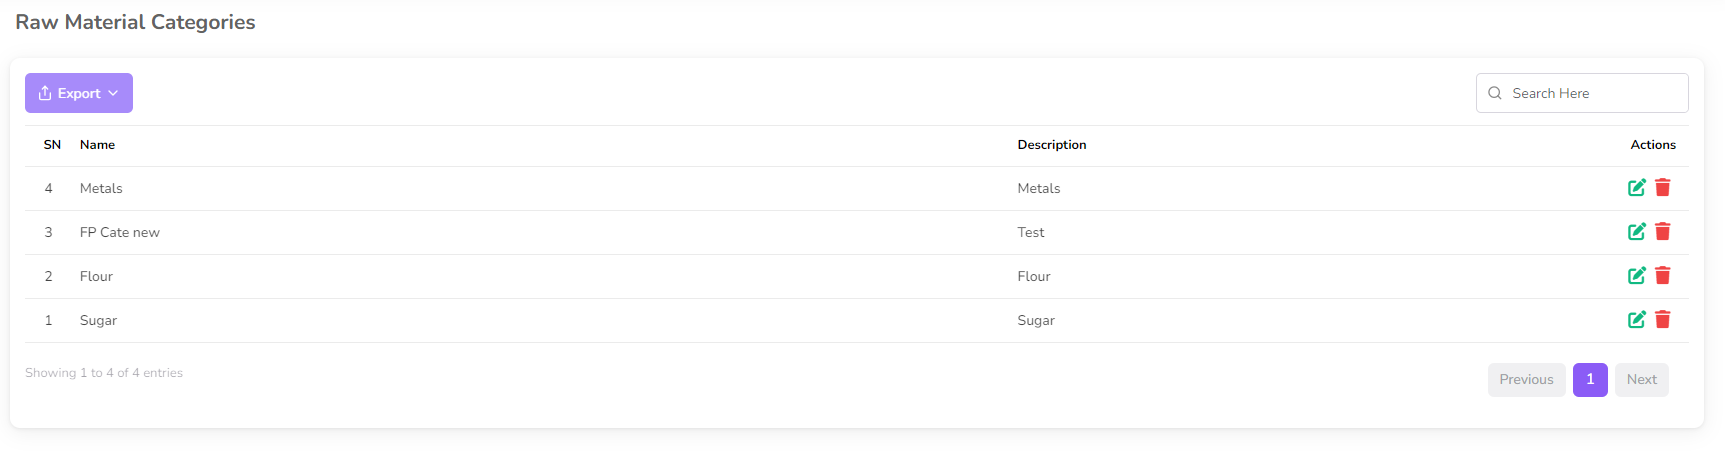
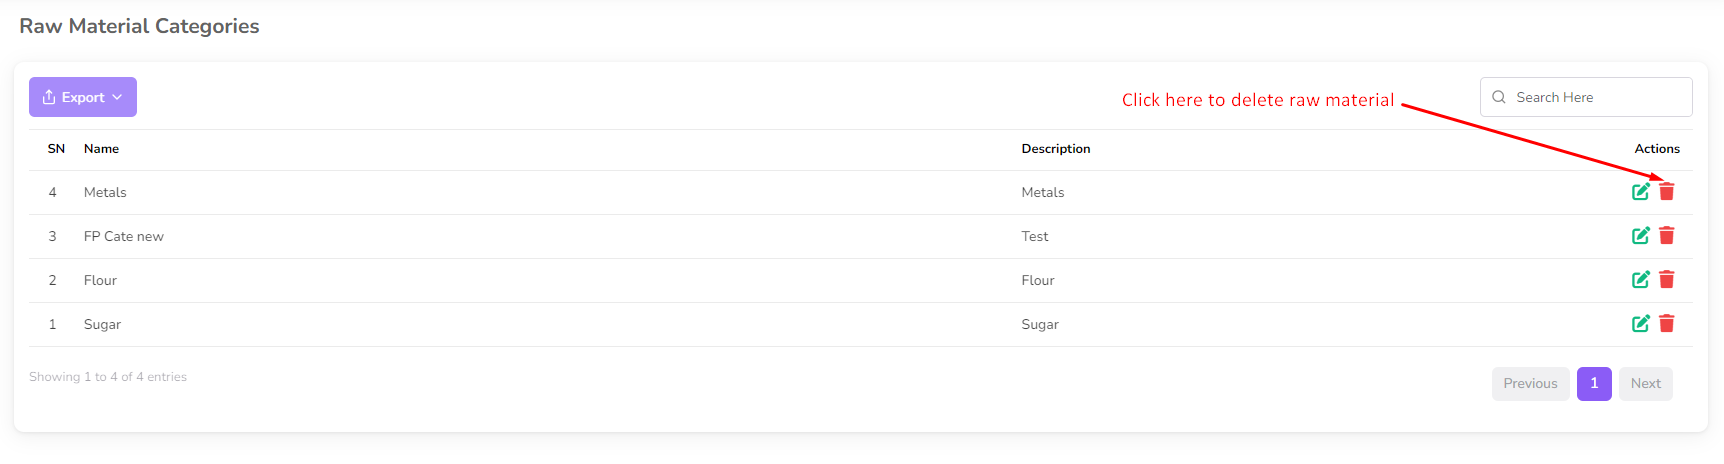
After clicking on "Raw Material Category" you can view the Raw Material Category list with
category name;
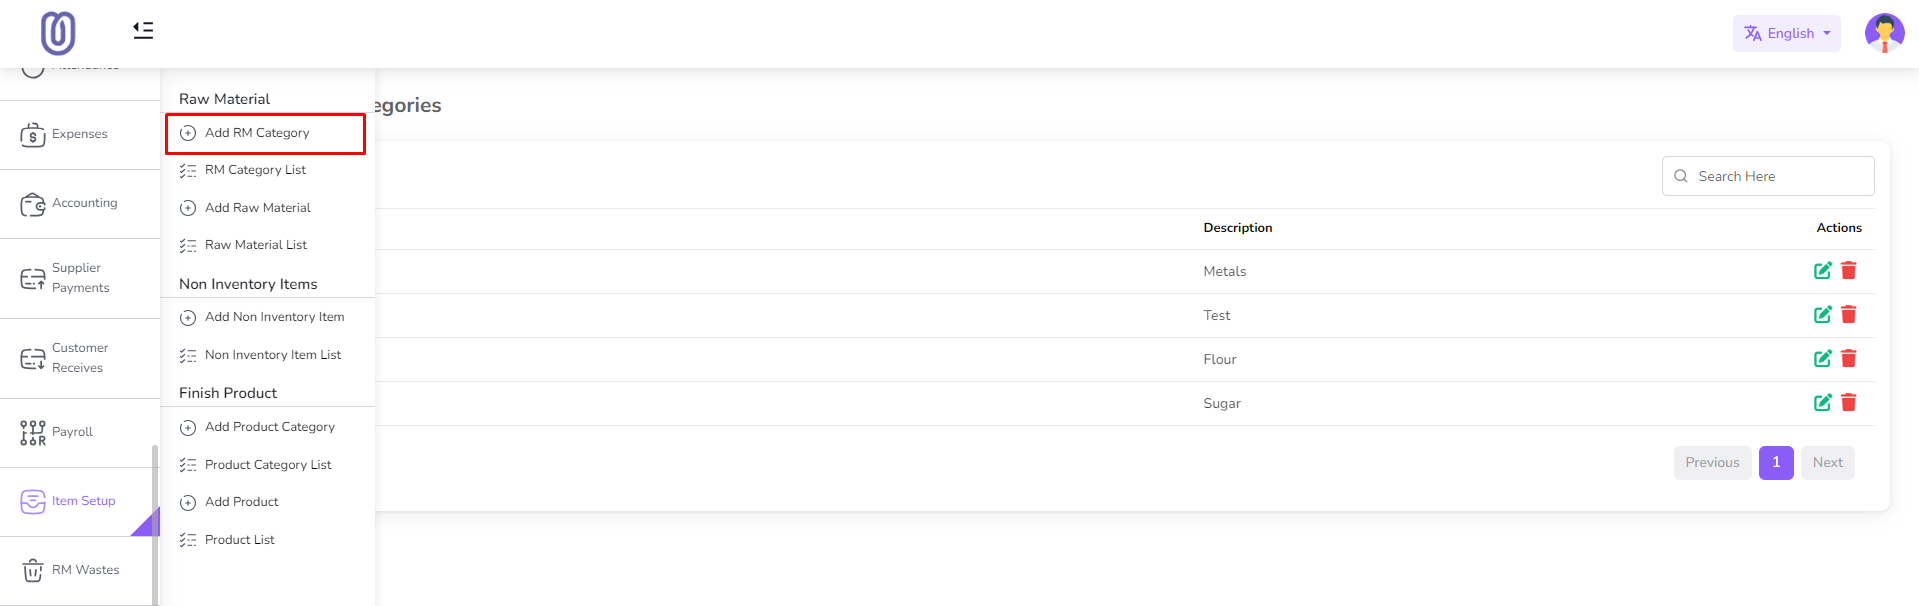
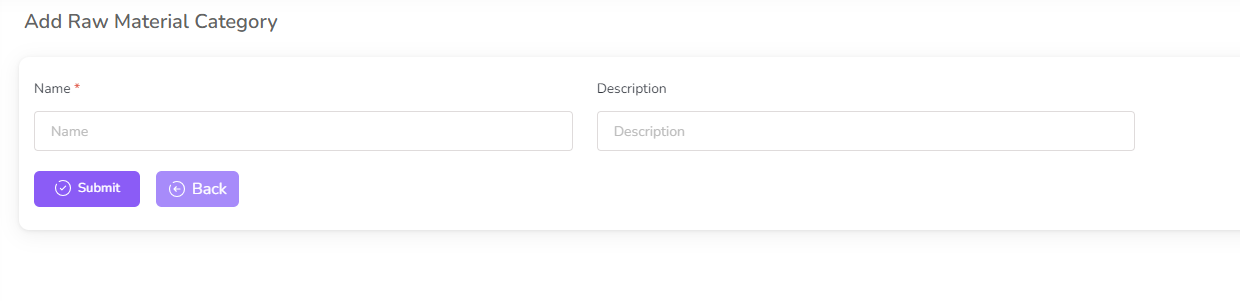
To add a new Raw Material Category, click on the "Add RM Category" from the sidebar menu.
Fill the Raw Material Category name and click on the "Submit" button to save the changes.
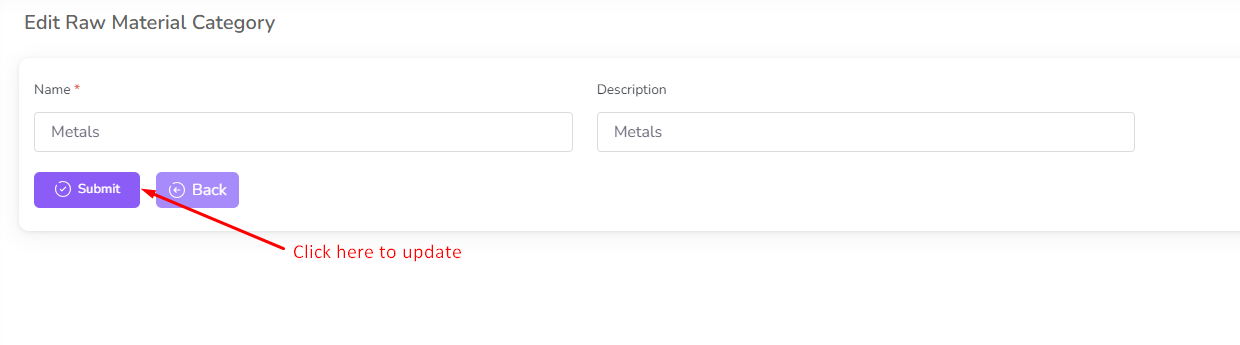
To edit the Raw Material Category, click on the "Edit" button from the Raw Material Category
row.

After clicking on the "Edit" button you can edit the Raw Material Category name, description
and click on
the "Submit" button to save the changes.
To delete the Raw Material Category, click on the "Delete" button from the Raw Material
Category row.
Raw Material
In this section, you can manage the Raw Material. You can add, edit, and delete Raw
Material.
To access the Raw Material List, navigate to the “Item Setup” section from the left sidebar
and click on
"Raw Material List".
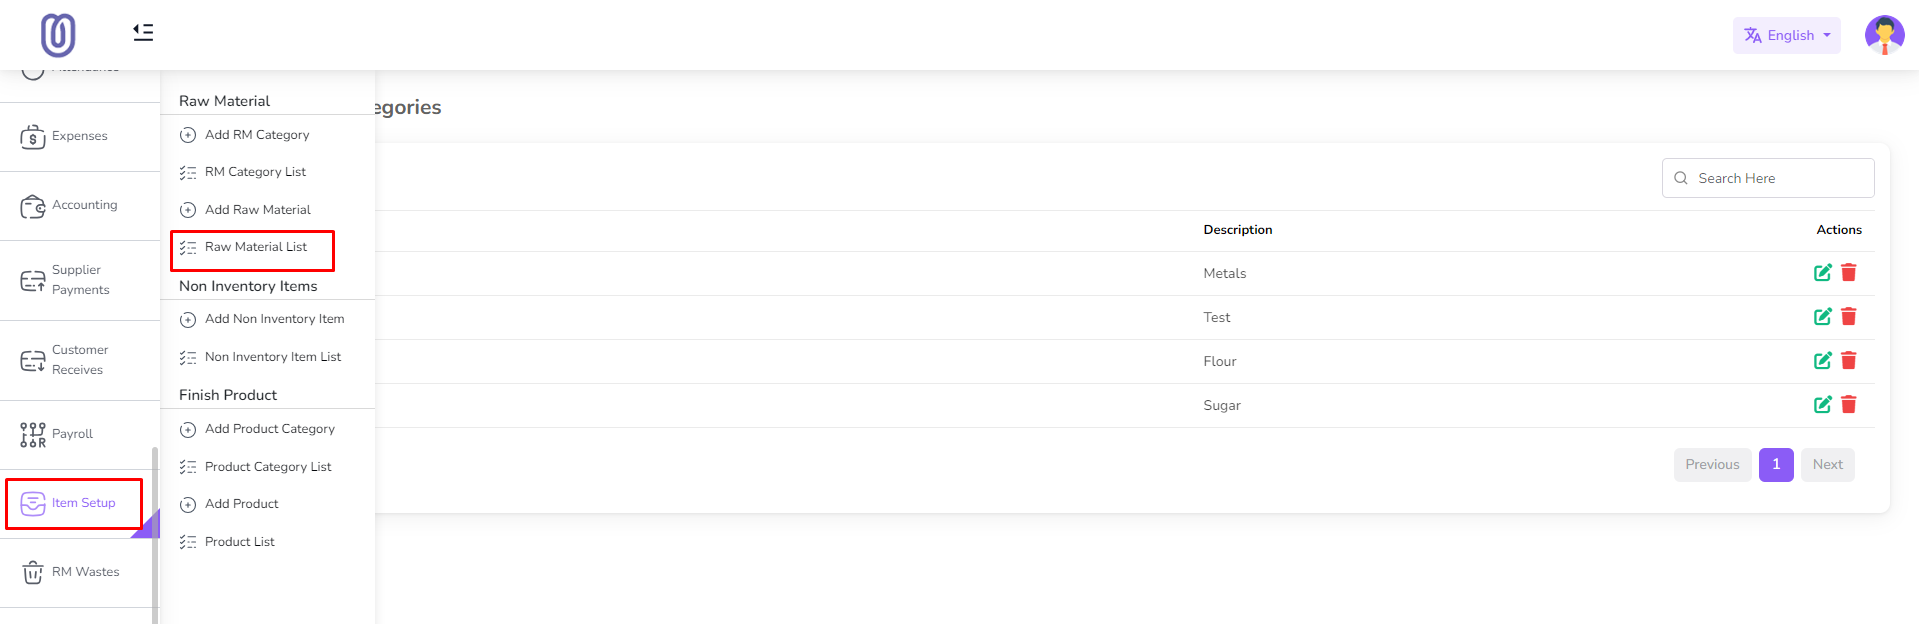
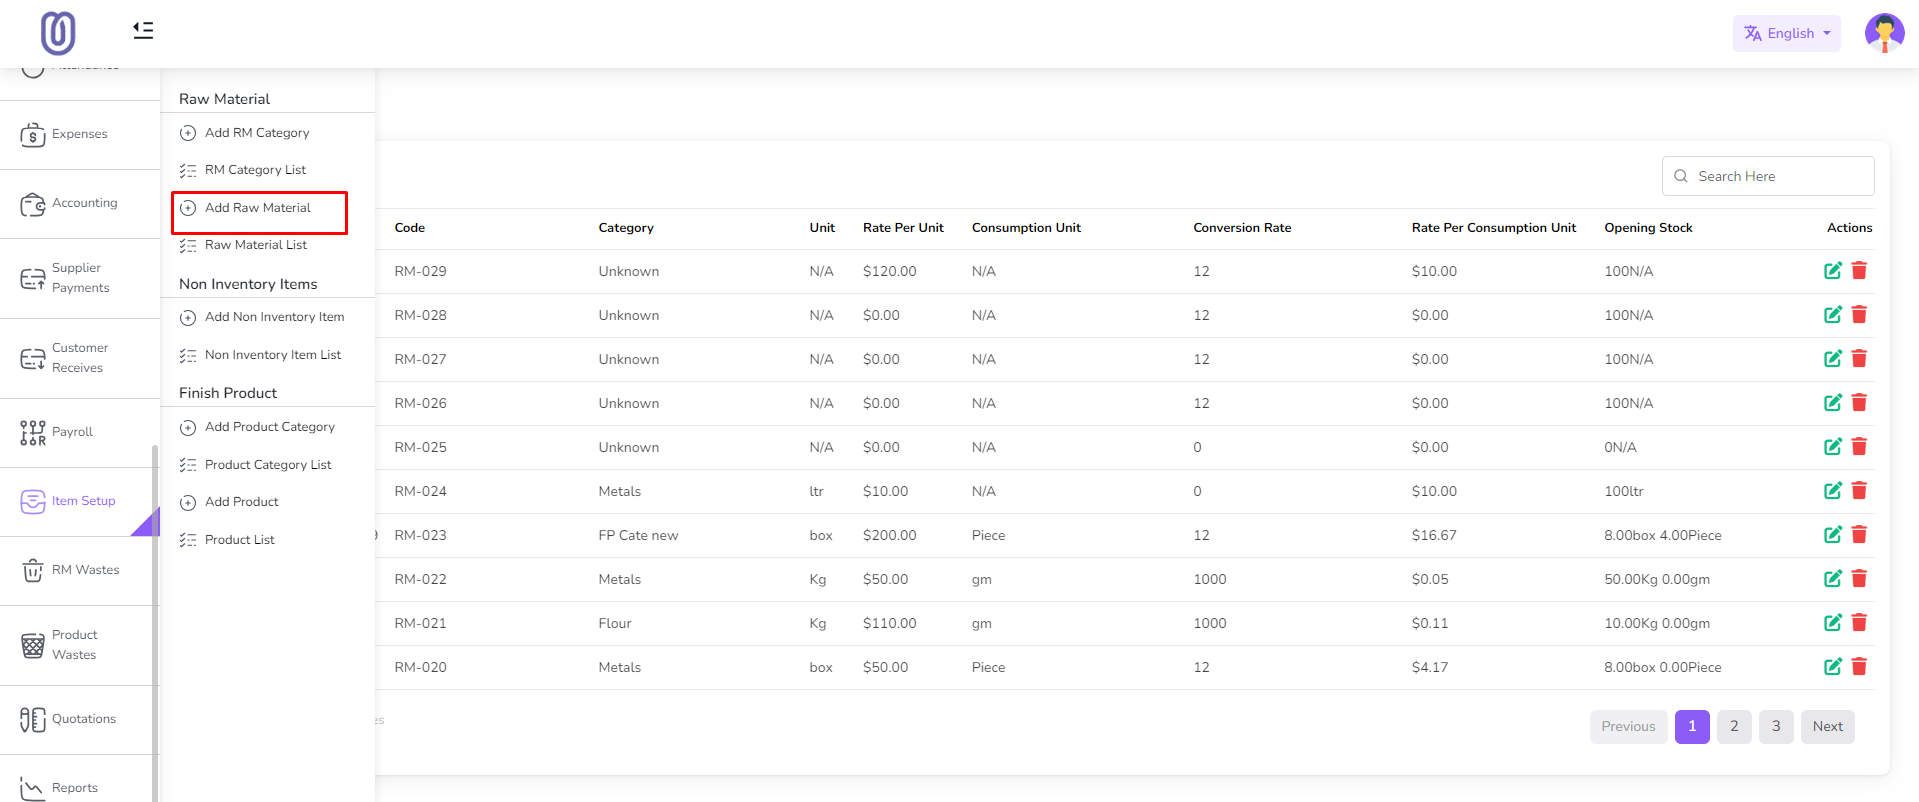
After clicking on "Raw Material List", you can view the Raw Material list with Raw Material
details.

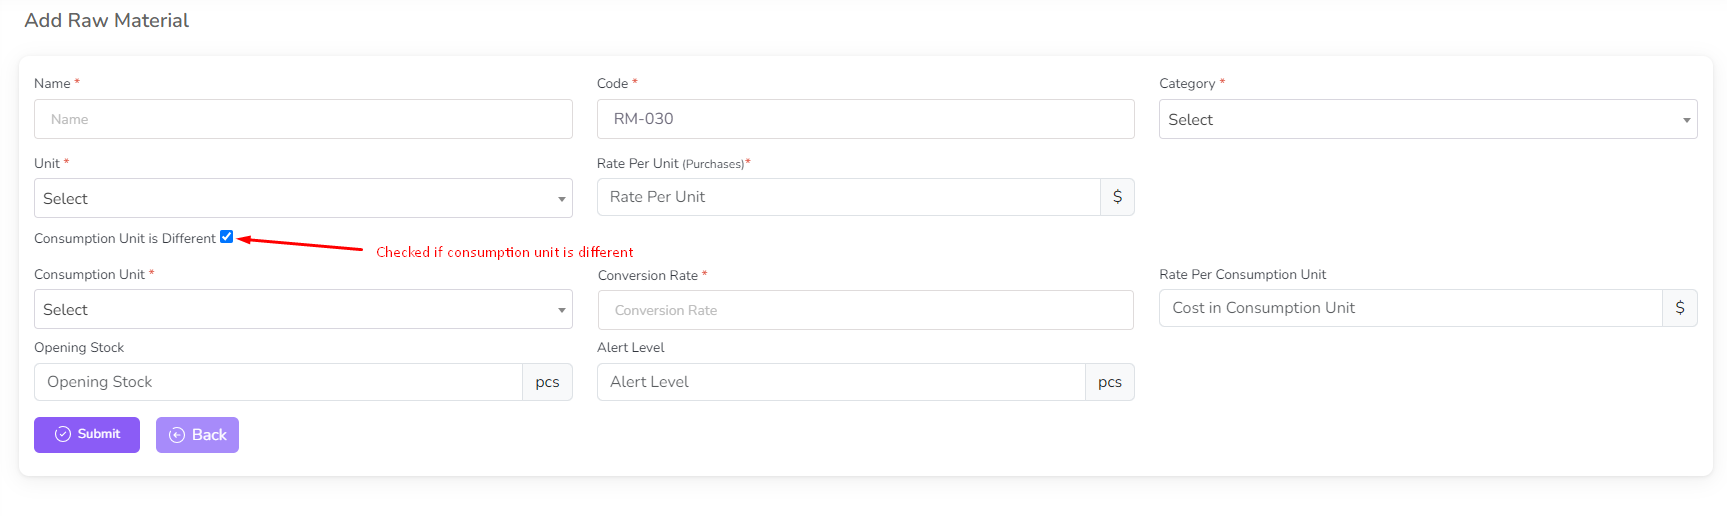
To add a new Raw Material, click on the "Add Raw Material" from the sidebar menu.
Fill the Raw Material details, select the Raw Material Category.
Also if your purchase unit and sale unit is different then you need to check "Consumption
Unit is Different" checkbox.
After that you can see the consumption unit in the Raw Material row. Select the consumption
unit from the dropdown. and type conversion rate.
When you type conversion rate system will calculate the purchase price and sale price based
on the conversion rate.
When you checked "Consumption Unit is Different" checkbox then your opening stock and alert
level will be based on the consumption unit.
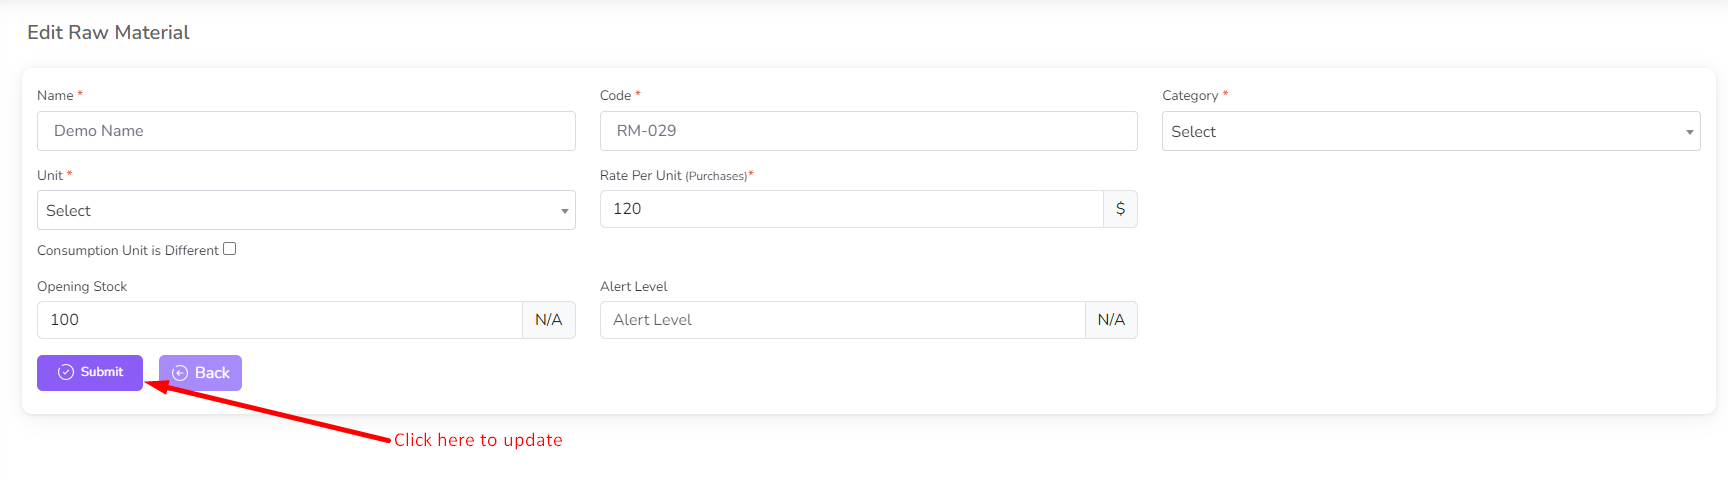
To edit the Raw Material, click on the "Edit" button from the Raw Material row.

After clicking on the "Edit" button, you can edit the Raw Material details, if needed change
the Raw Material Category then select the Raw Material Category and click on
the "Submit" button to save the changes.
To delete the Raw Material, click on the "Delete" button from the Raw Material row.

Non Inventory Item
In this section, you can manage the Non Inventory Item. You can add, edit, and delete Non
Inventory Item.
In production management software, a Non Inventory Item refers to a product or material that
is not tracked or managed as inventory. This can include items that are not stocked or held
in inventory, such as services, labor, or items that are directly consumed or used in
production without being stored. Non Inventory Items are typically not subject to inventory
management processes like tracking, counting, or reordering.
To access the Raw Material List, navigate to the “Item Setup” section from the left sidebar
and click on
"Non Inventory Item List".
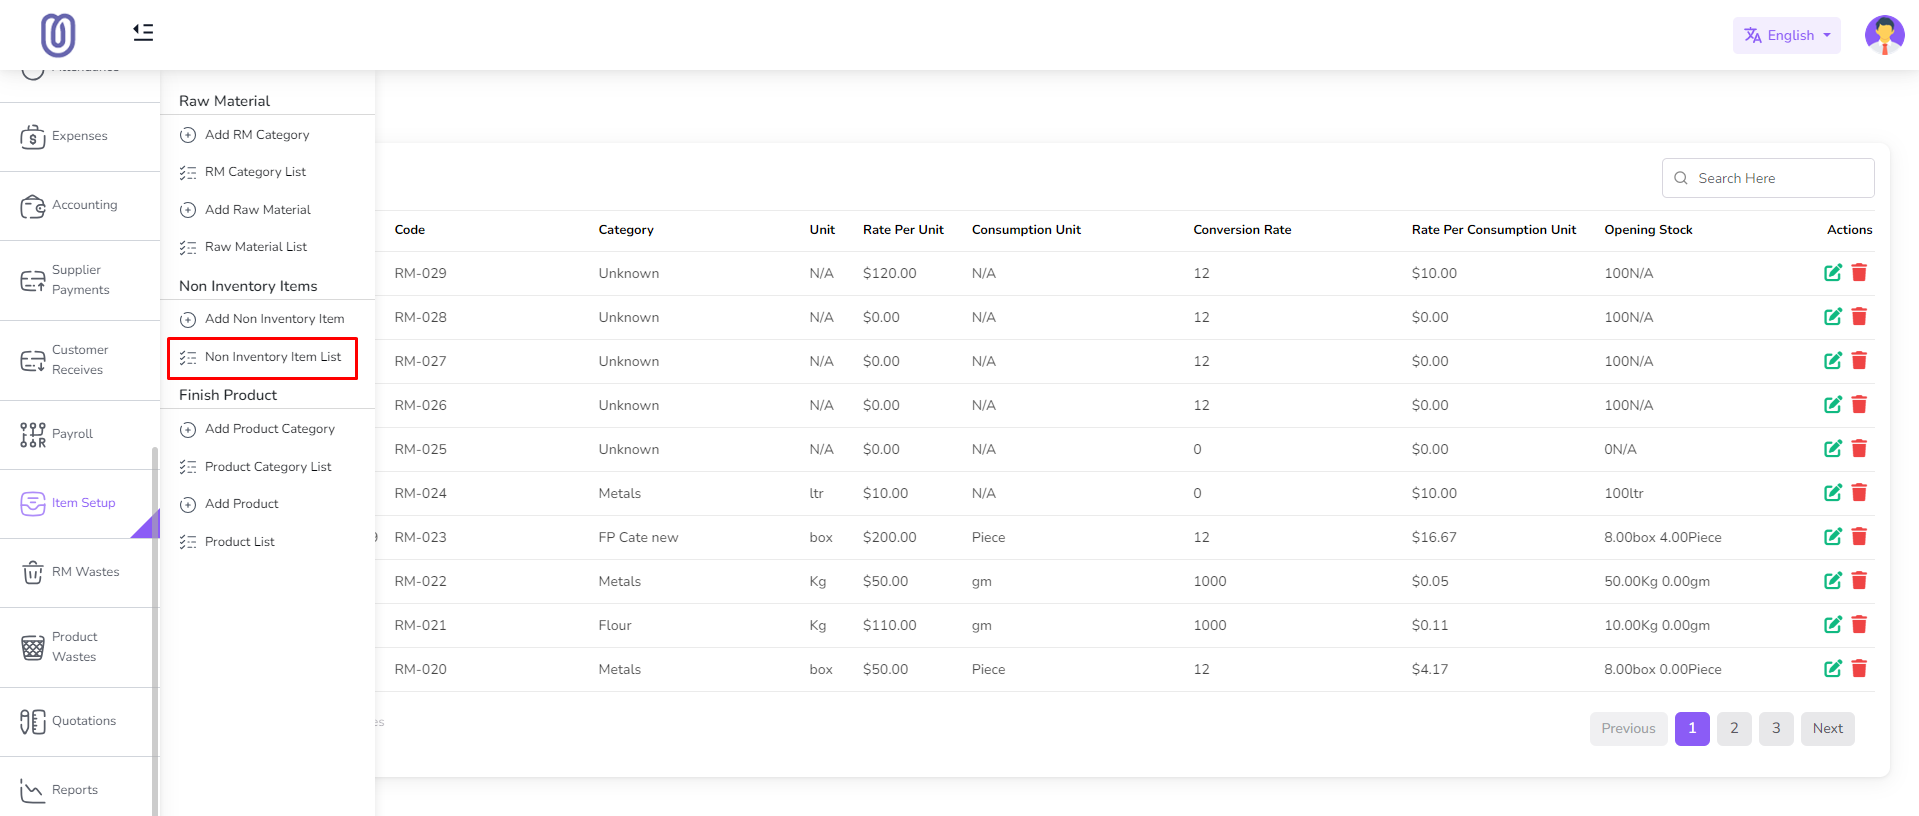
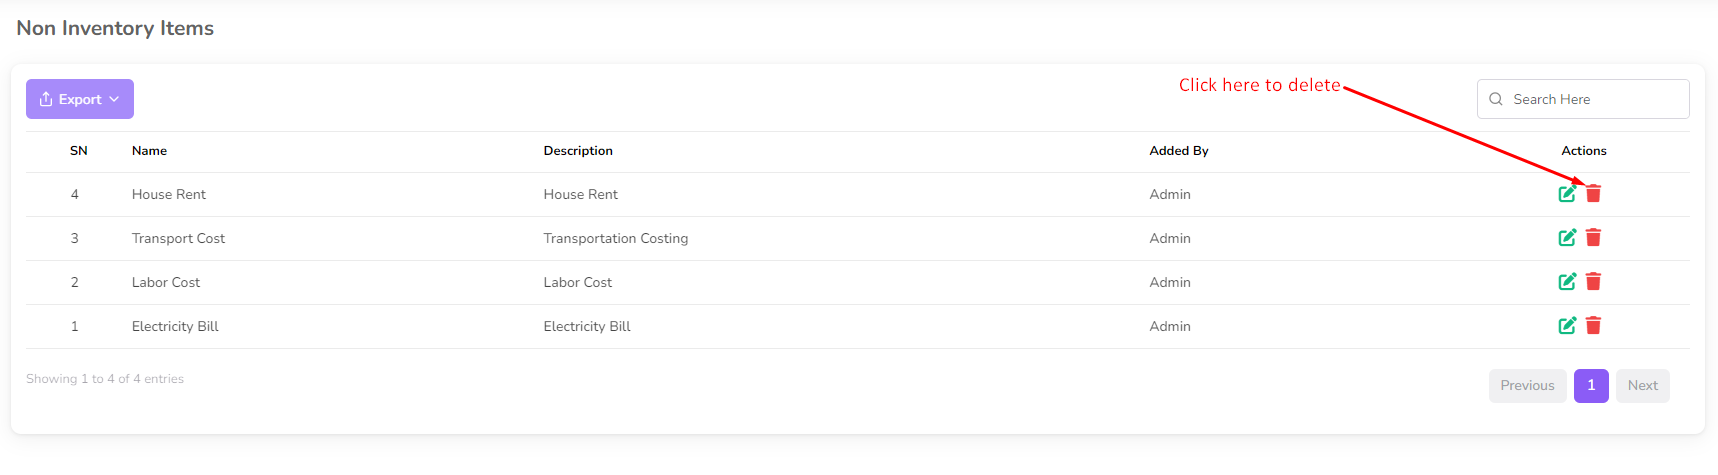
After clicking on "Non Inventory Item List", you can view the Non Inventory Item list with
Non Inventory Item
details.
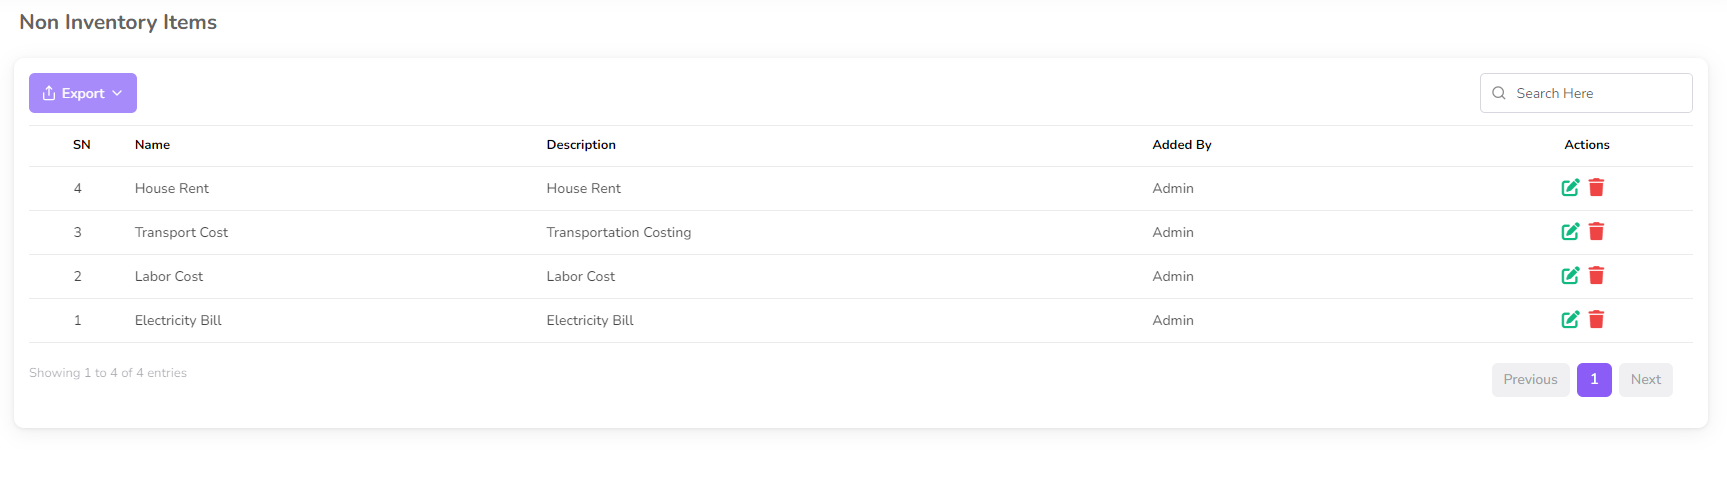
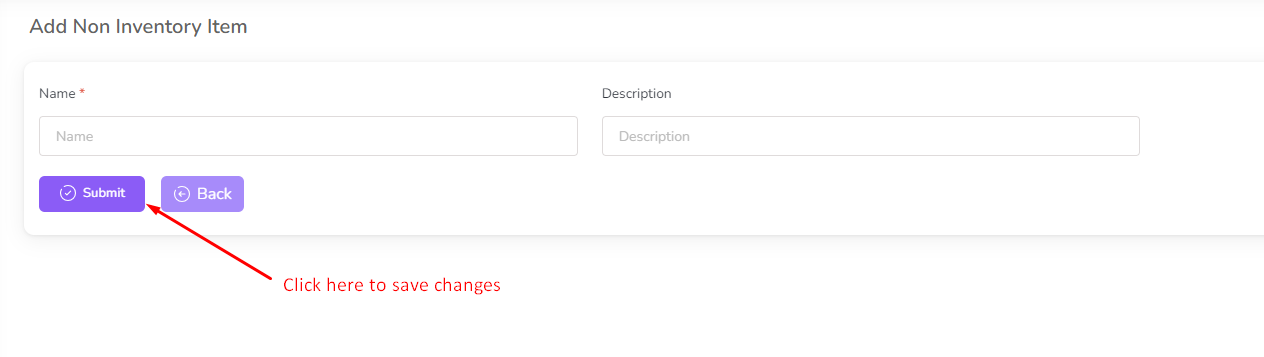
To add a new Non Inventory Item, click on the "Add Non Inventory Item" from the sidebar
menu.

Fill the Non Inventory Item name and description and click on the "Submit" button to save
the changes.
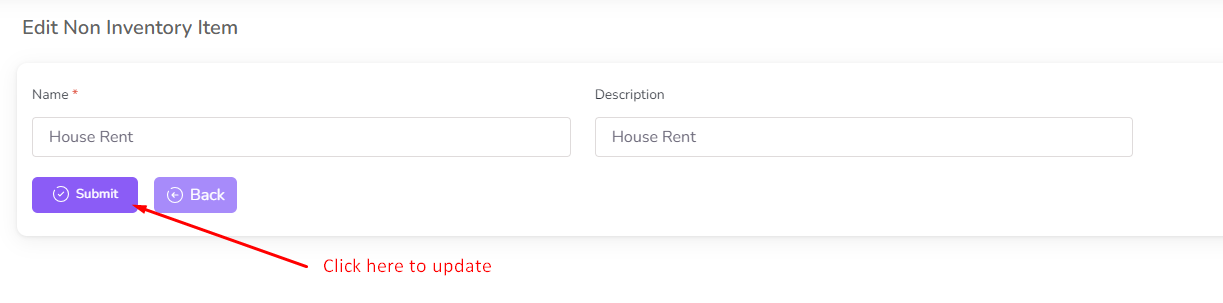
To edit the Non Inventory Item, click on the "Edit" button from the Non Inventory Item row.

After clicking on the "Edit" button, you can edit the Non Inventory Item details and click
on
the "Submit" button to save the changes.
To delete the Non Inventory Item, click on the "Delete" button from the Non Inventory Item
row.
Product Category
In this section, you can manage the Product Category. You can add, edit, and delete Product
Inventory Item.
To access the Product Category List, navigate to the “Item Setup” section from the left
sidebar
and click on
"Product Category List".

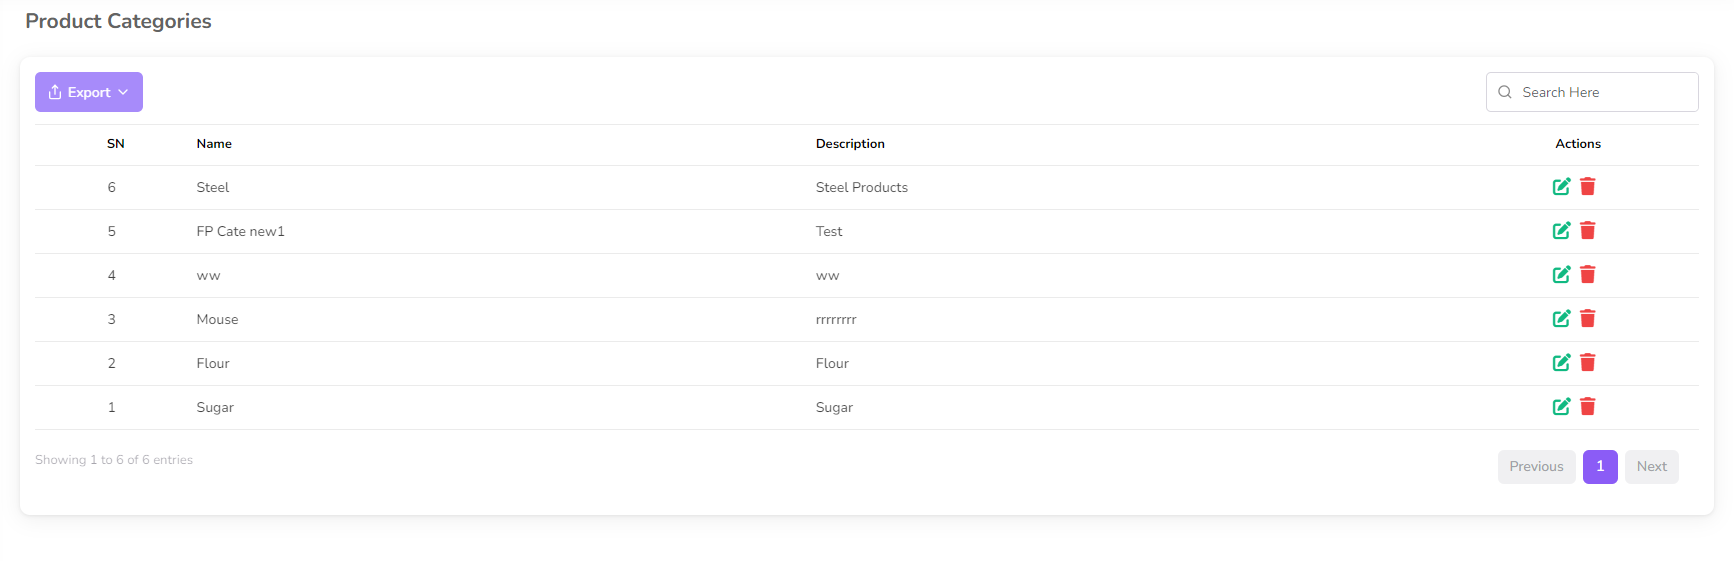
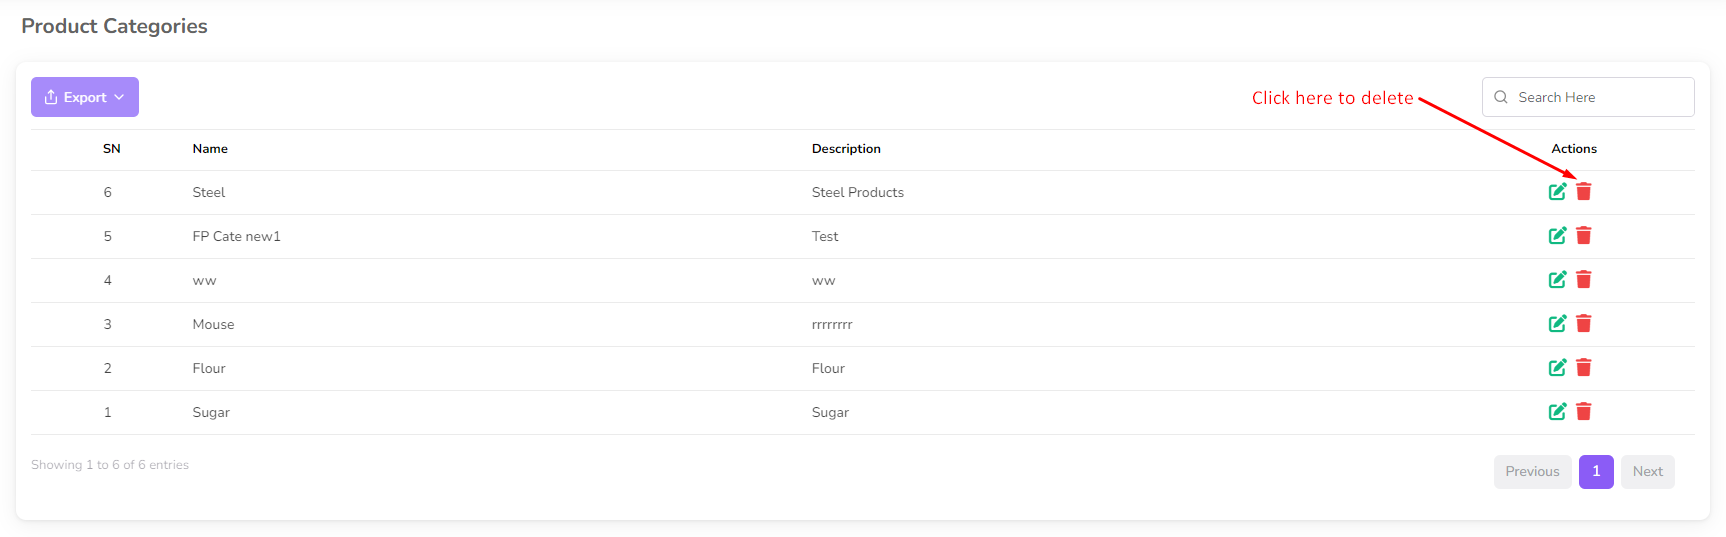
After clicking on "Product Category List", you can view the Product Category list with
Product Category
details.
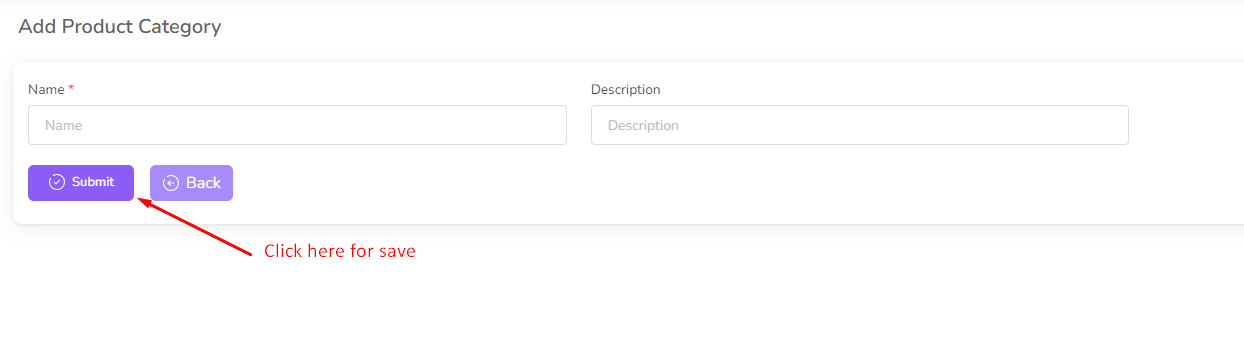
To add a new Product Category, click on the "Add Product Category" from the sidebar menu.

Fill the Product Category name and description and click on the "Submit" button to save the
changes.
To edit the Product Category, click on the "Edit" button from the Product Category row.

After clicking on the "Edit" button, you can edit the Product Category details and click on
the "Submit" button to save the changes.

To delete the Product Category, click on the "Delete" button from the Product Category row.
Product
In this section, you can manage the Product. You can add, edit, and delete Product
Inventory Item. Also you can clone the product.
To access the Product List, navigate to the “Item Setup” section from the left sidebar
and click on
"Product List".
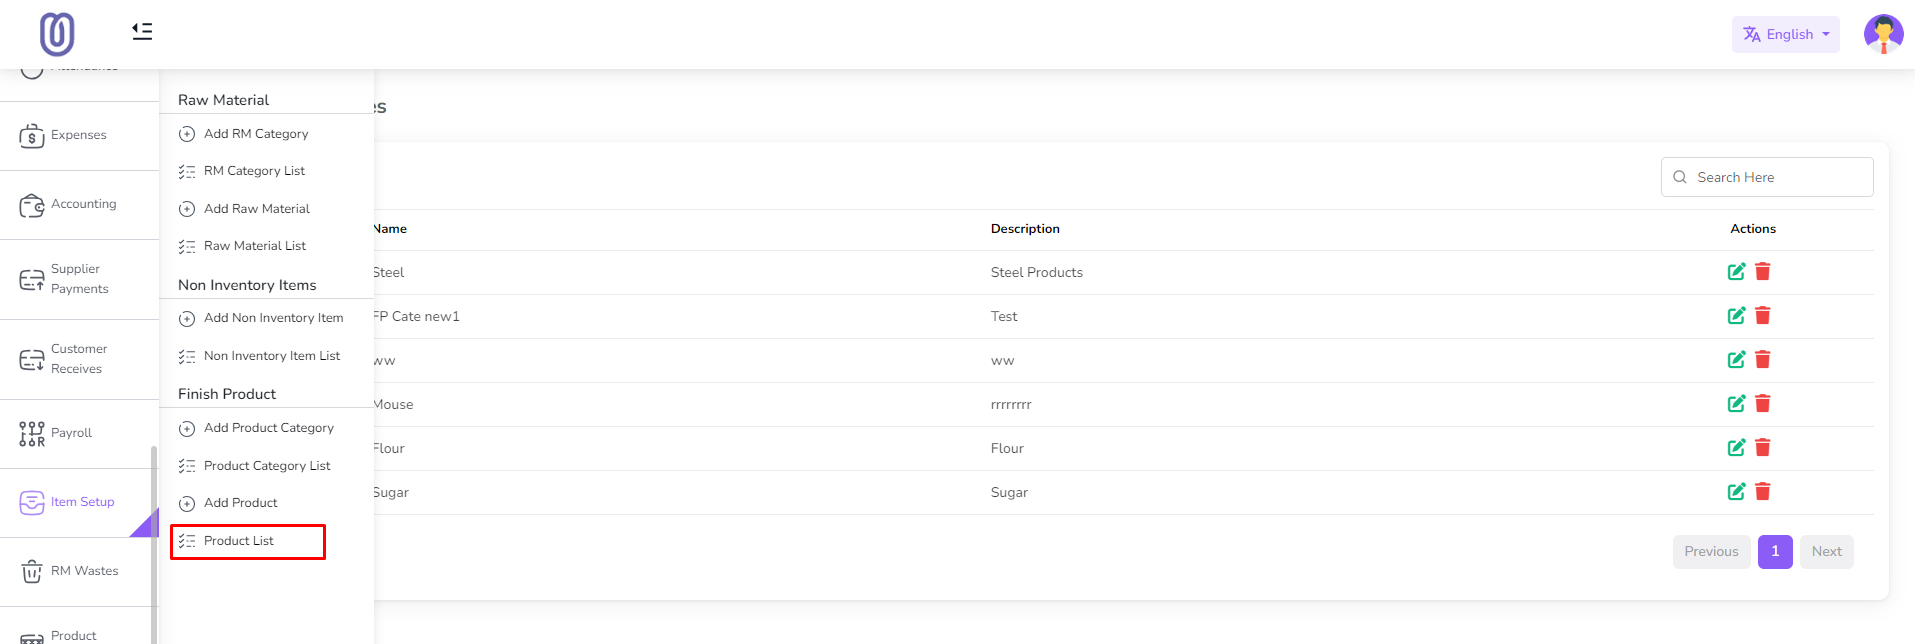
After clicking on "Product List", you can view the Product list with Product
details.

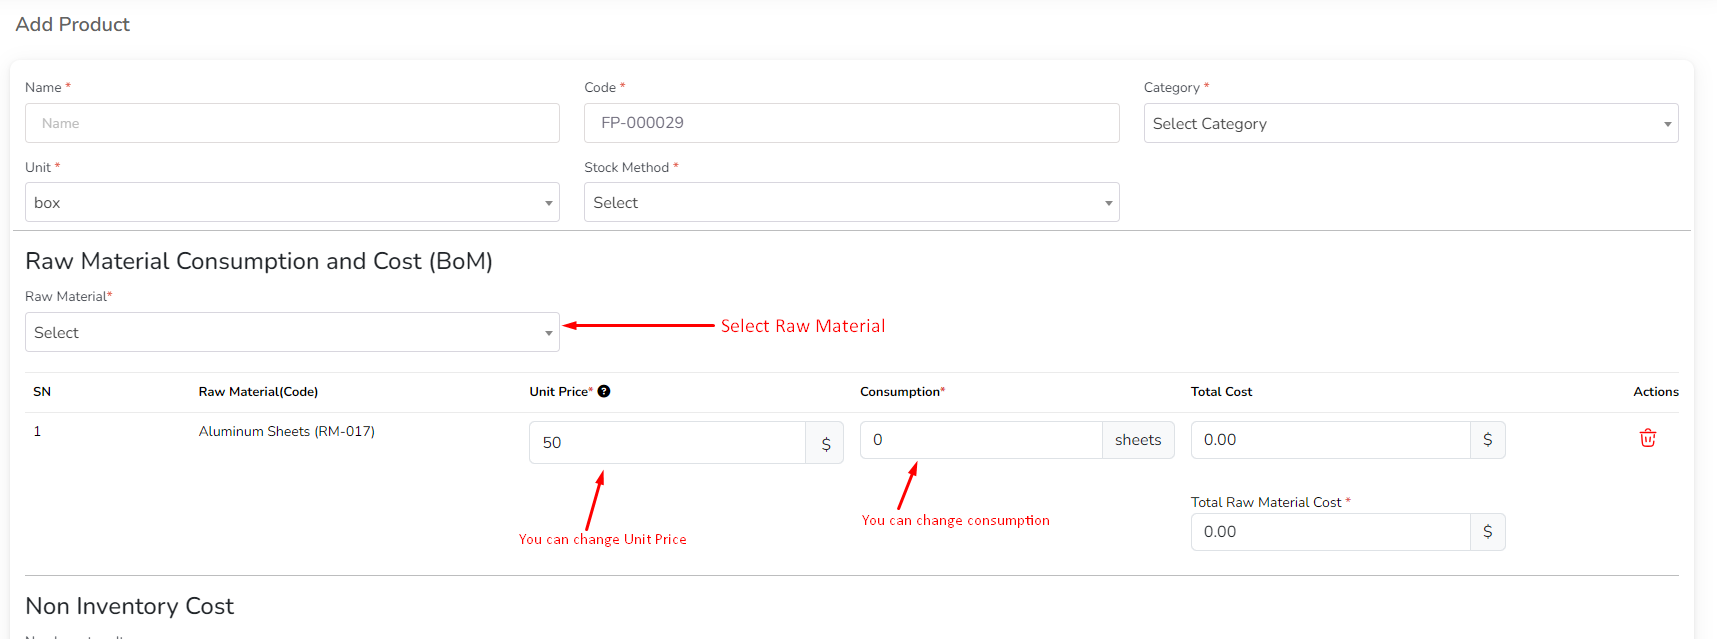
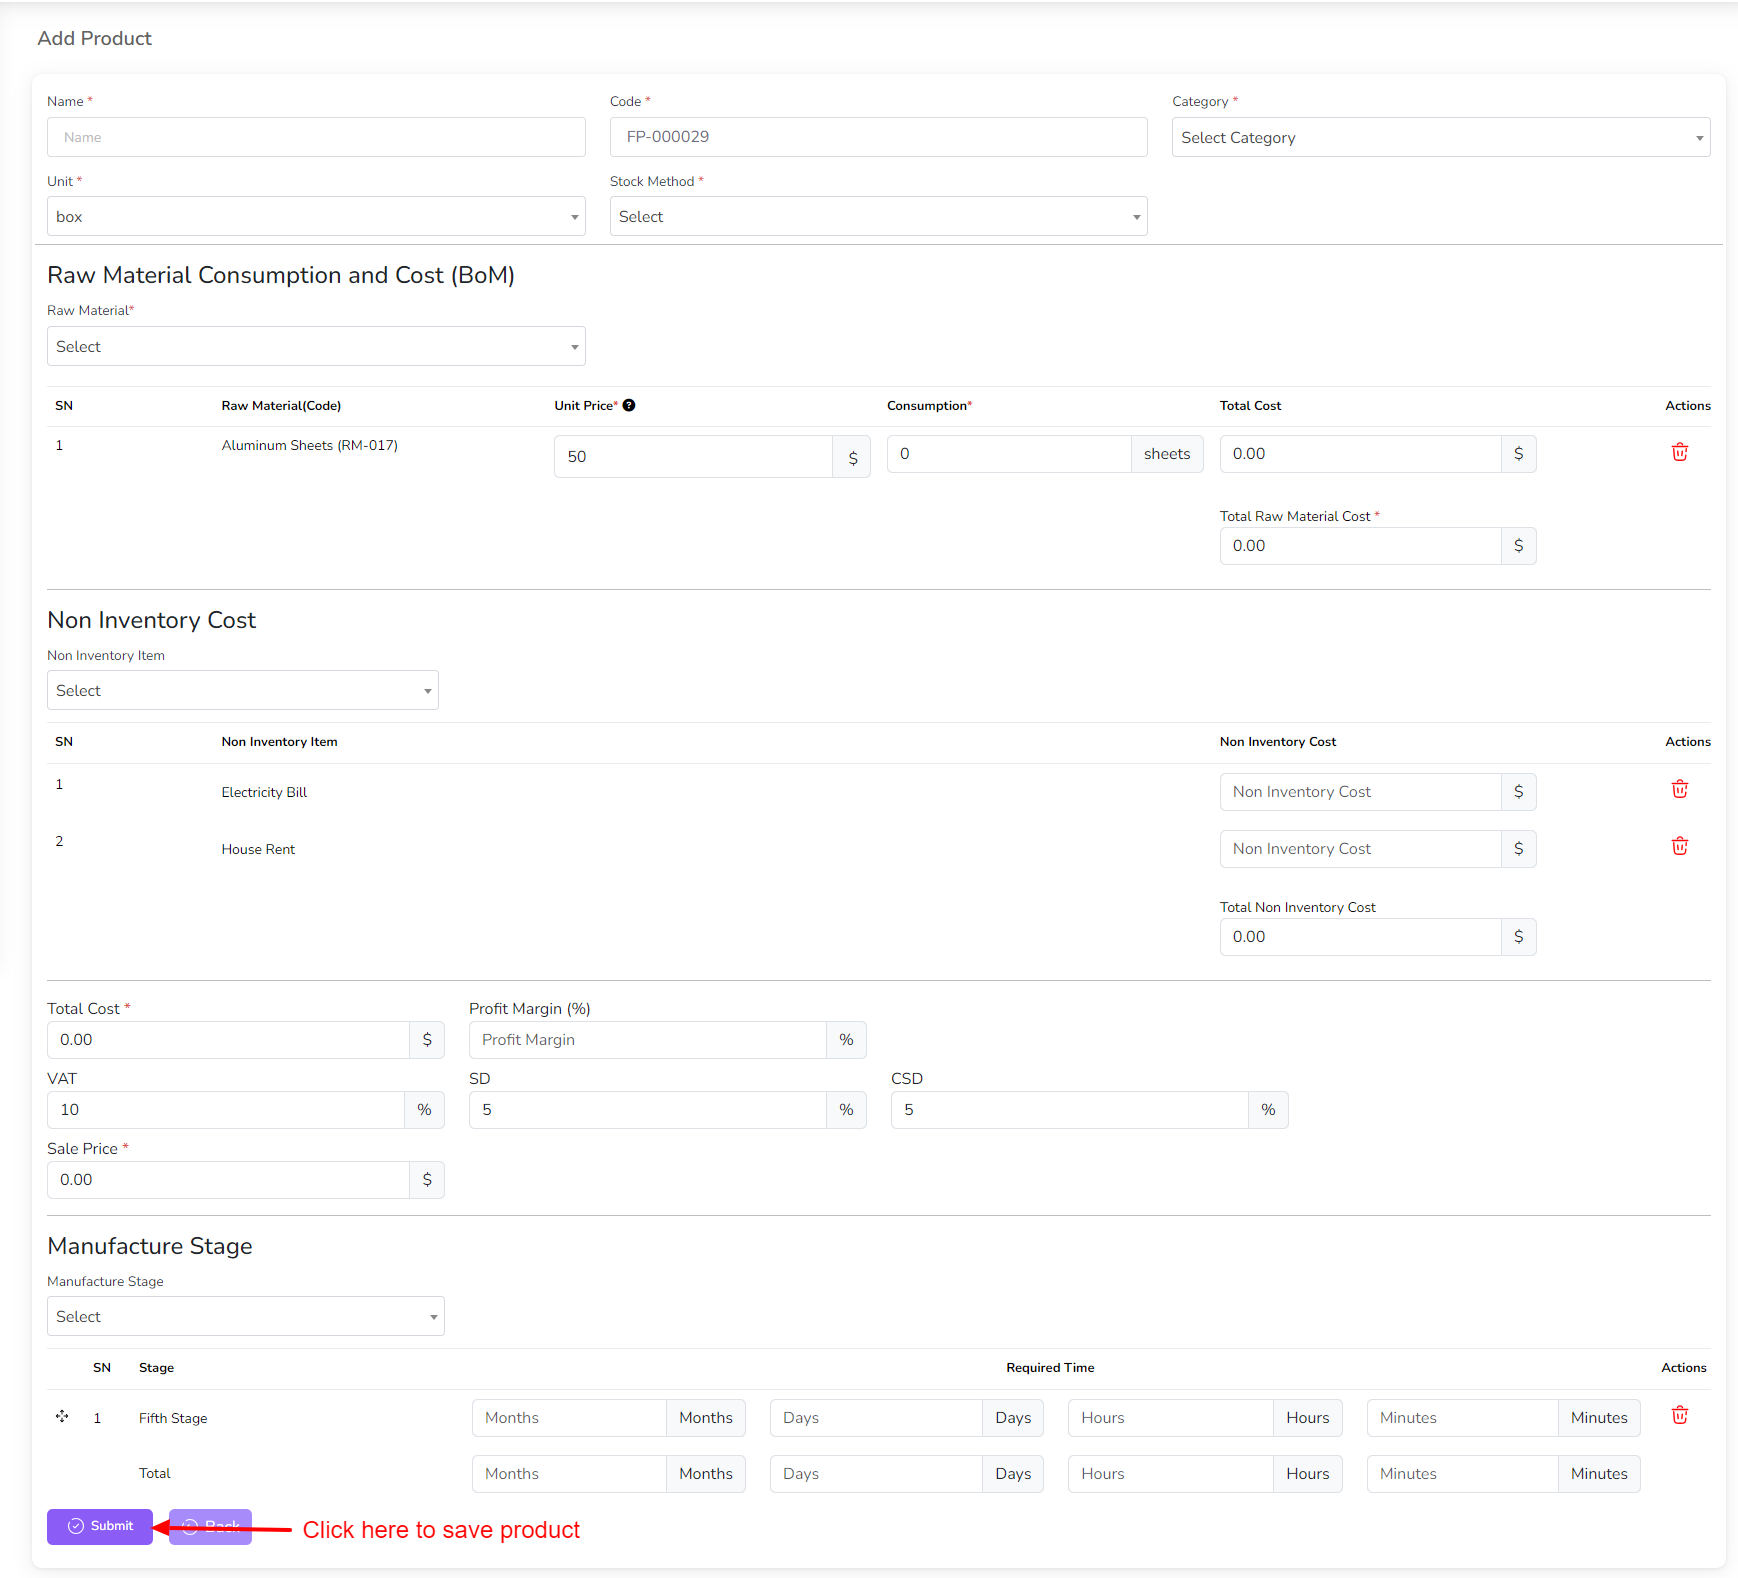
To add a new Product, click on the "Add Product" from the sidebar menu.

Add Raw Material for the product in dropdown. Select raw material from dropdown it will be
added in cart. You can change Unit Price and Consumption.
Also you can add multiple raw material.
Add Non Inventory Item for the product in dropdown. Select non inventory item from dropdown
it will be added in cart. Before Select Non Inventory Item you need to add Non Inventory
Item in system. How to add Non Inventory Item click on this link.
Also you can add multiple non inventory item.

Add Production Stage for the product in dropdown. Select production stage from dropdown it
will be added in cart. You can change No. of month, days, hours and minute.
Before Select Production Stage you need to add Production Stage in system. How to add
Production Stage click on this link.
Also you can add multiple production stage.

After that click on the "Submit" button to save the changes.
To edit the Product, click on the "Edit" button from the Product row.

After clicking on the "Edit" button, you can edit the Product details and click on
the "Submit" button to save the changes.

You can clone the product by clicking on the "Clone" button from the Product row.
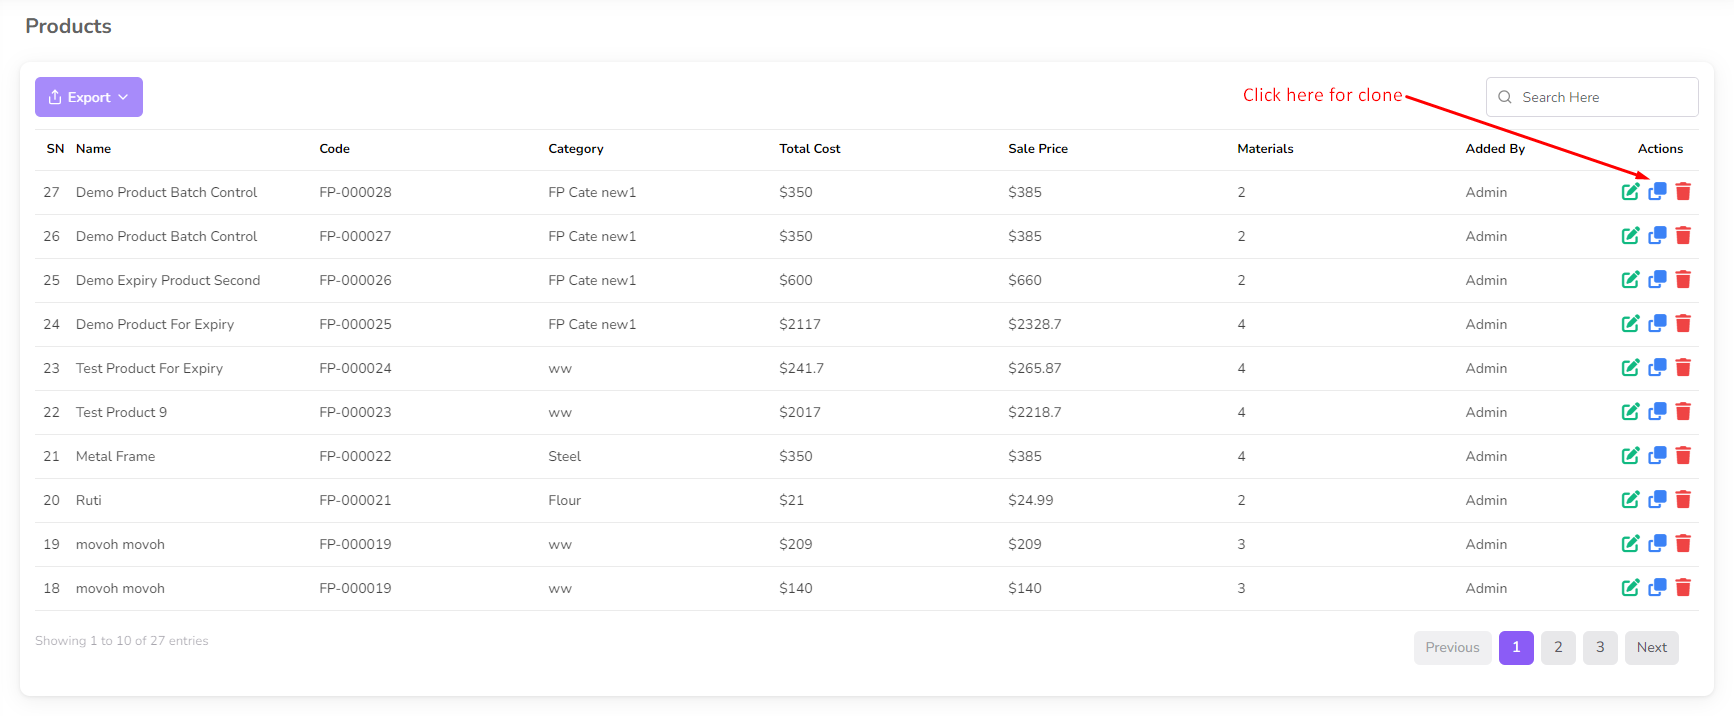
if need change the product details and click on the "Submit" button to save the changes.

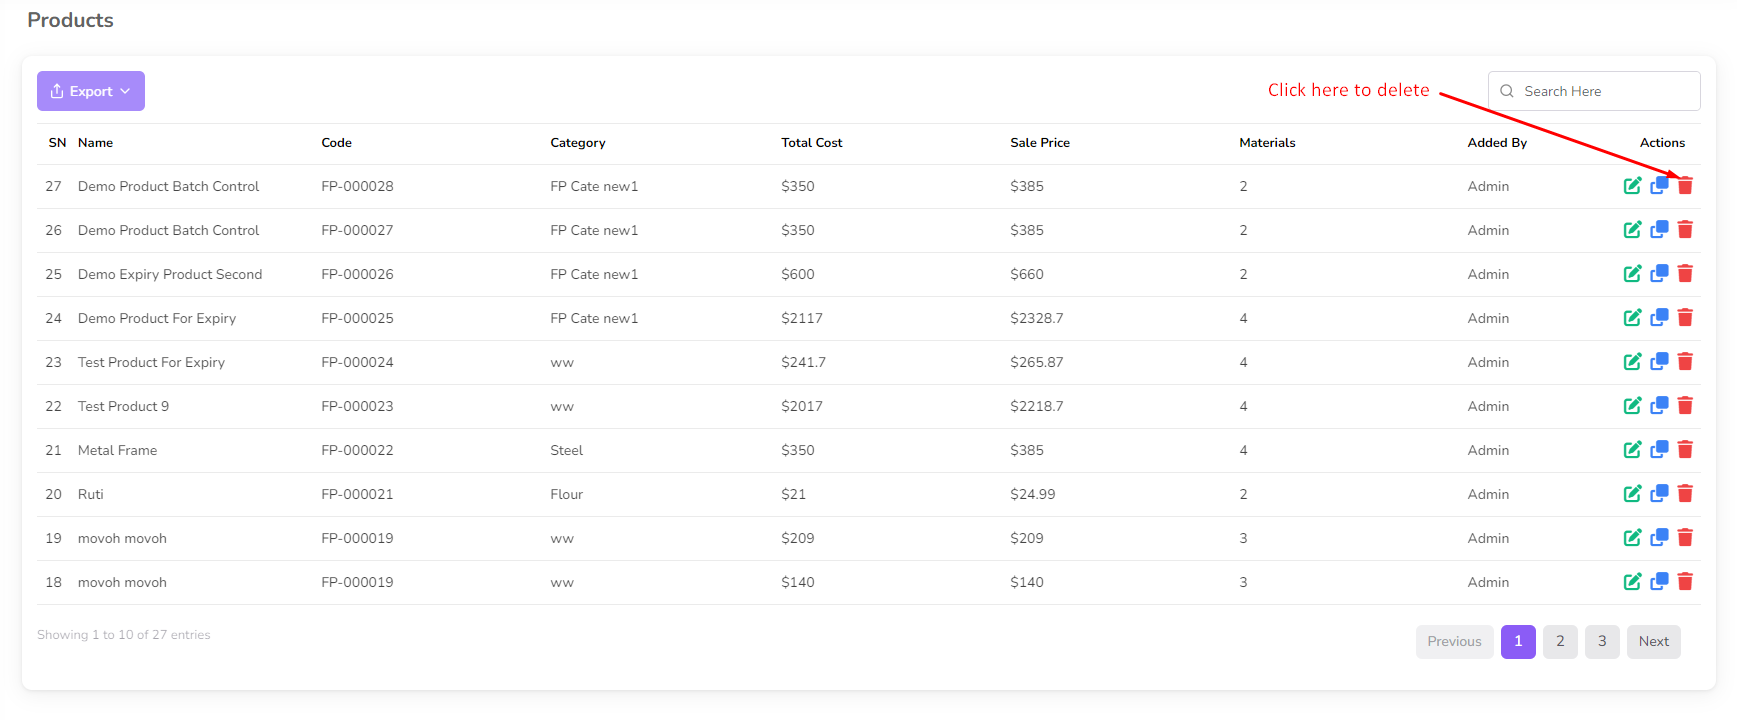
To delete the Product, click on the "Delete" button from the Product row.
Raw Material Waste Management
The Raw Material Waste Management feature allows you to effectively manage raw material
waste.
To access Raw Material Waste Management, navigate to the “RM Waste” menu from the left
sidebar.
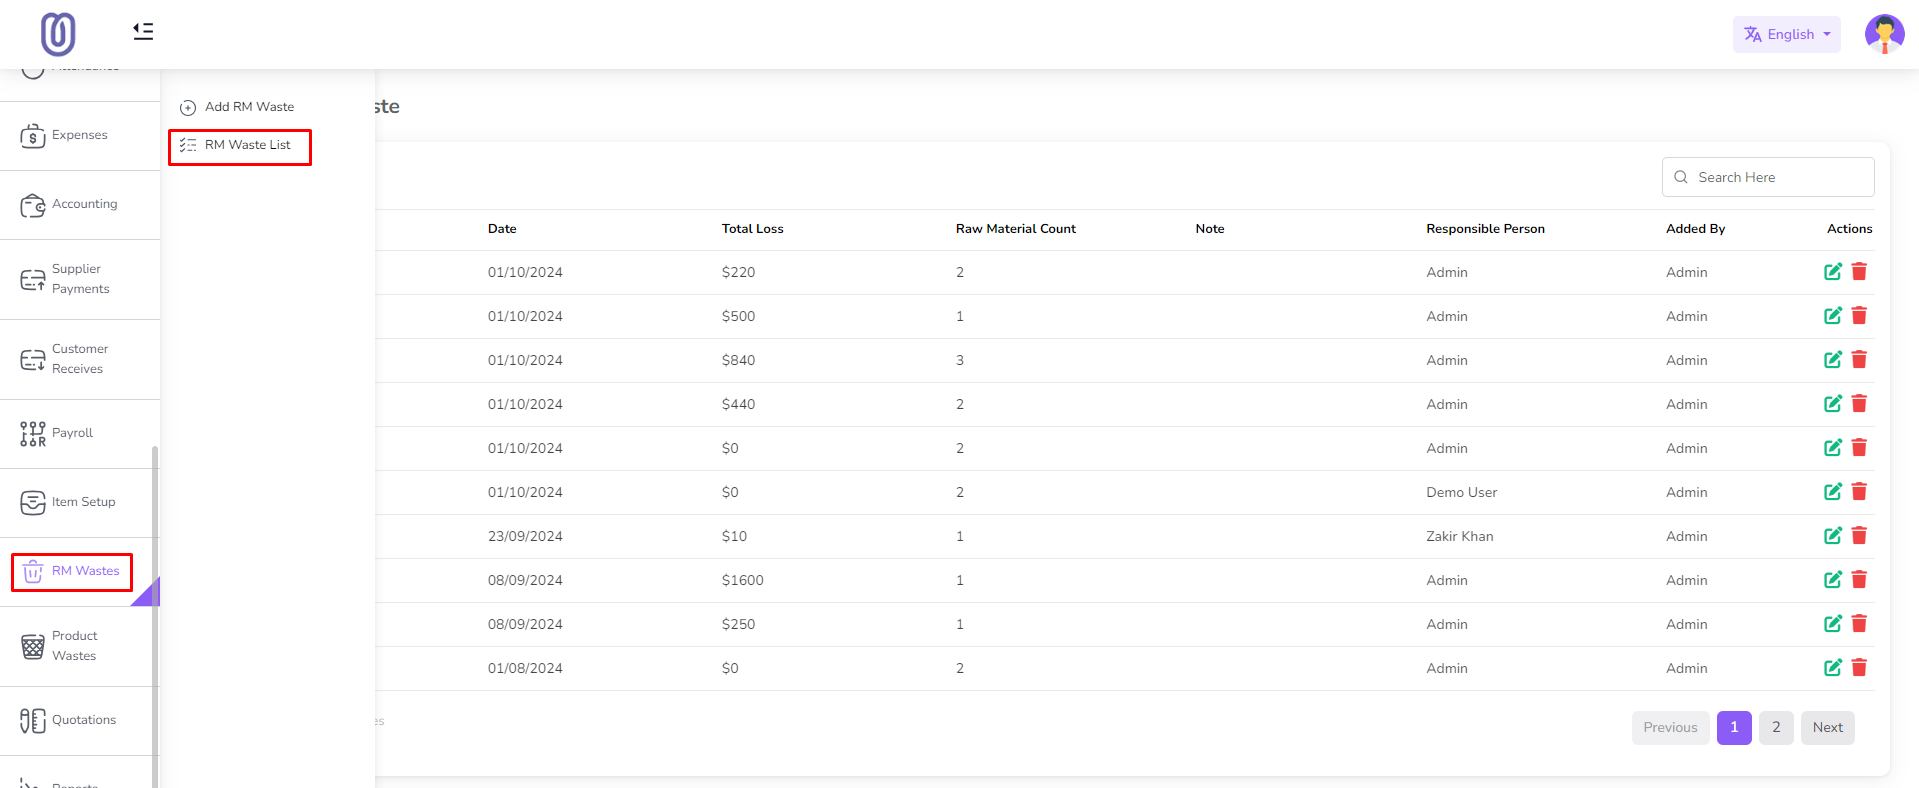
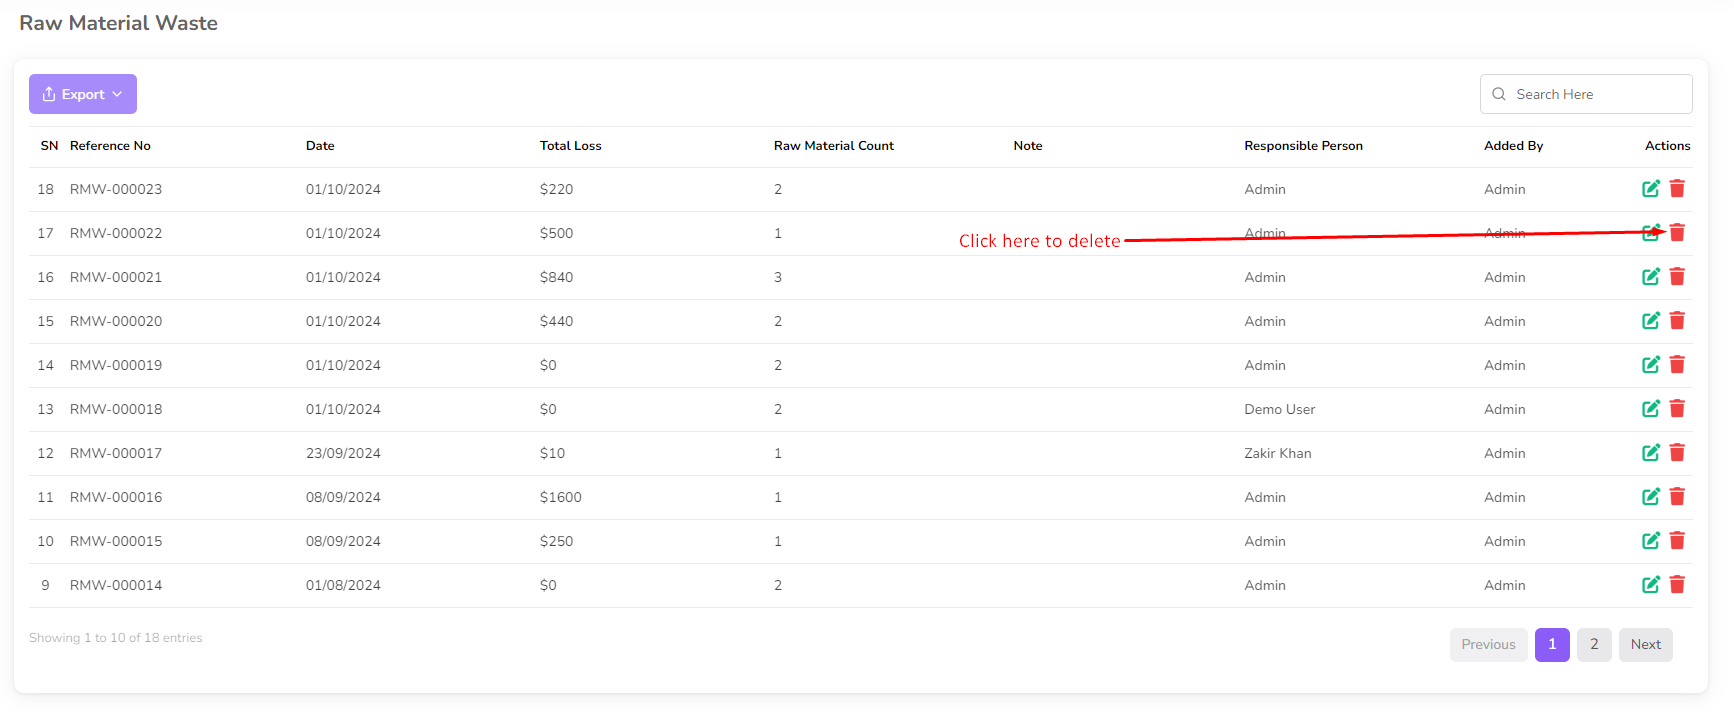
Once you access the Raw Material Waste Management page, you can view waste details,
including material name, Total Raw Material, and total loss.

To Add "Add RM Waste" from the left sub menu.

Select the material and enter the quantity and click on the "Submit" button.
Note: Only stock raw materials available in the dropdown.

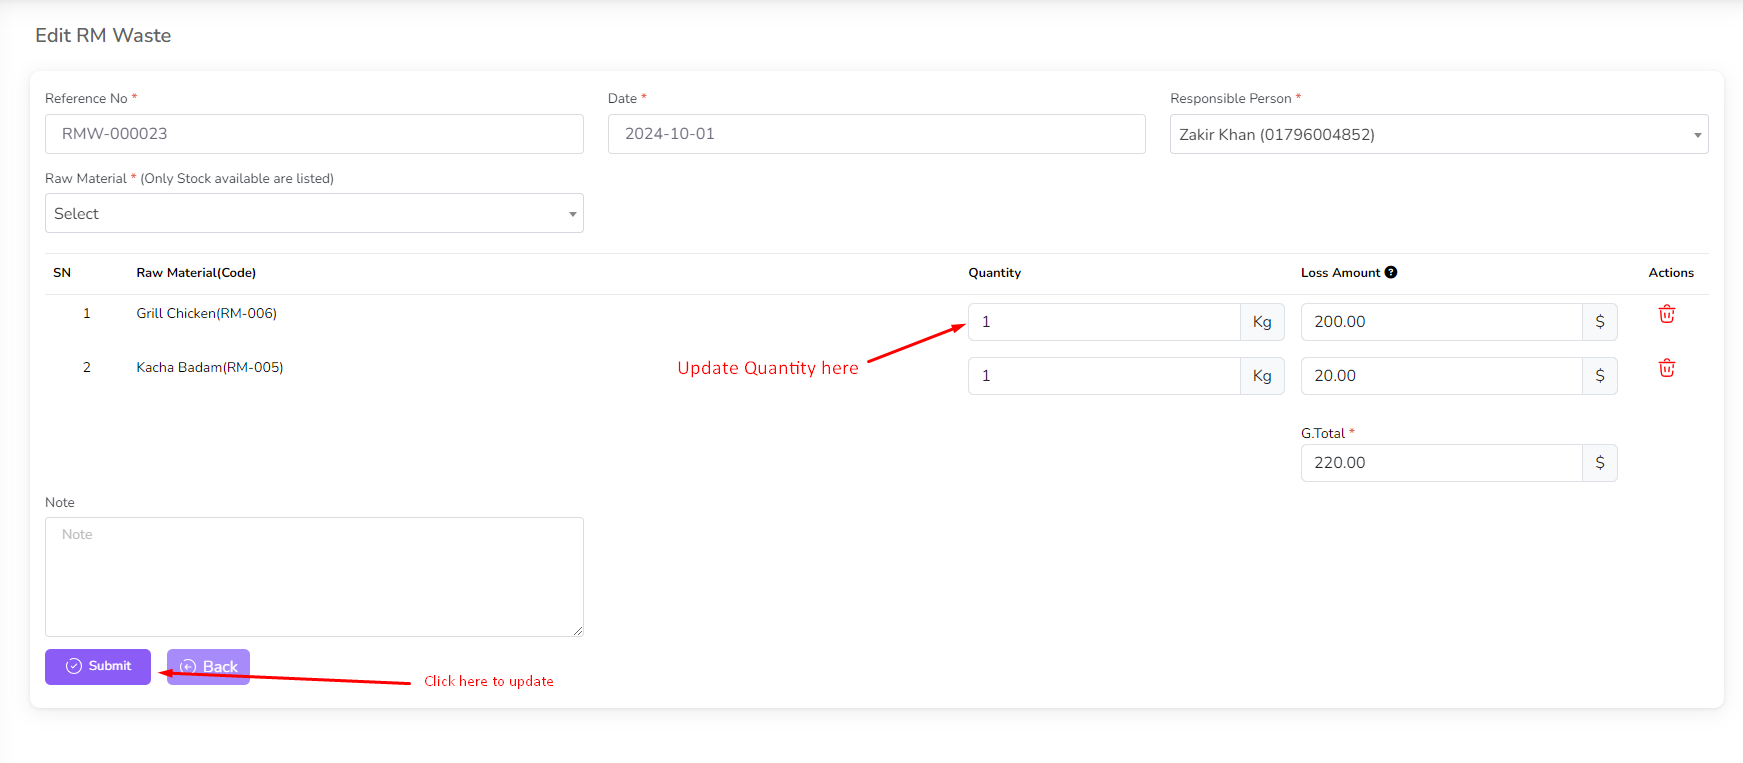
For edit waste click on the "Edit" Icon.

Make the necessary changes and click on the "Submit" button to save the changes.
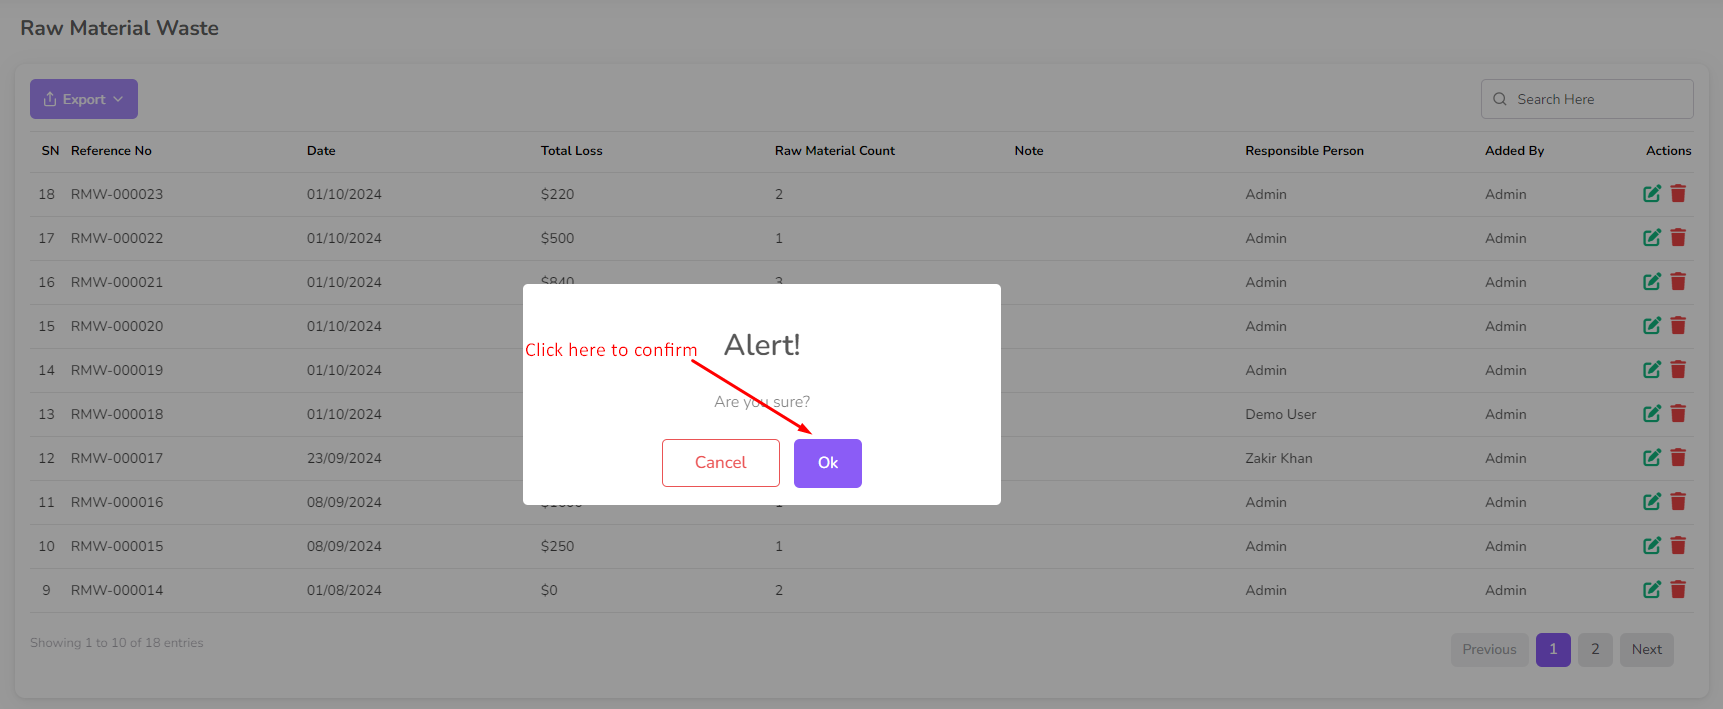
To delete a waste, click on the "Delete" button next to the waste you want to delete. Then a
confirmation dialog will be opened.
Confirm the deletion and the waste will be removed from the list.
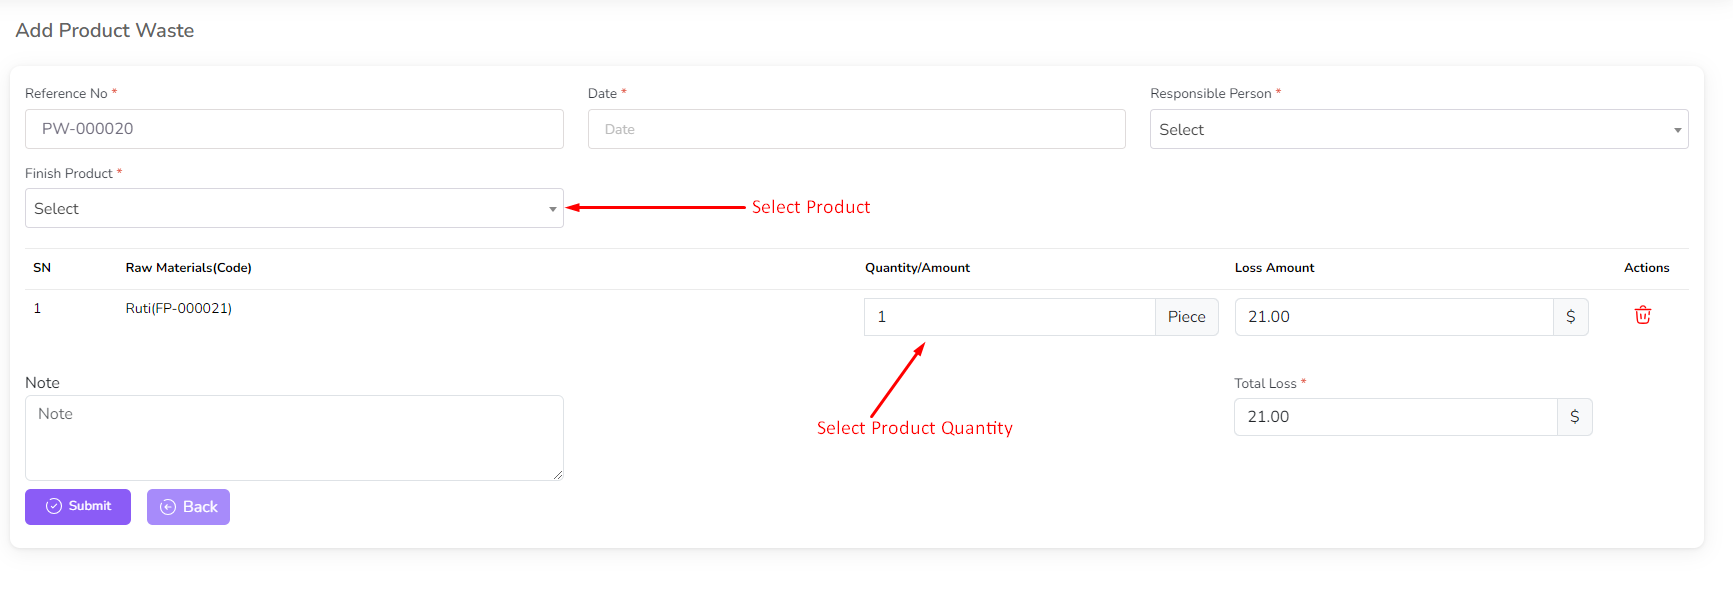
Product Waste Management
The Product Waste Management feature allows you to effectively manage product waste.
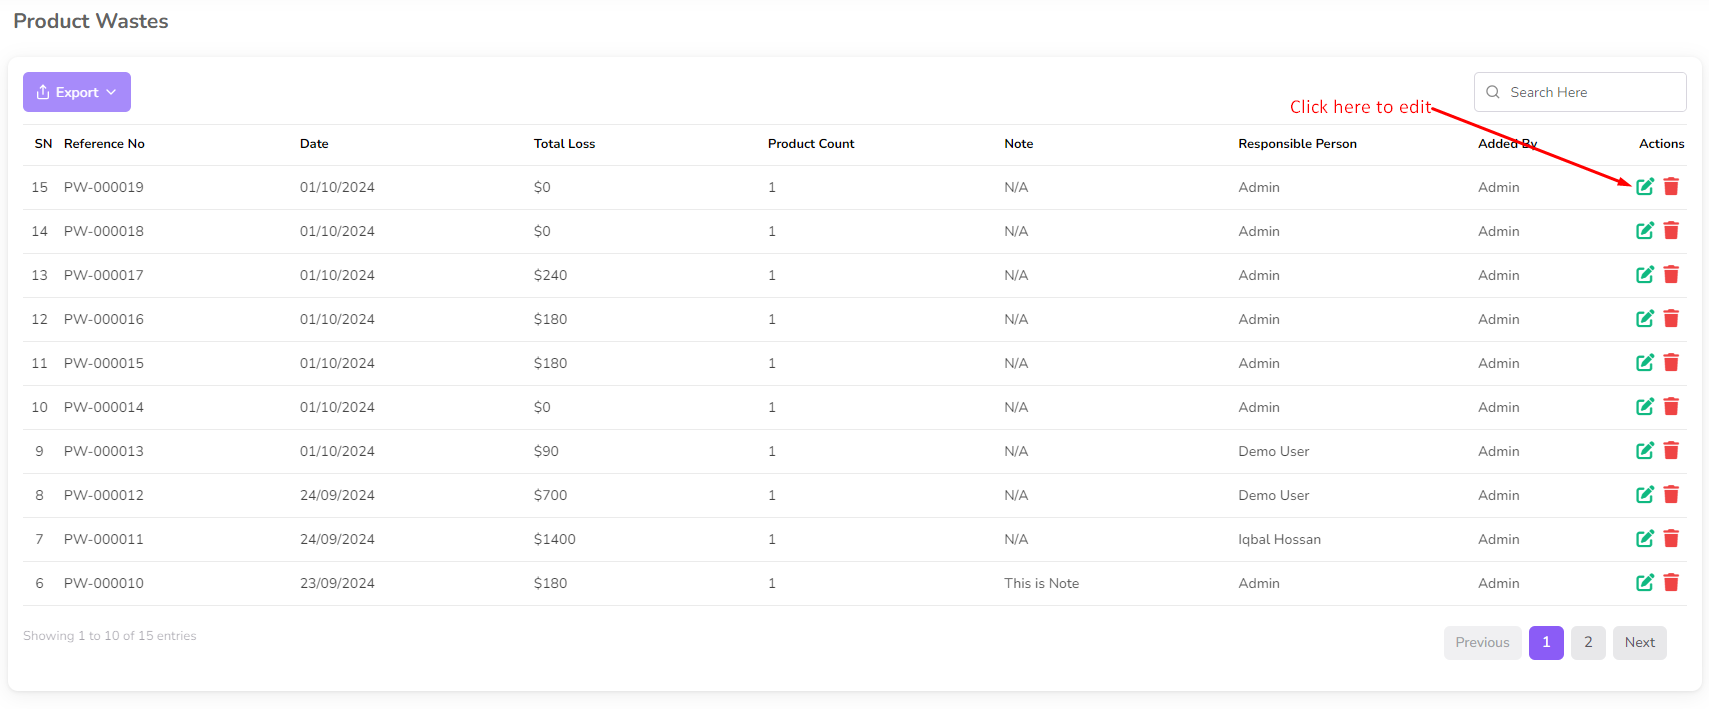
To access Product Waste Management, navigate to the “Product Waste” menu from the left
sidebar.

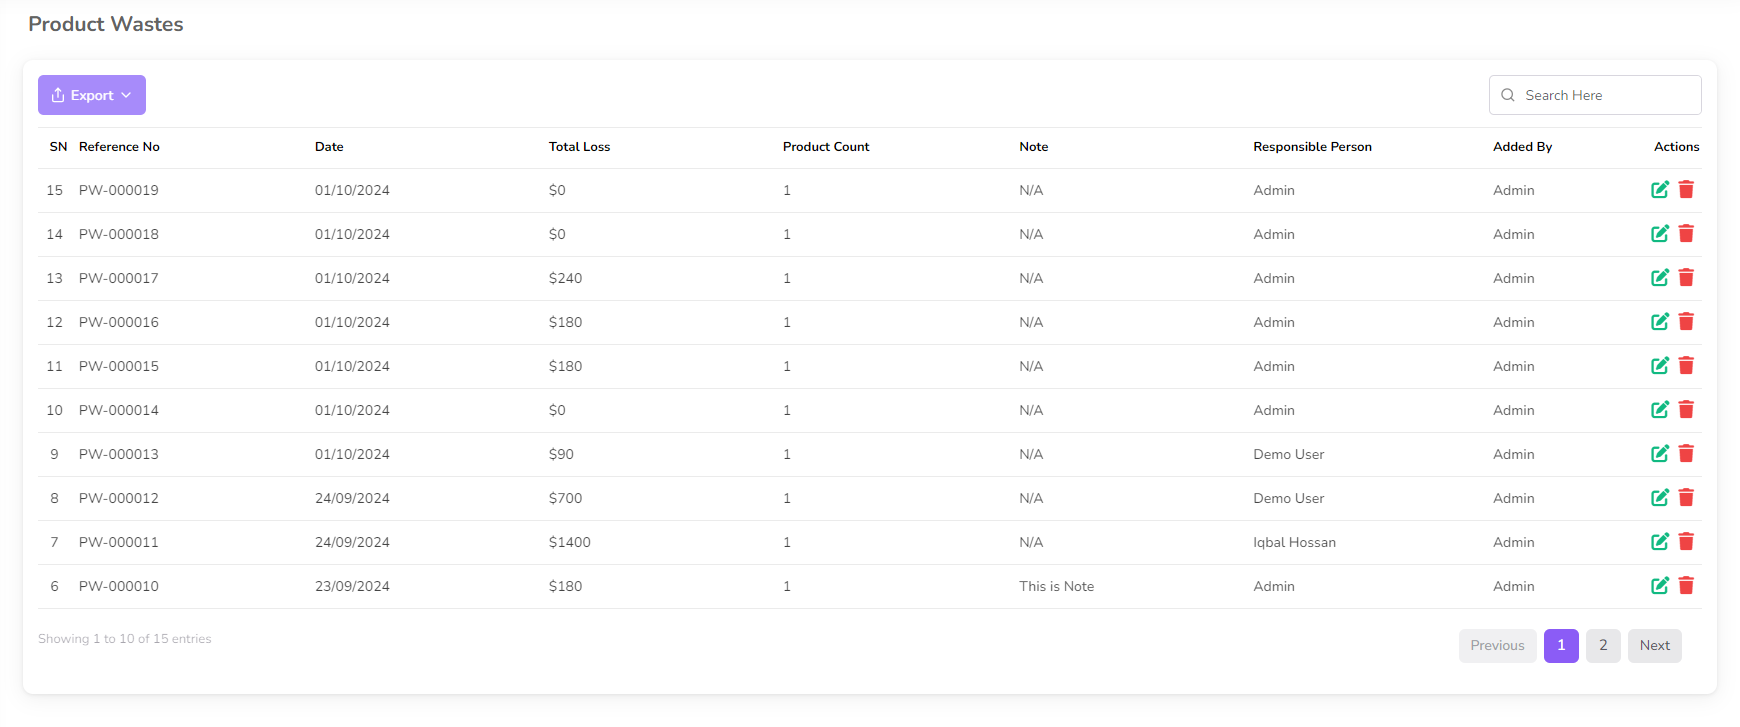
Once you access the Product Waste Management page, you can view waste details, including
product name, Total Product Waste, and total loss.
To Add "Add Product Waste" from the left sub menu.

Select the product and enter the quantity and click on the "Submit" button.
Note: Only stock products available in the dropdown.
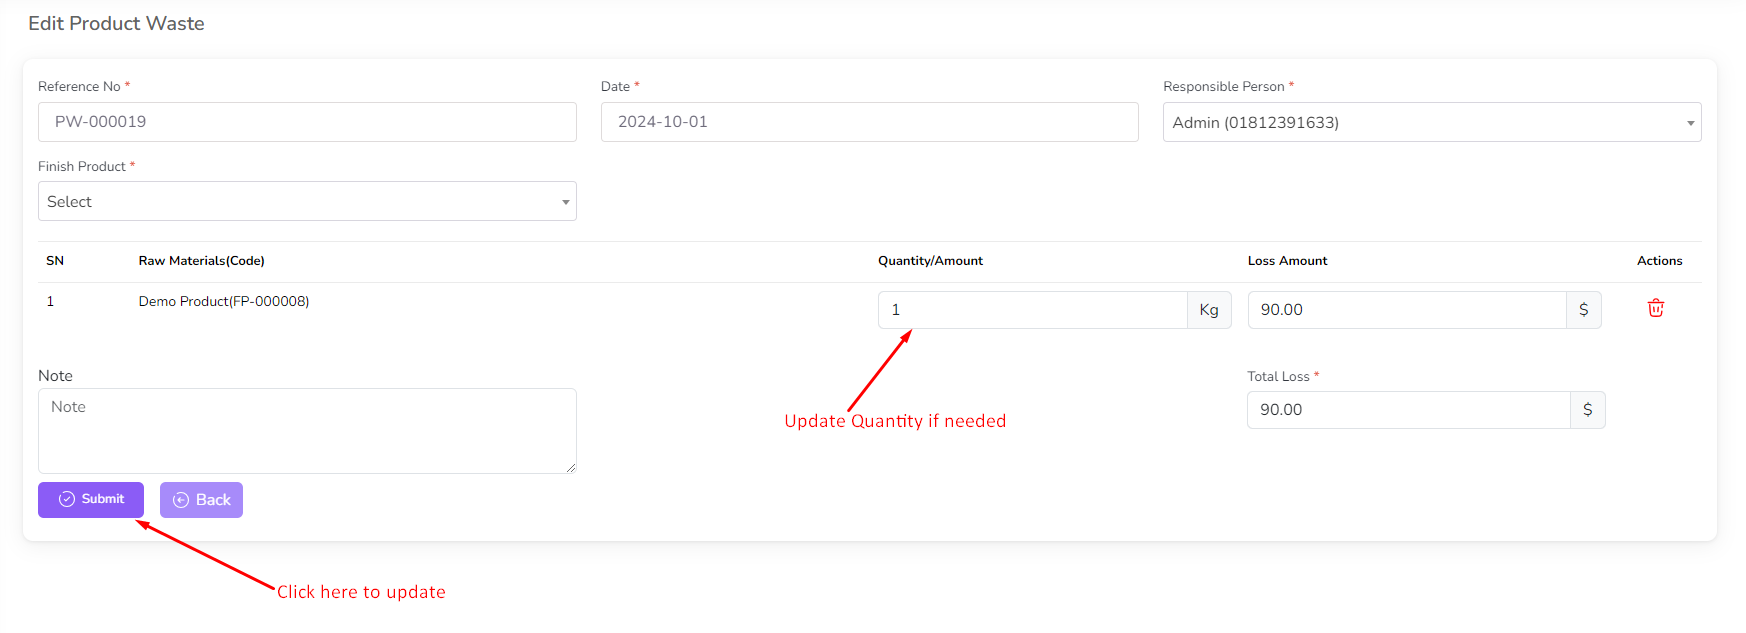
For edit waste click on the "Edit" Icon.
Make the necessary changes and click on the "Submit" button to save the changes.
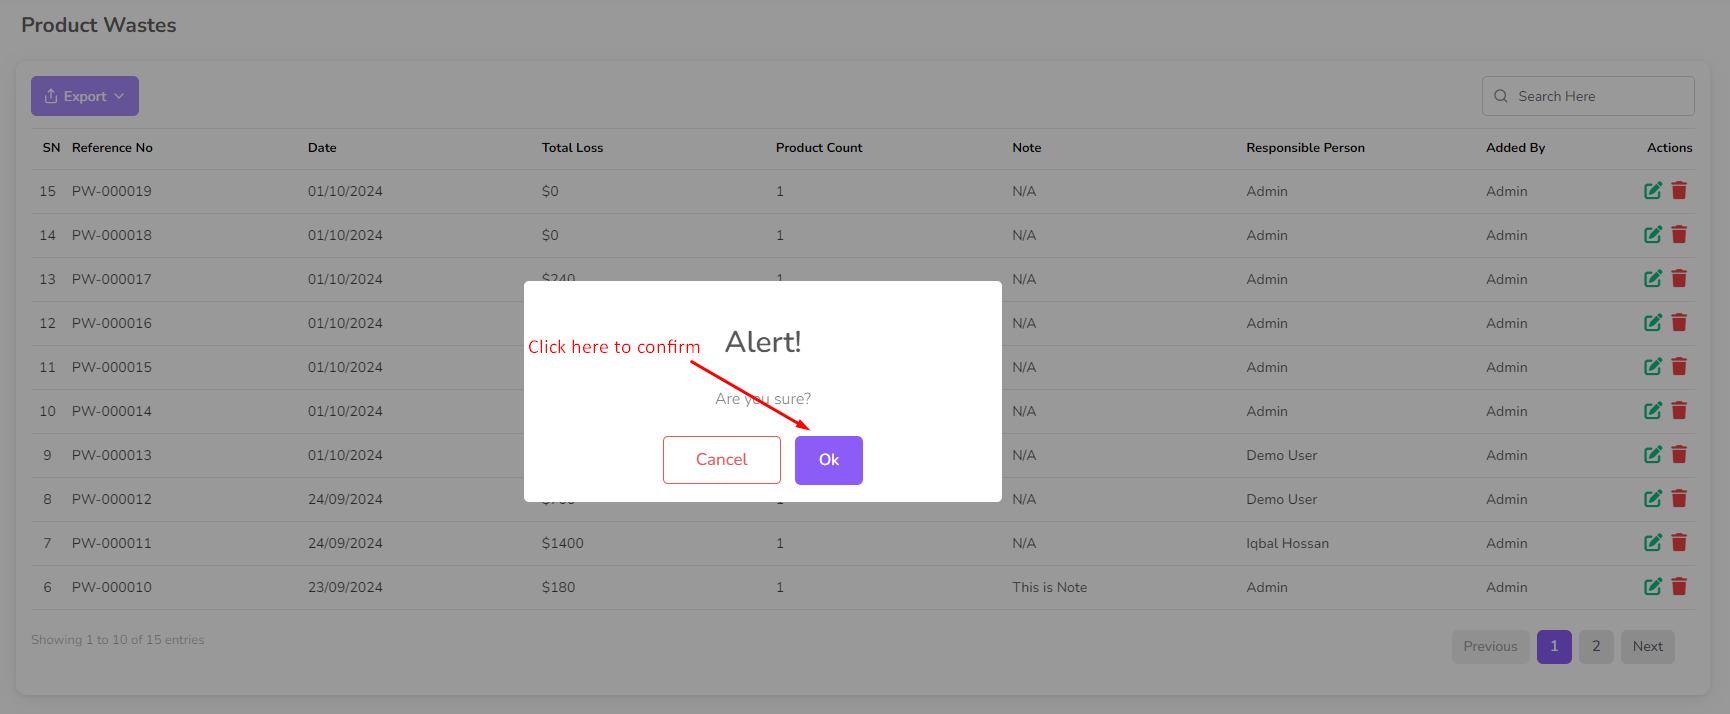
To delete a waste, click on the "Delete" button next to the waste you want to delete. Then a
confirmation dialog will be opened.
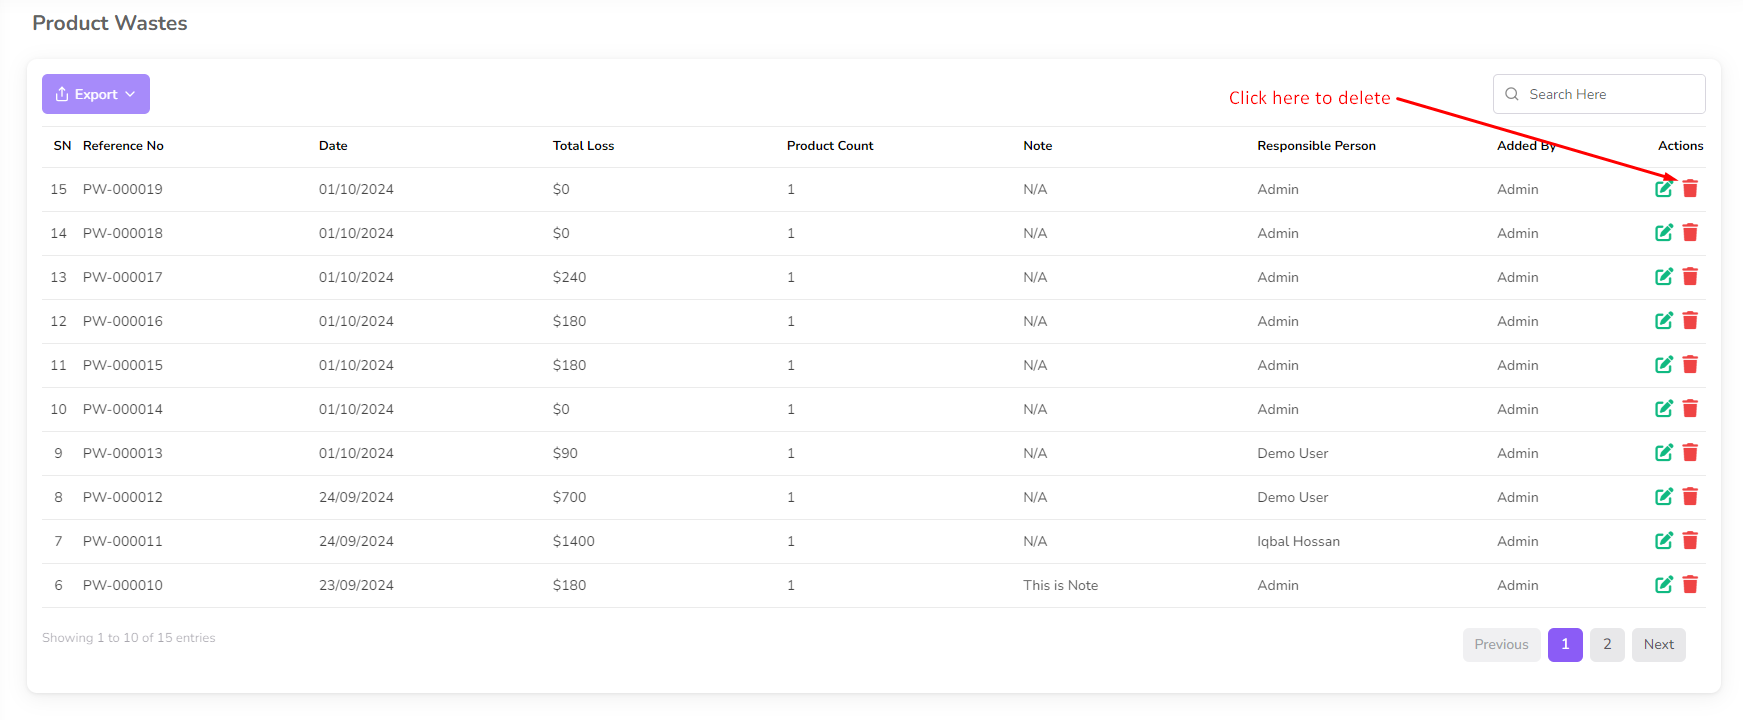
Confirm the deletion and the waste will be removed from the list.
Quotation Management
The Quotation Management feature allows you to effectively manage quotations for your
customers.
To access Quotation Management, navigate to the “Quotation” menu from the left sidebar.
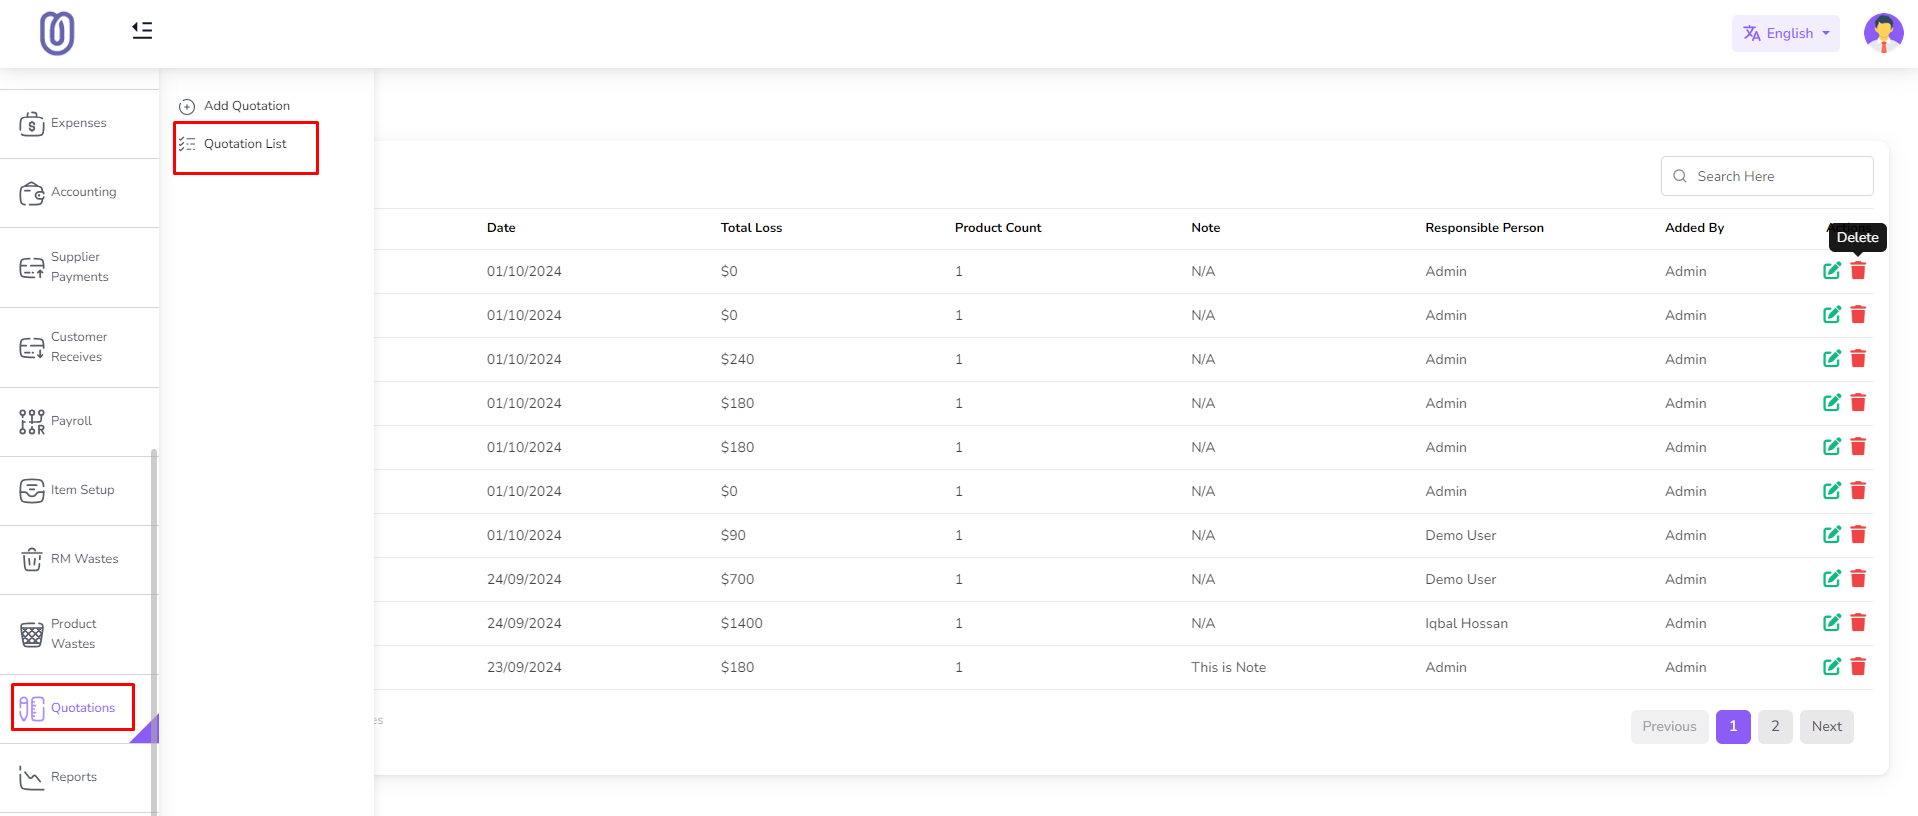
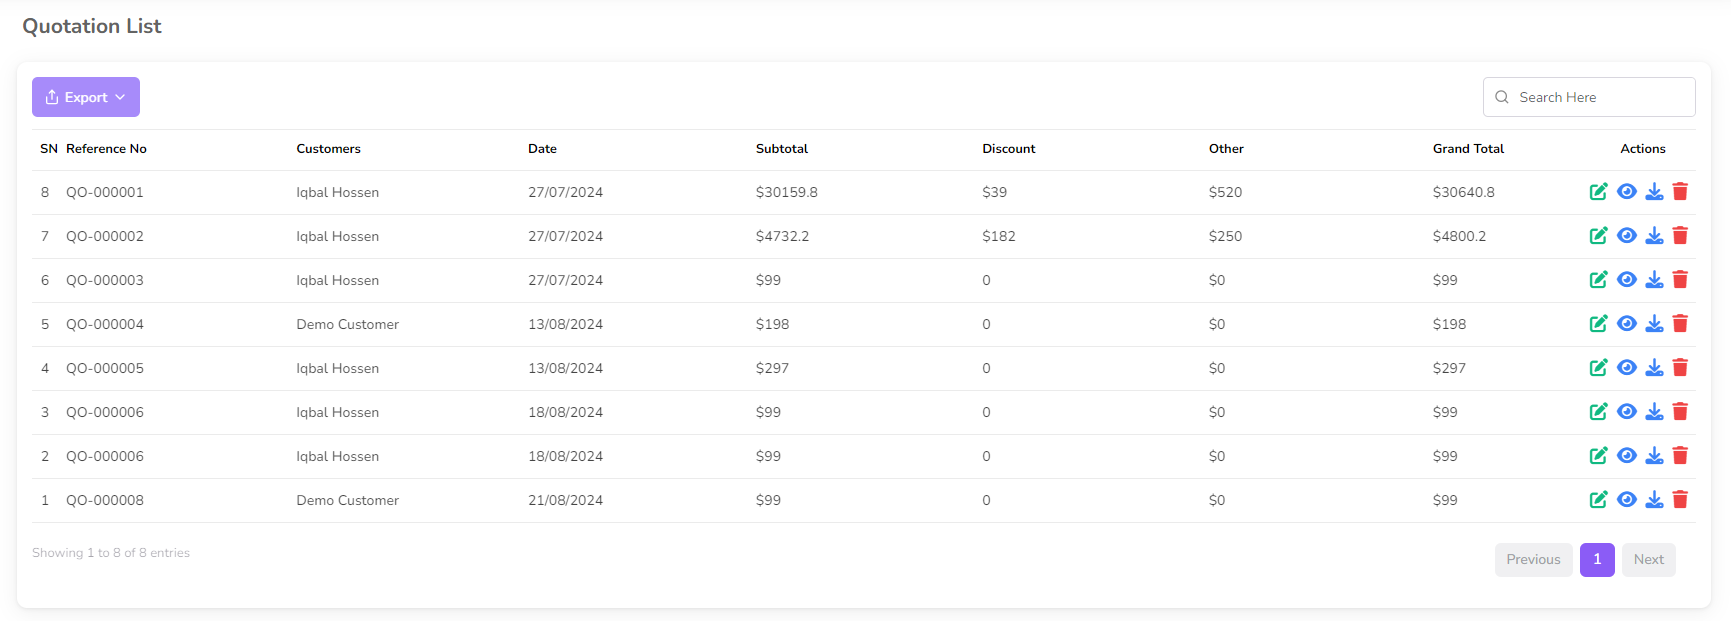
Once you access the Quotation Management page, you can view quotation details, including
customer name, quotation date, and total amount.
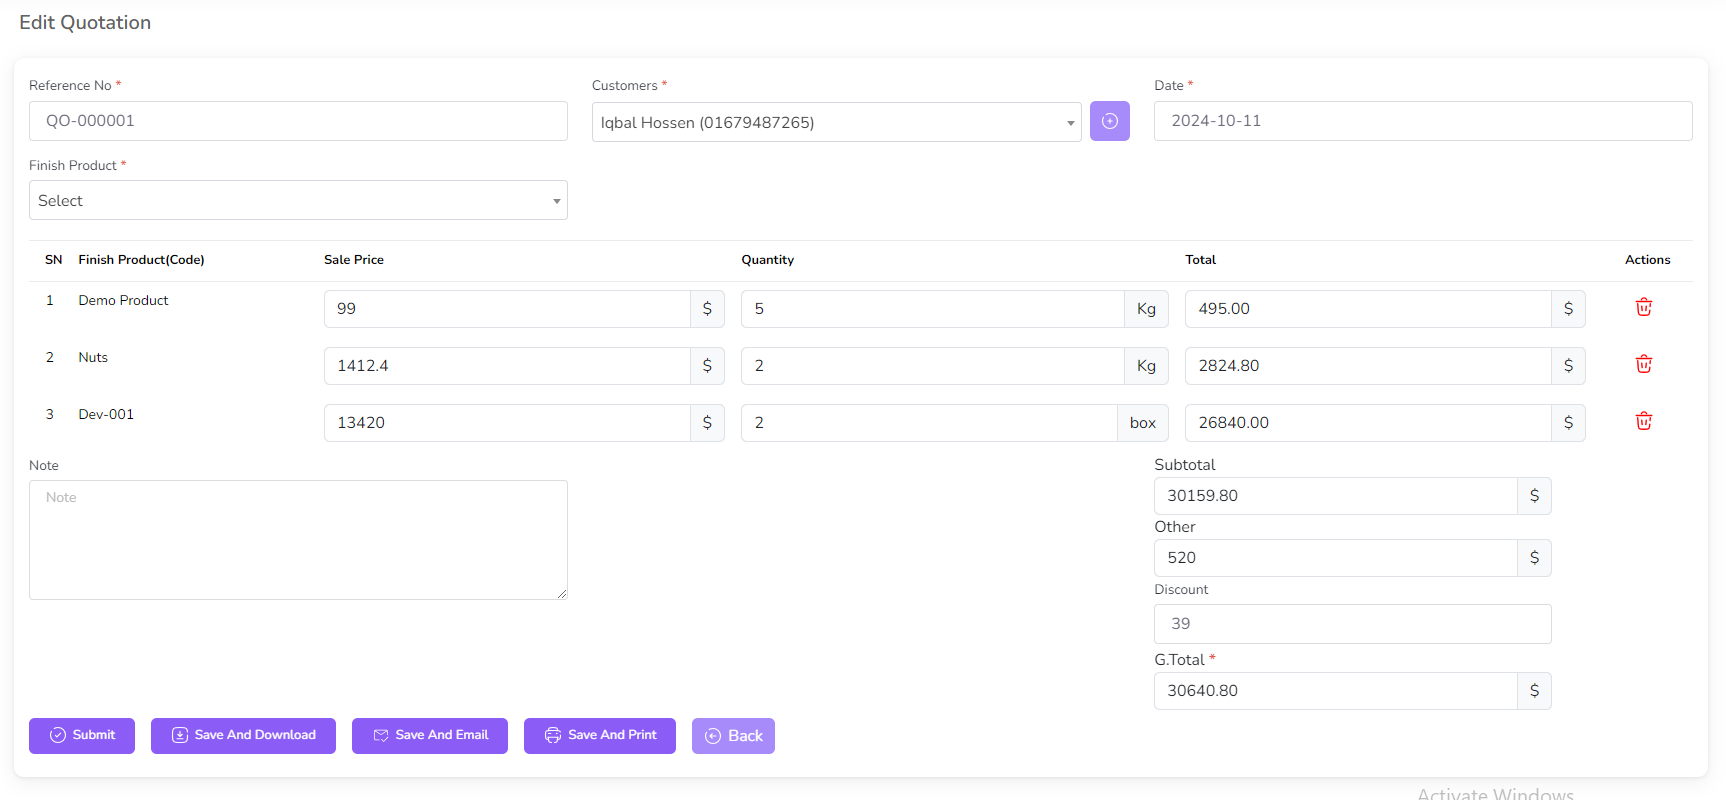
To Add click "Add Quotation" from the left sub menu.
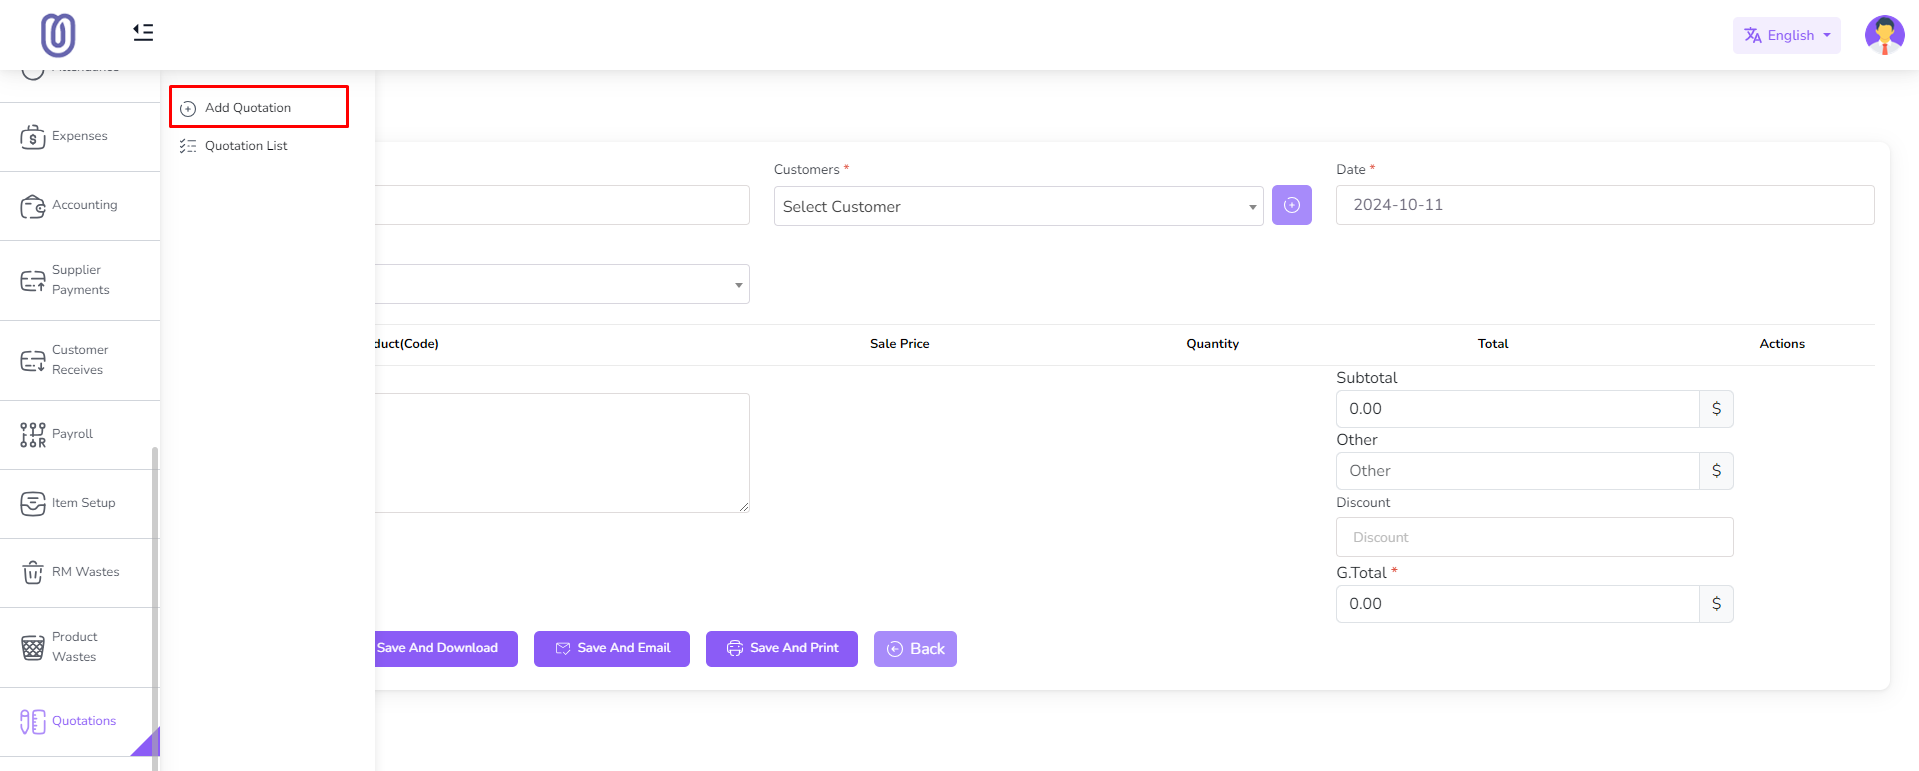
Select the customer and enter the quotation details, including products and prices, and
click on the "Submit" button for save.
Click "Save and Download" button for download the quotation in pdf format.
Click "Save and Email" button for save and email the quotation.
Click "Save and Print" button for save and print the quotation.
Click "Back" button for back to the quotation list page.

For edit quotation click on the "Edit" Icon.
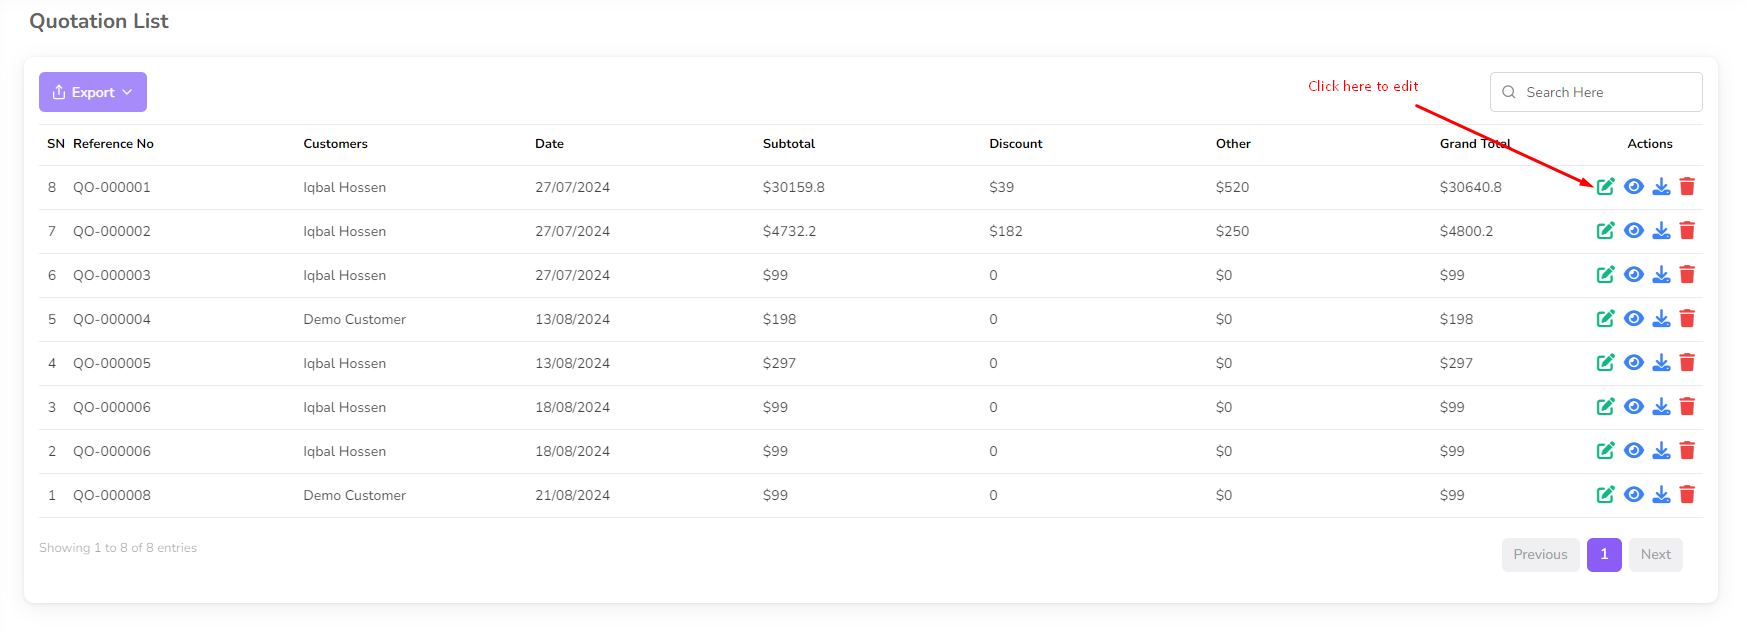
Make the necessary changes and click on the "Submit" button to save the changes.
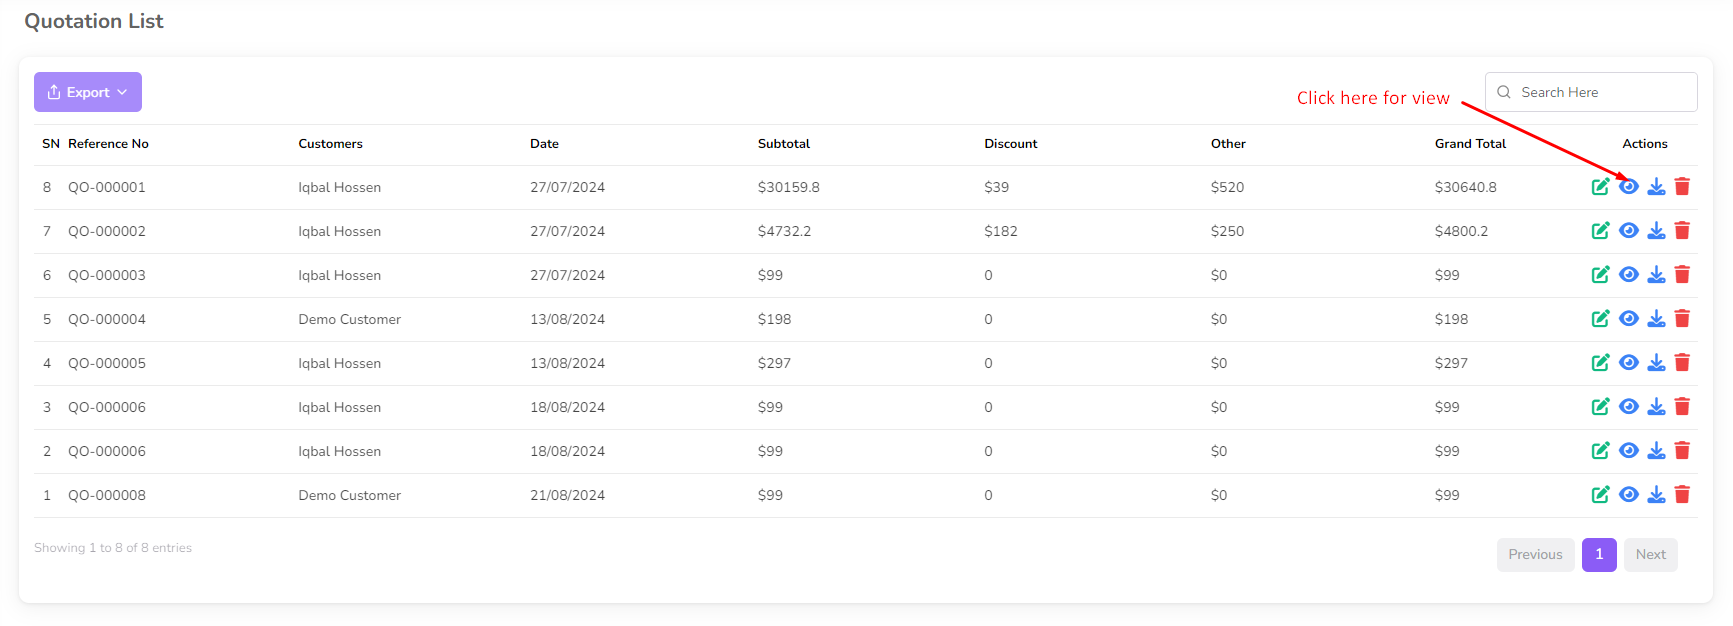
For View quotation click on the "View" Icon.
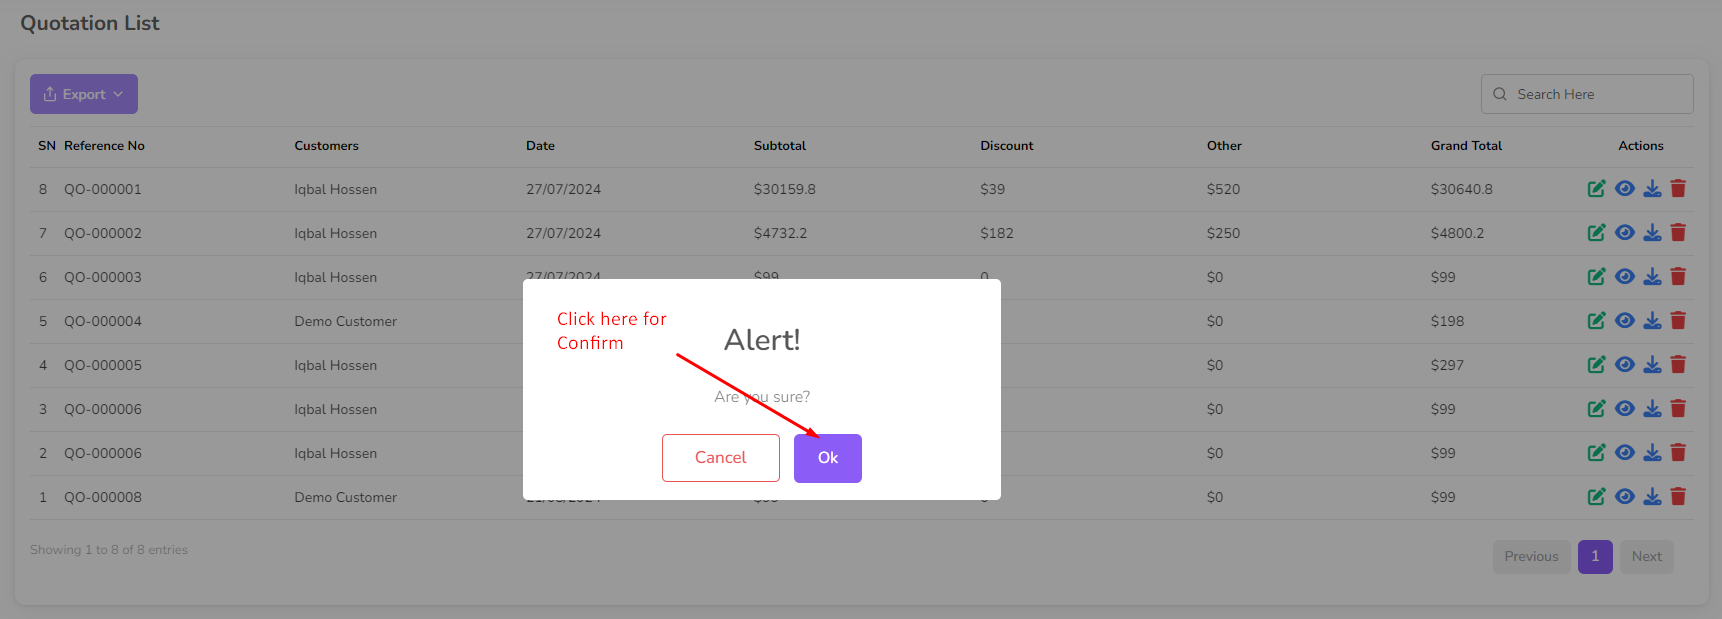
To delete a quotation, click on the "Delete" button next to the quotation you want to
delete. Then a confirmation dialog will be opened.
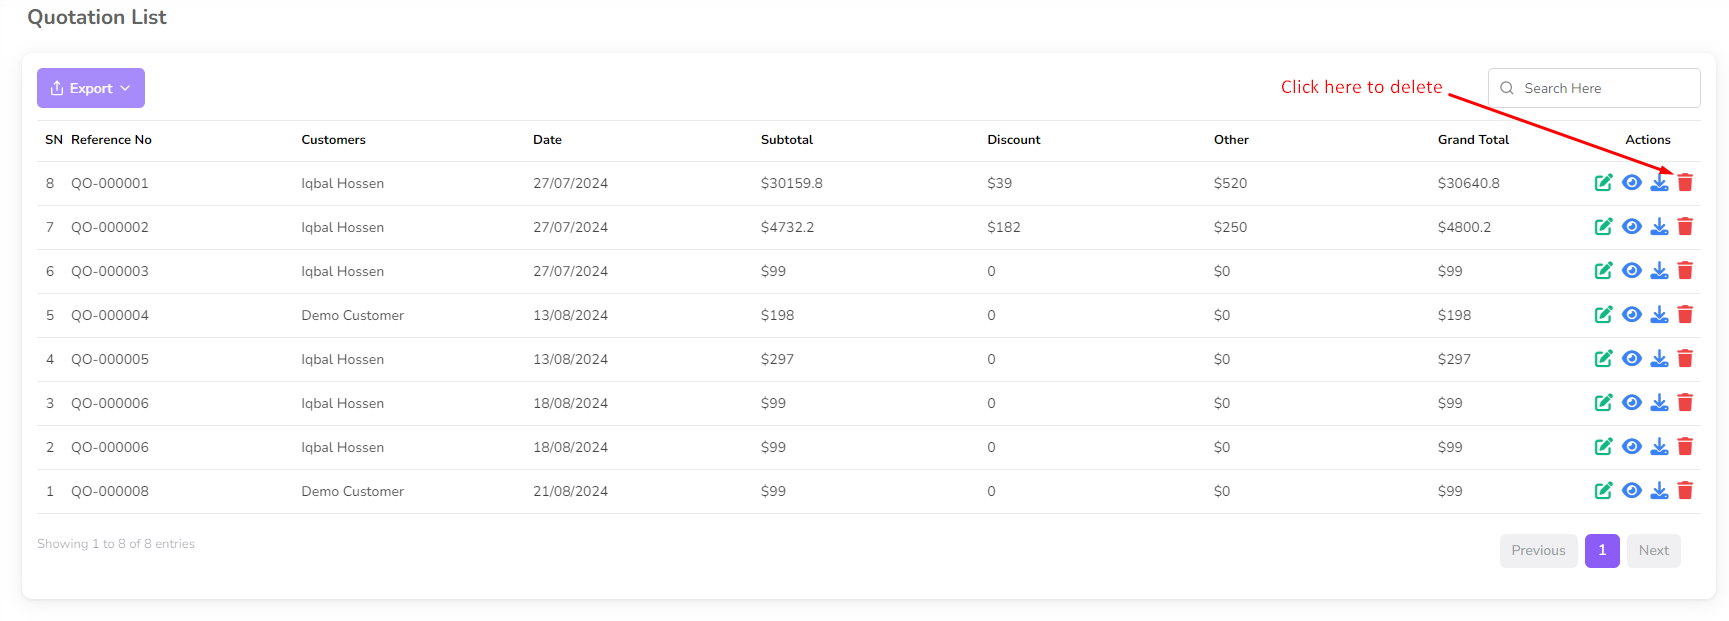
Confirm the deletion and the quotation will be removed from the list.
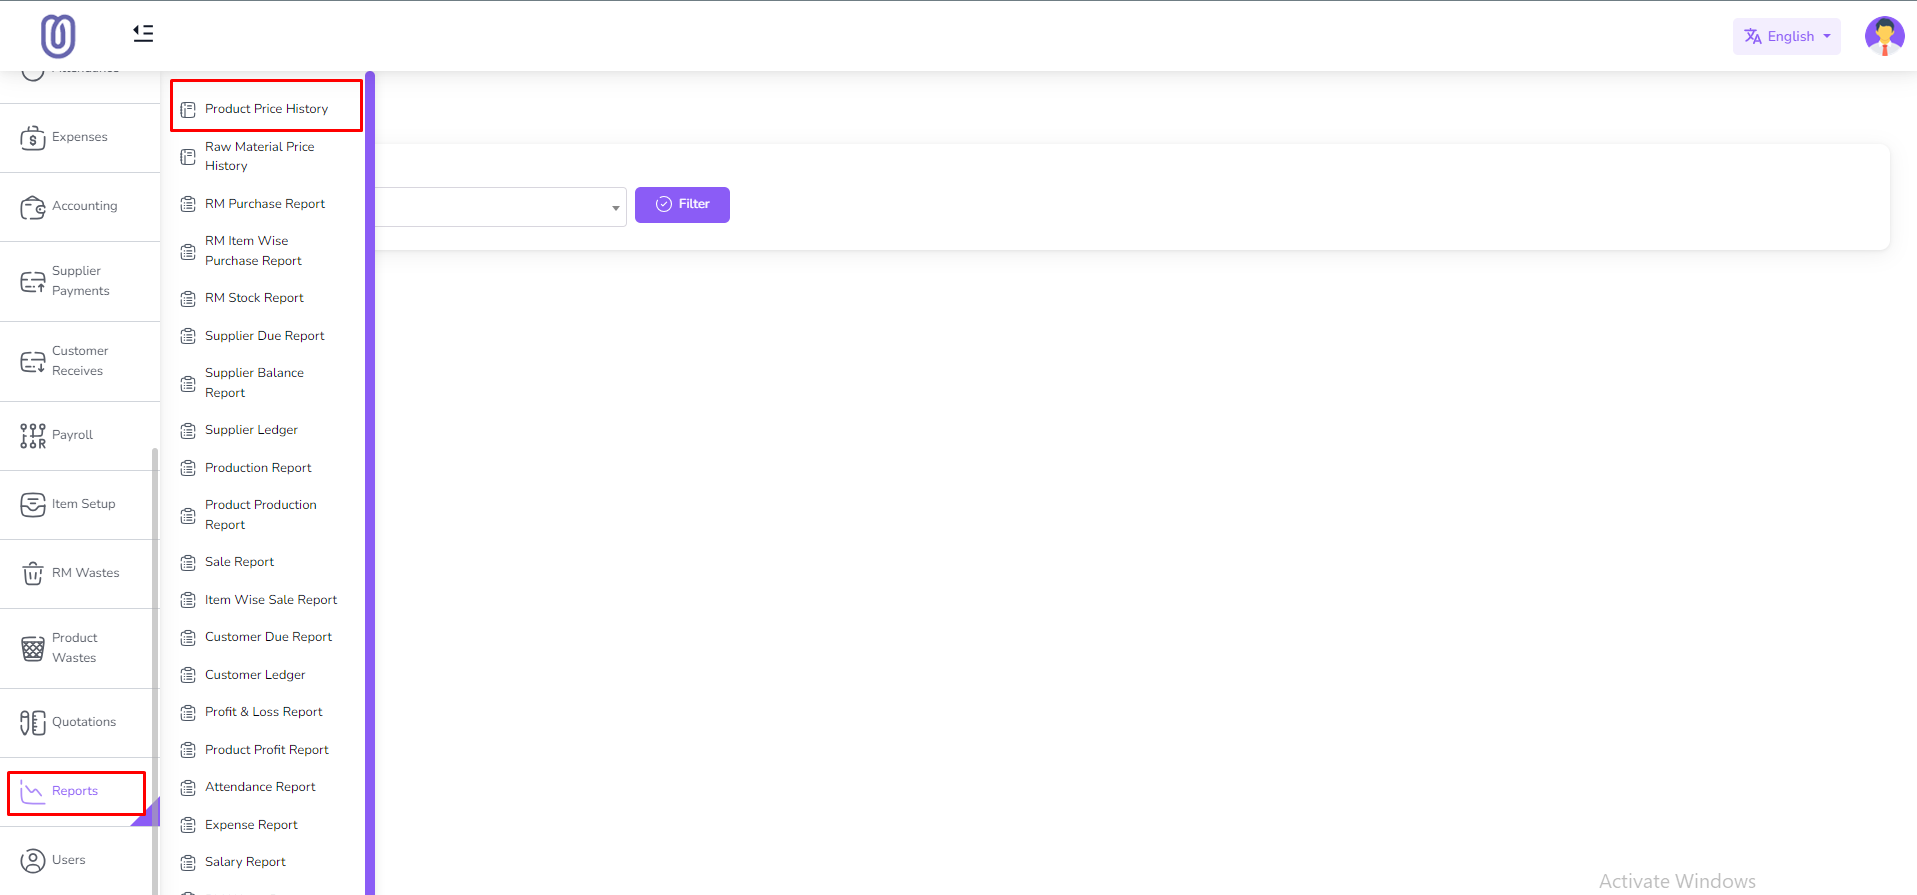
Product Price History
In this section you can view the price history of a product.
To access the Product Price History page, navigate to the "Reports" section from the left
sidebar and click on "Product Price History".
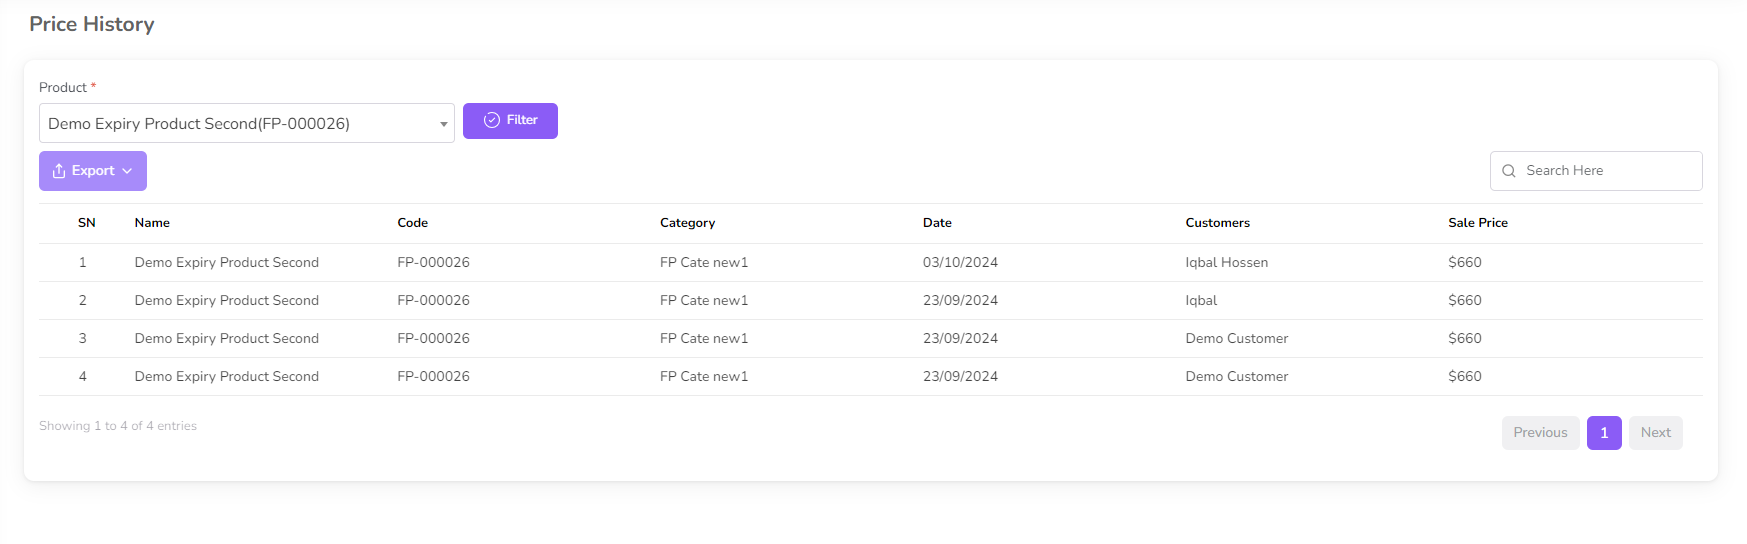
Select the product from the dropdown and click on the "Filter" button.

Then you can view the price history of the product.
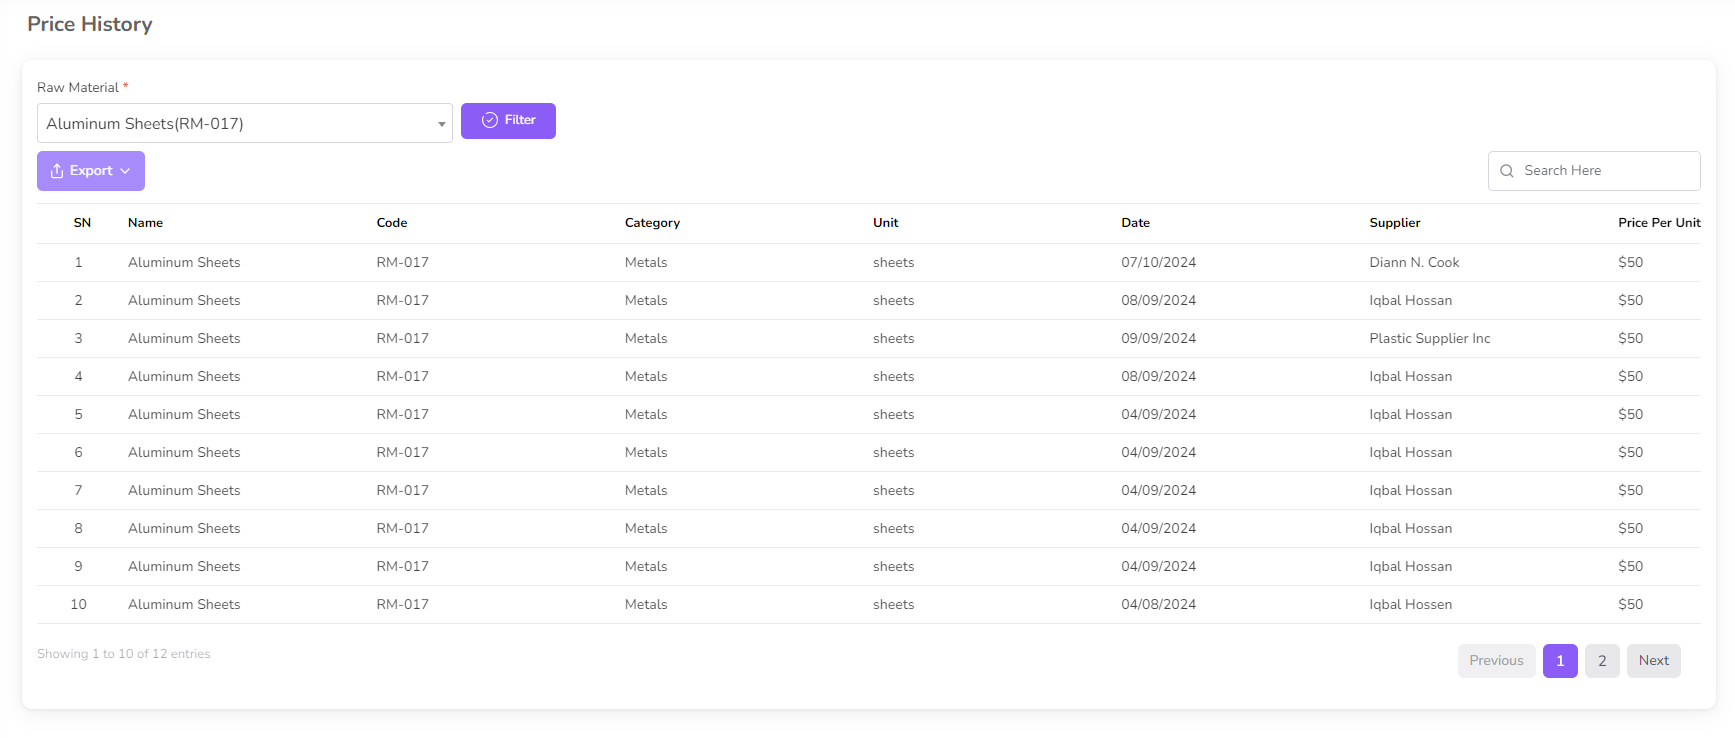
Raw Material Price History
In this section you can view the price history of a raw material.
To access the Raw Material Price History page, navigate to the "Reports" section from the
left sidebar and click on "Raw Material Price History".

Select the raw material from the dropdown and click on the "Filter" button.
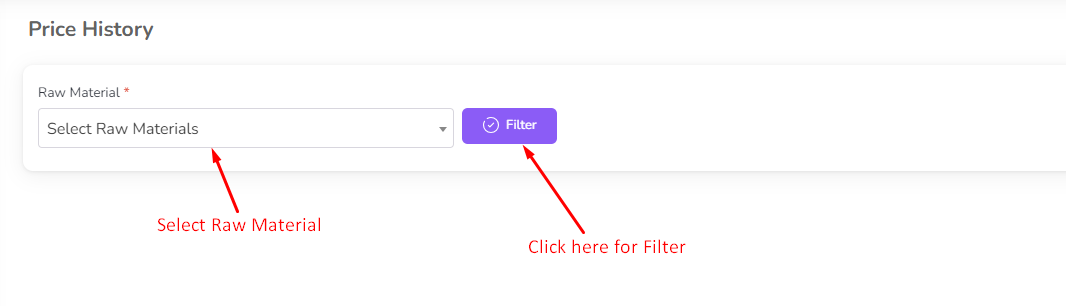
Then you can view the price history of the raw material.
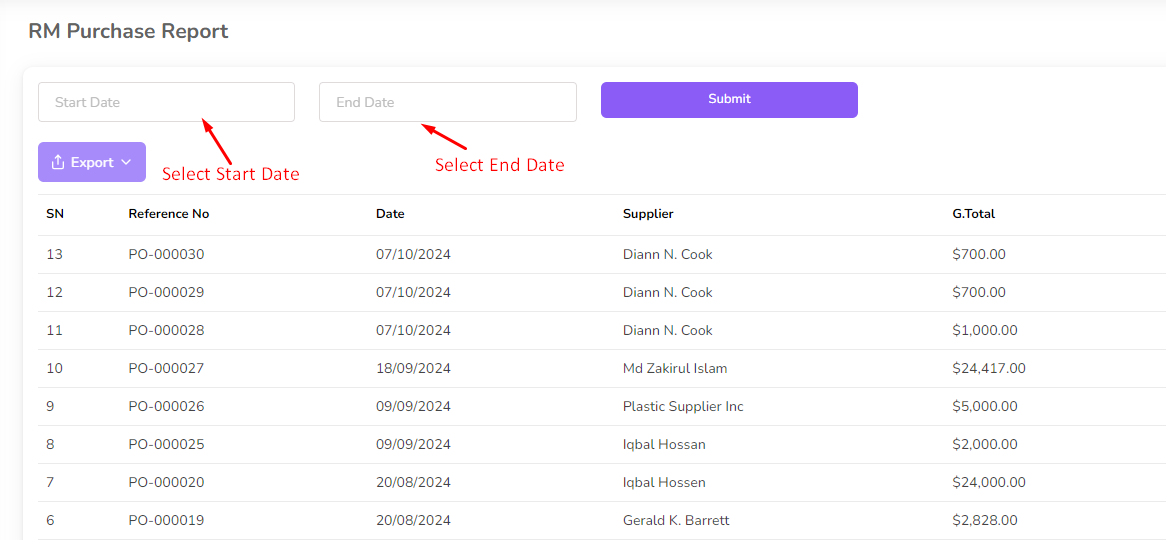
RM Purchase Report
In this section you can view the purchase report of a raw material.
To access the RM Purchase Report page, navigate to the "Reports" section from the left
sidebar and click on "RM Purchase Report".
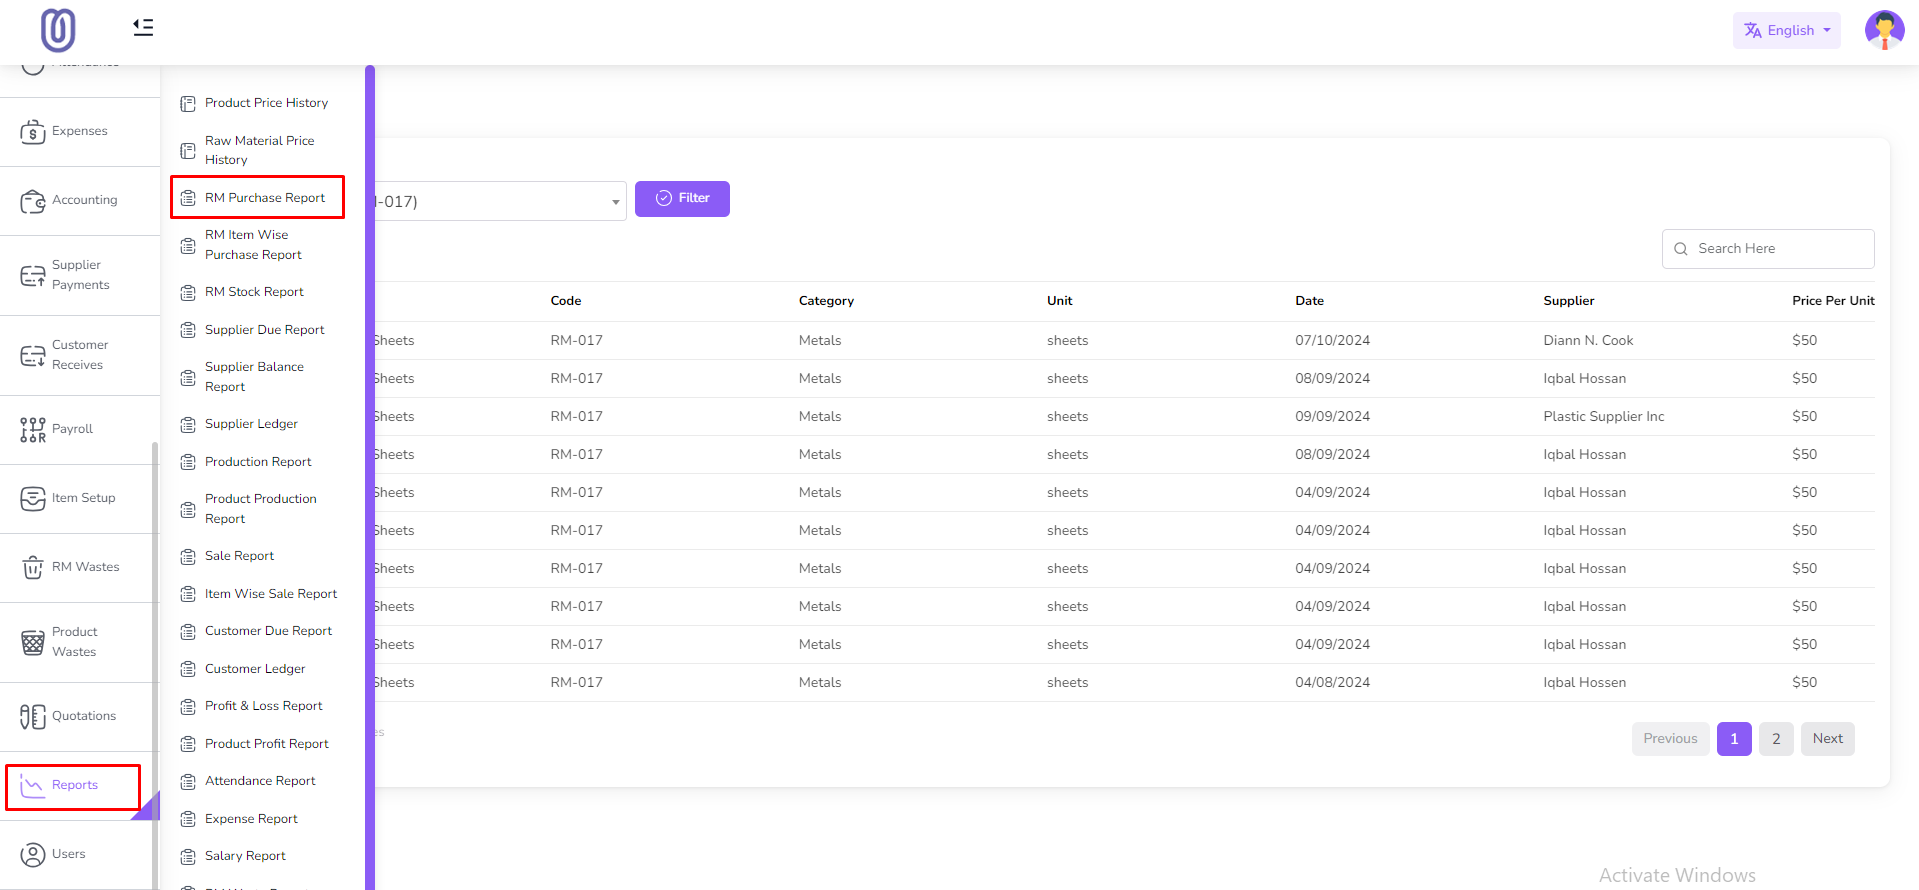
In this page you can view the purchase report of a raw material.

You can filter by date range. First select date and click on the "Submit" button.
RM Item Wise Purchase Report
In this section you can view the purchase report of a raw material item wise.
To access the RM Item Wise Purchase Report page, navigate to the "Reports" section from the
left sidebar and click on "RM Item Wise Purchase Report".

In this page you can view the purchase report of a raw material item wise.

You can filter by date range. First select date and click on the "Submit" button.

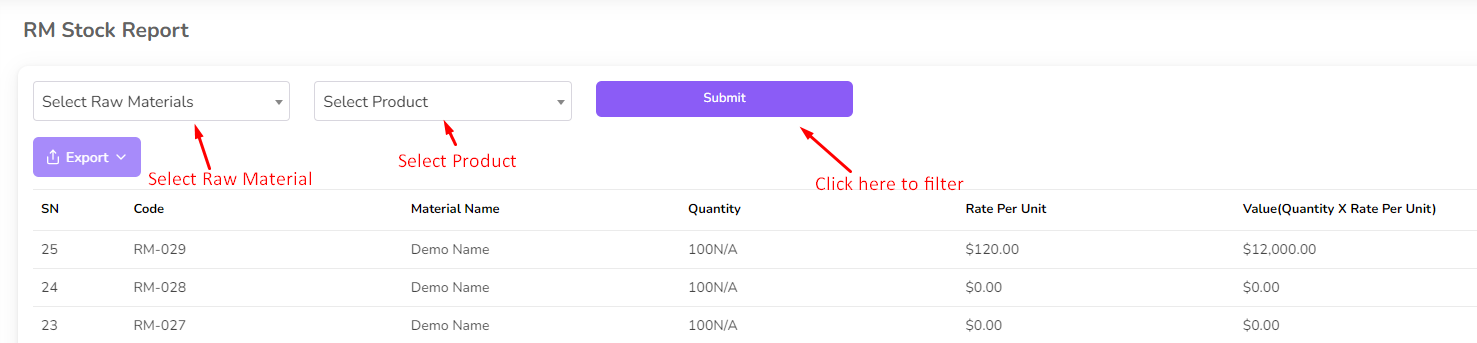
Raw Material Stock Report
In this section you can view the stock report of a raw material.
To access the Raw Material Stock Report page, navigate to the "Reports" section from the
left sidebar and click on "RM Stock Report".

In this page you can view the stock report of a raw material.
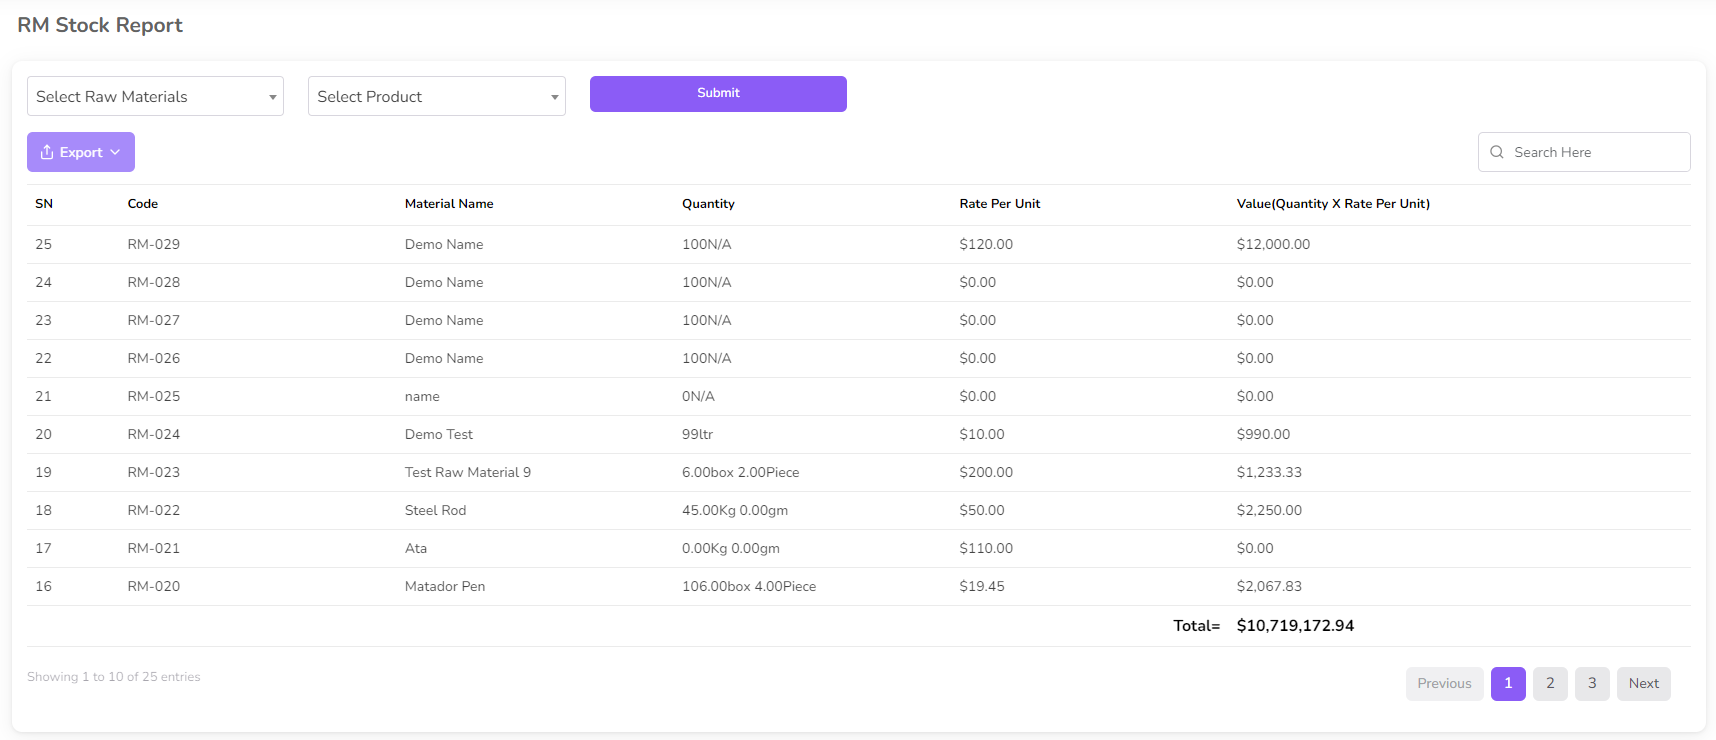
You can filter by Raw material and product.
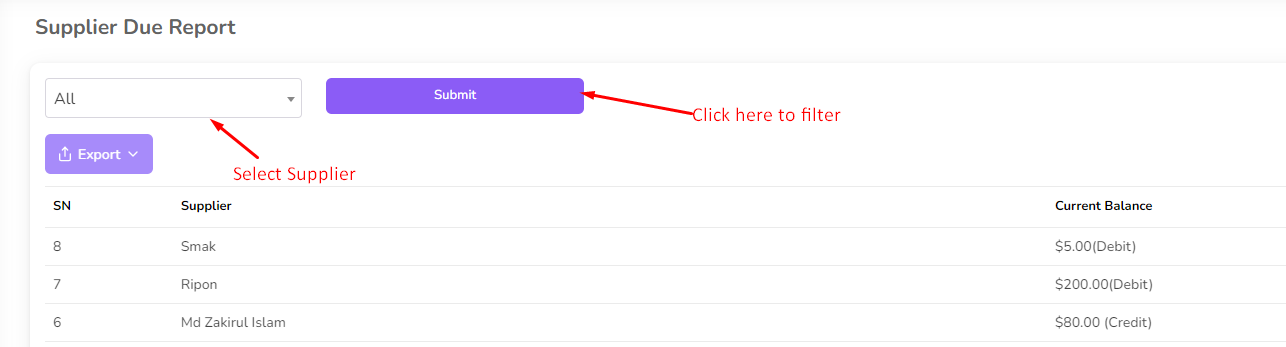
Supplier Due Report
In this section you can view the due report of a supplier.
To access the Supplier Due Report page, navigate to the "Reports" section from the
left sidebar and click on "Supplier Due Report".
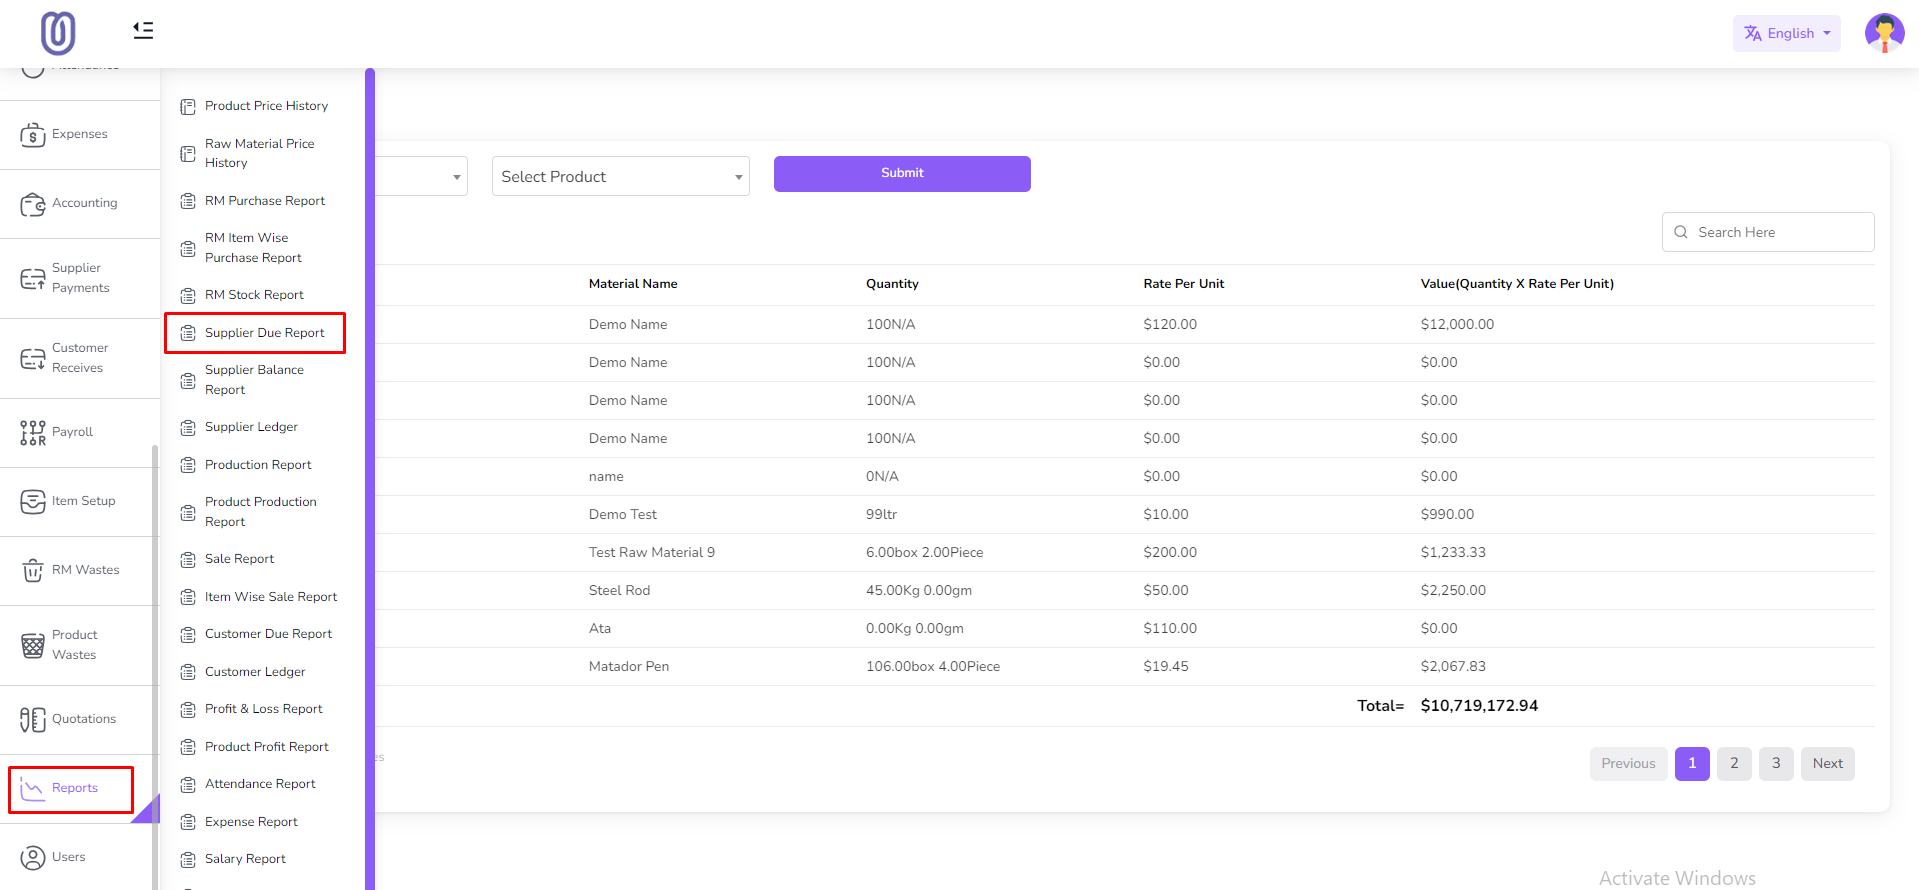
In this page you can view the due report of a supplier.
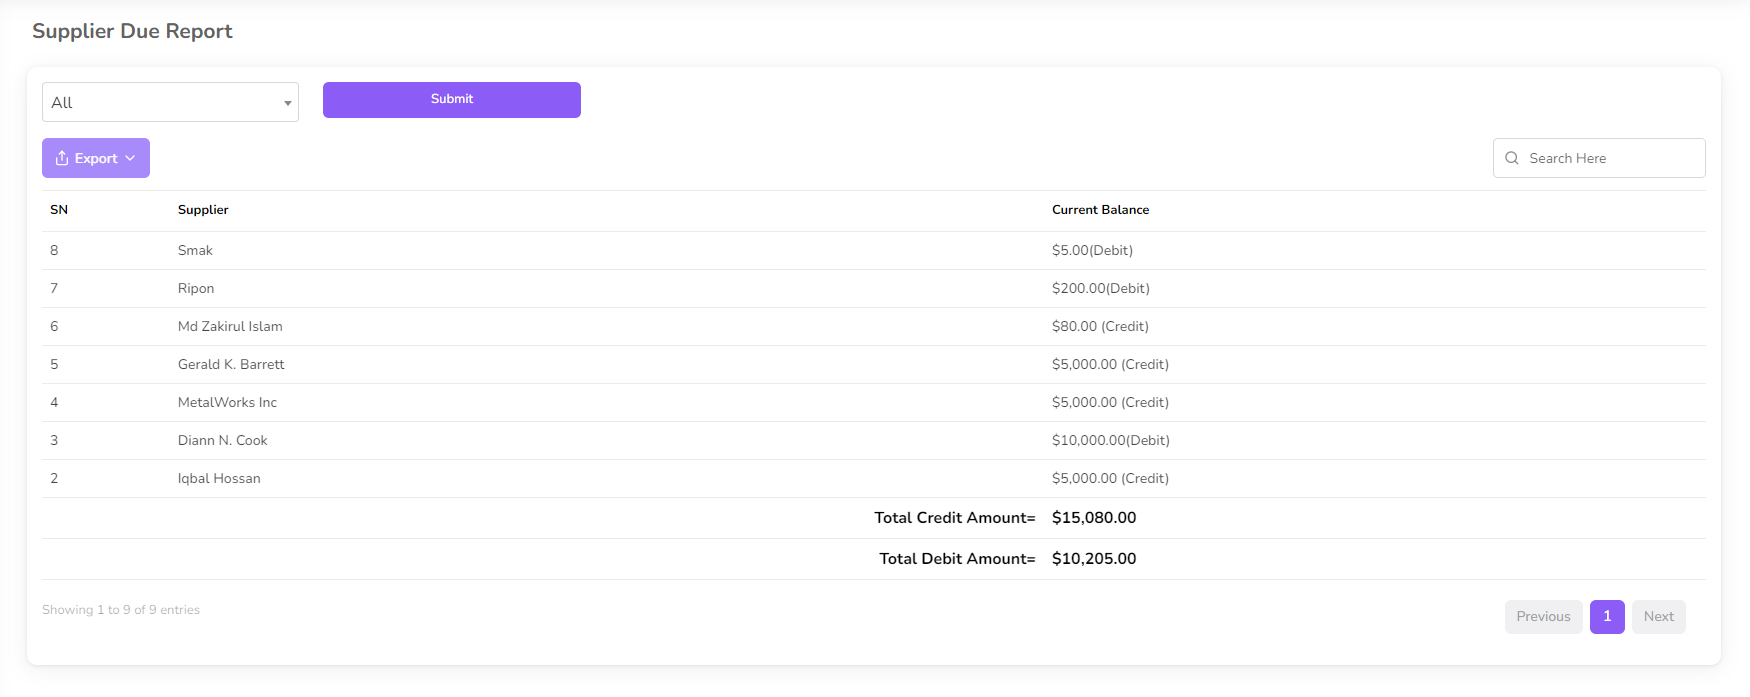
You can filter by Supplier.
Supplier Balance Report
In this section you can view the balance report of a supplier.
To access the Supplier Balance Report page, navigate to the "Reports" section from the
left sidebar and click on "Supplier Balance Report".
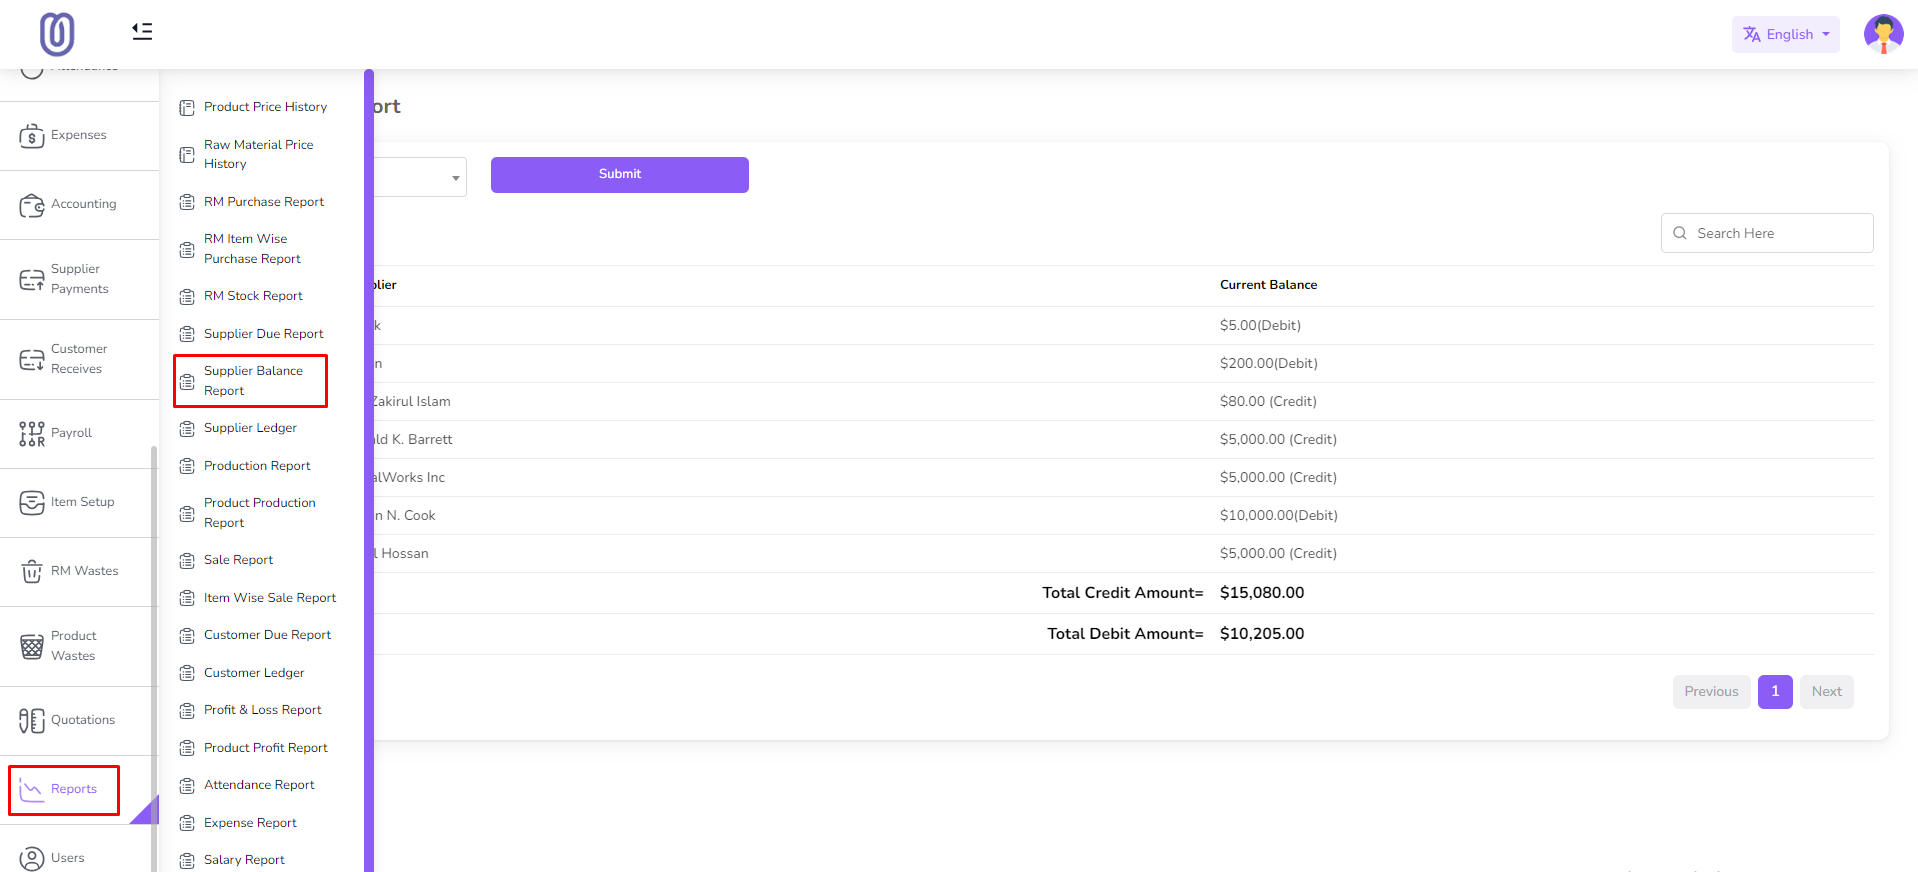
In this page you can view the balance report of a supplier.

You can filter by Supplier.

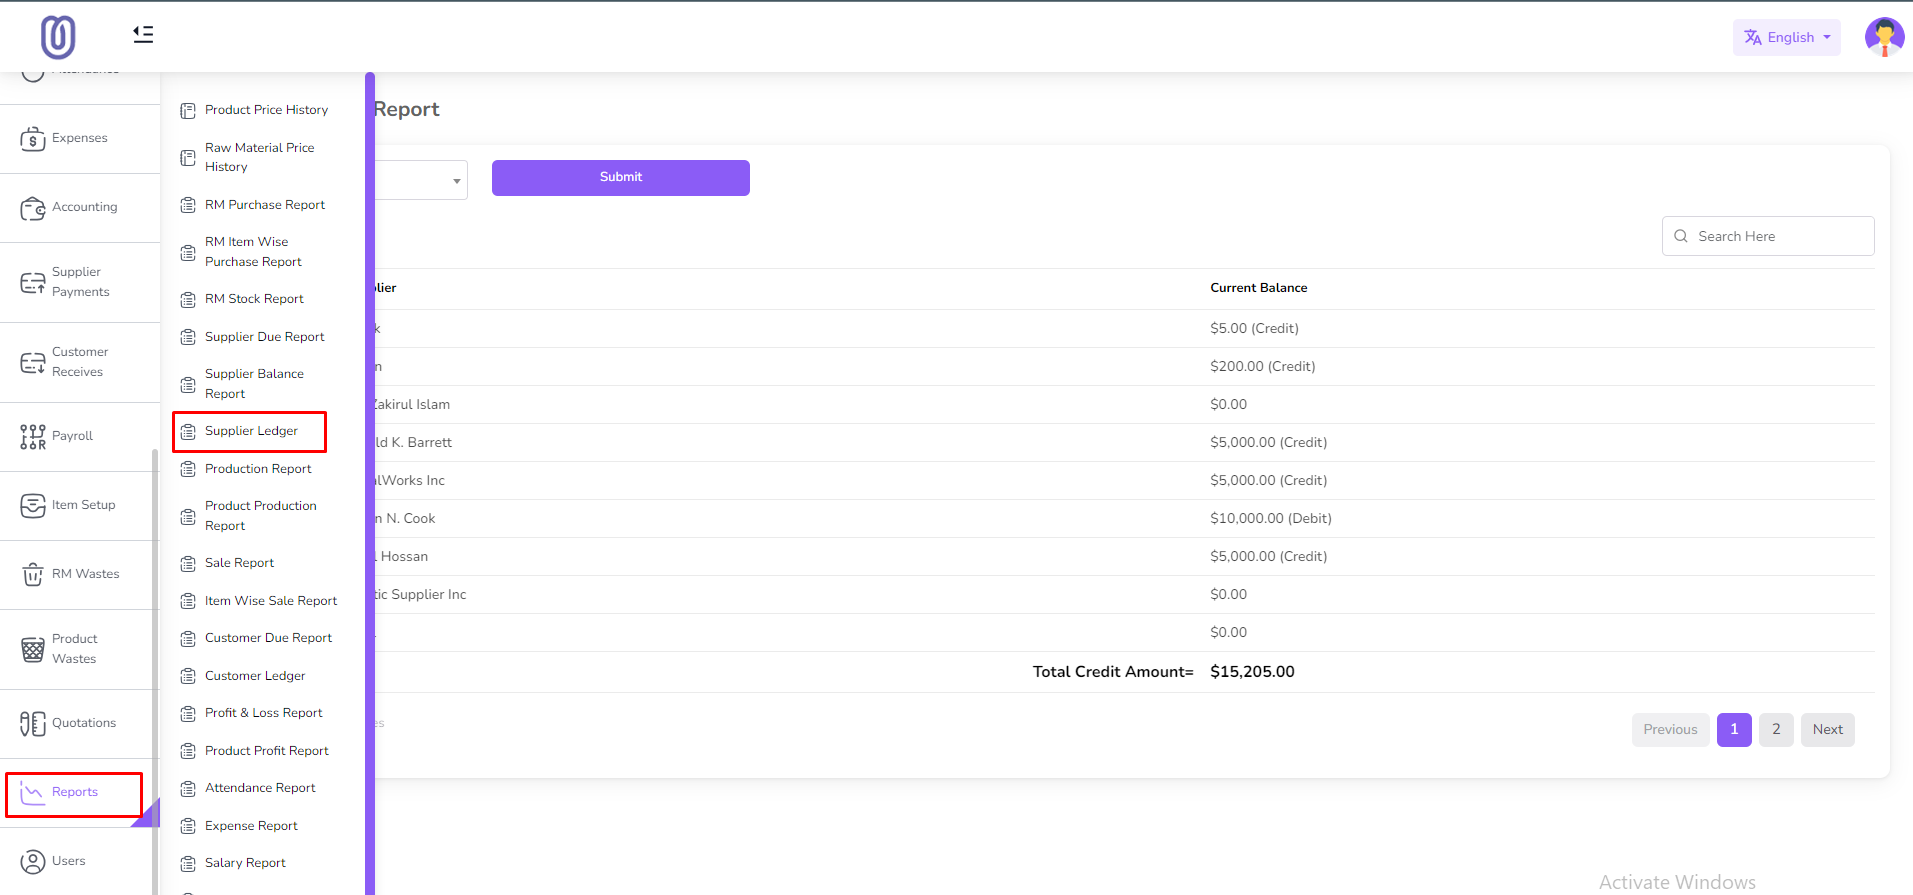
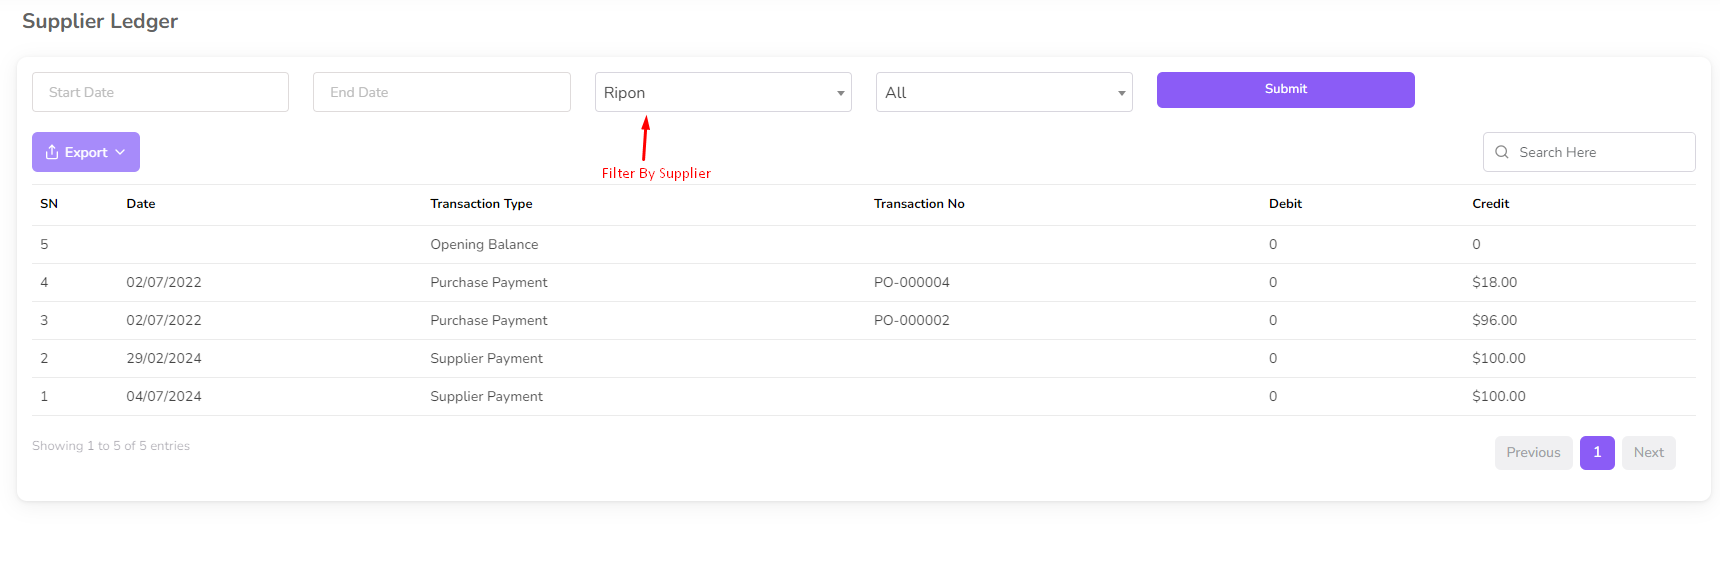
Supplier Ledger Report
In this section you can view the ledger report of a supplier.
To access the Supplier Ledger Report page, navigate to the "Reports" section from the
left sidebar and click on "Supplier Ledger".
In this page you can view the ledger report of a supplier.
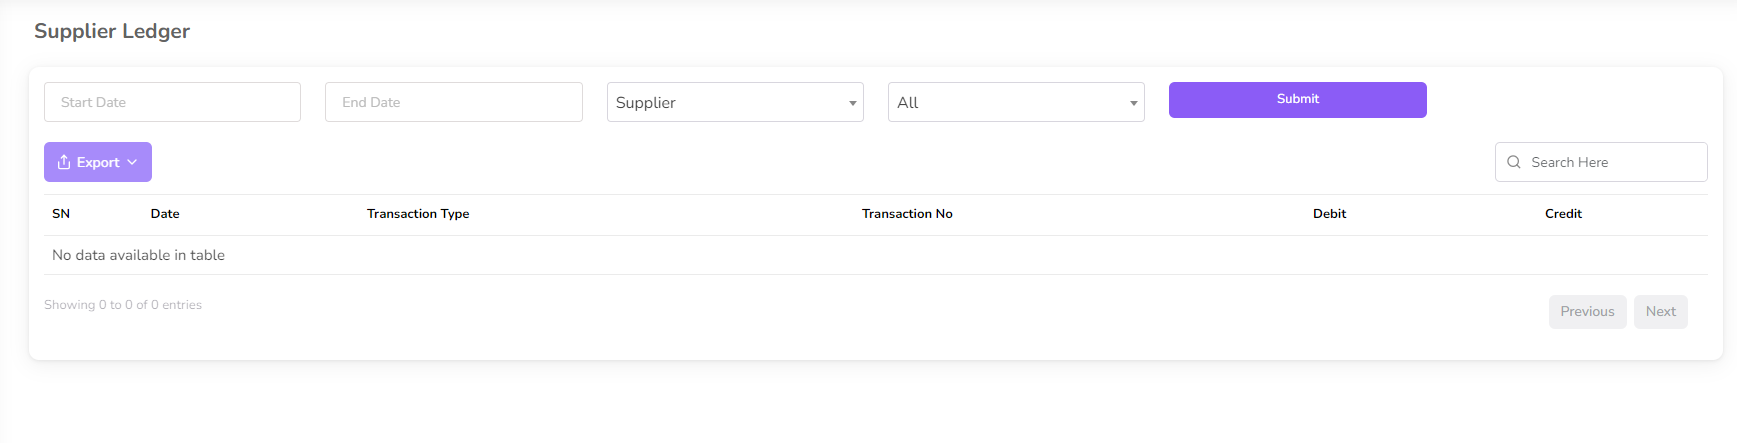
You can filter by Supplier, date range and payment type
Production Report
In this section you can view the production report.
To access the Production Report page, navigate to the "Reports" section from the
left sidebar and click on "Production Report".

In this page you can view the production report.

Product Production Report
In this section you can view the production report of a product.
To access the Product Production Report page, navigate to the "Reports" section from the
left sidebar and click on "Product Production Report".

In this page you can view the production report of a product.

Sale Report
In this section you can view the sale report.
To access the Sale Report page, navigate to the "Reports" section from the
left sidebar and click on "Sale Report".
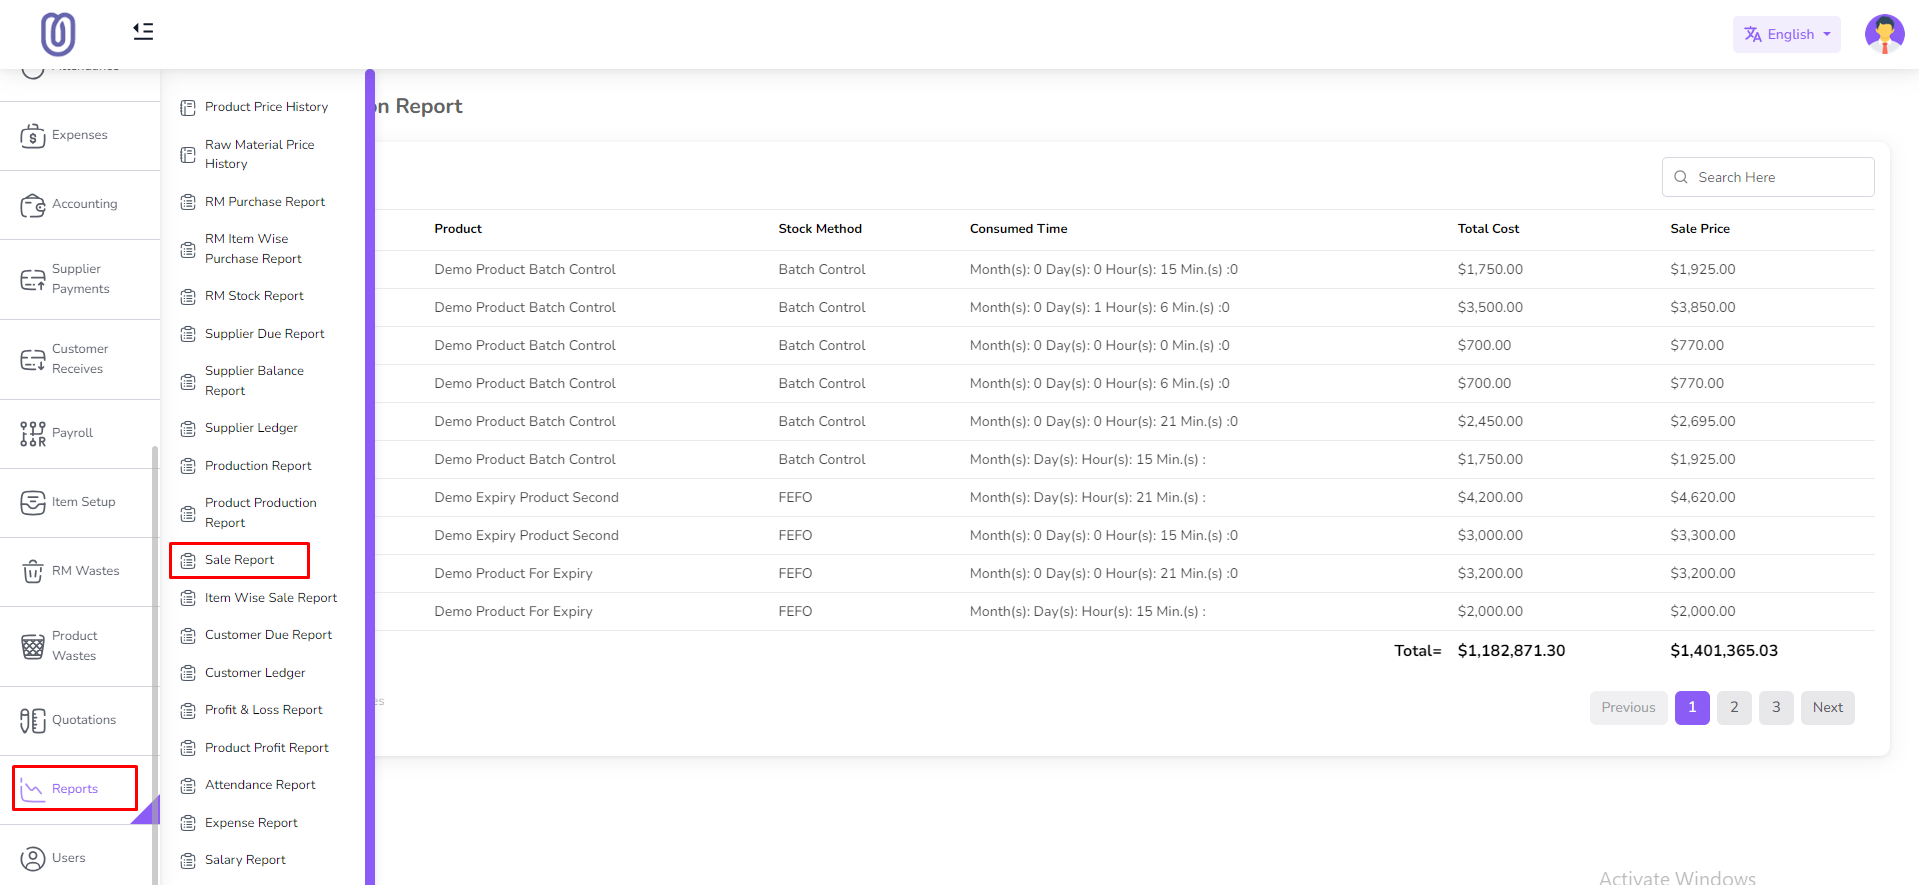
In this page you can view the sale report.

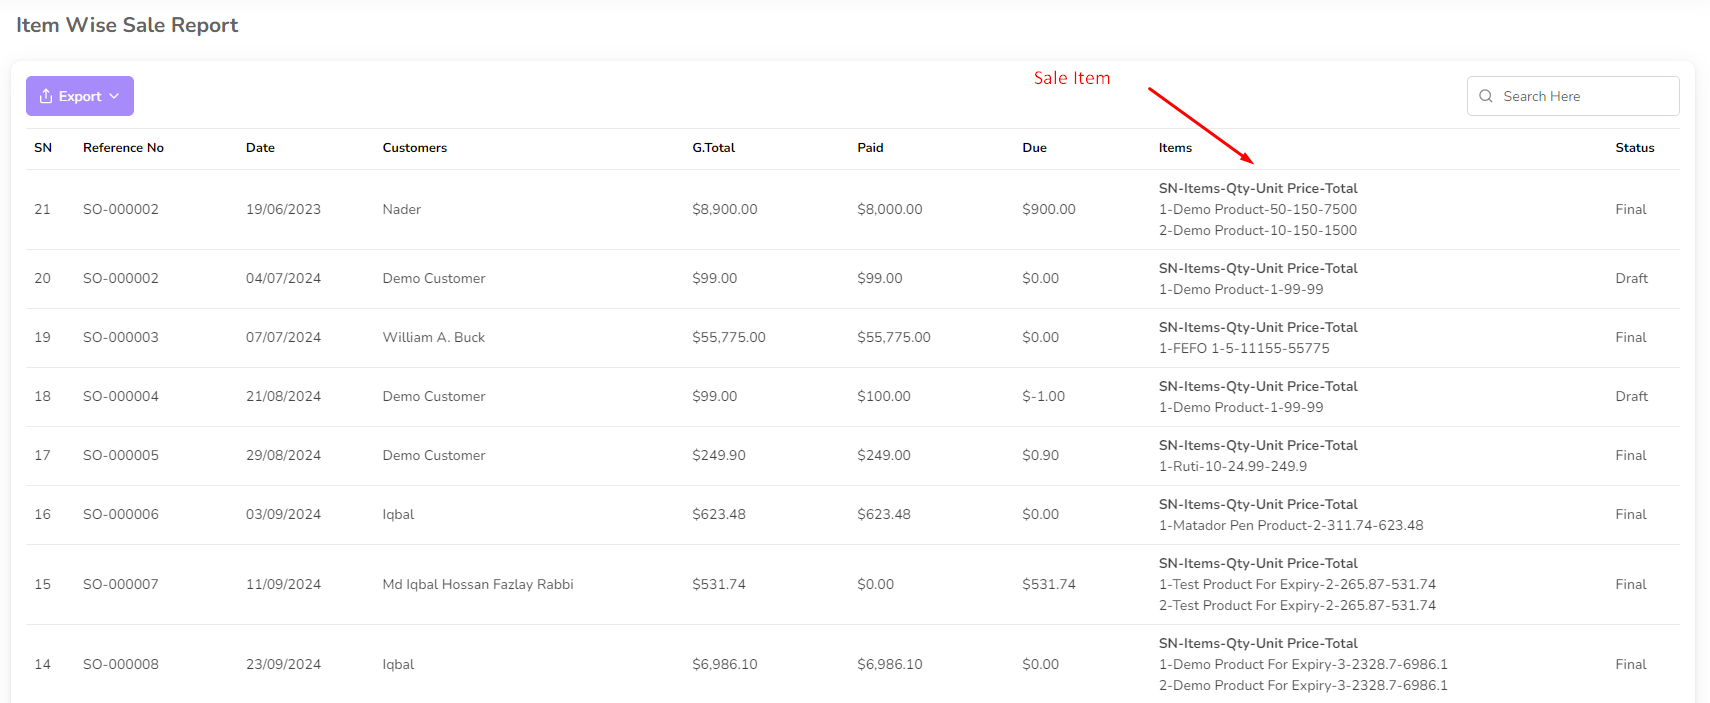
Item Wise Sale Report
In this section you can view the sale report of a product item wise.
To access the Item Wise Sale Report page, navigate to the "Reports" section from the
left sidebar and click on "Item Wise Sale Report".

In this page you can view the sale report of a product item wise.
Customer Due Report
In this section you can view the due report of a customer.
To access the Customer Due Report page, navigate to the "Reports" section from the
left sidebar and click on "Customer Due Report"

In this page you can view the due report of a customer.

Customer Ledger Report
In this section you can view the ledger report of a customer.
To access the Customer Ledger Report page, navigate to the "Reports" section from the
left sidebar and click on "Customer Ledger".

In this page you can view the ledger report of a customer.
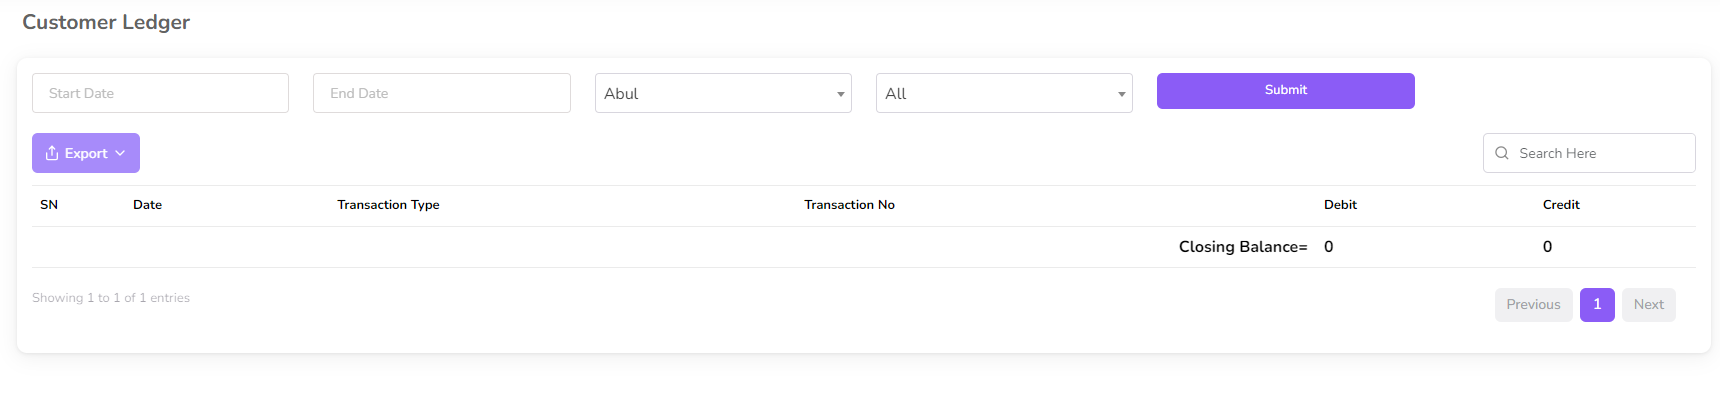
You can filter by Customer, date range and payment type

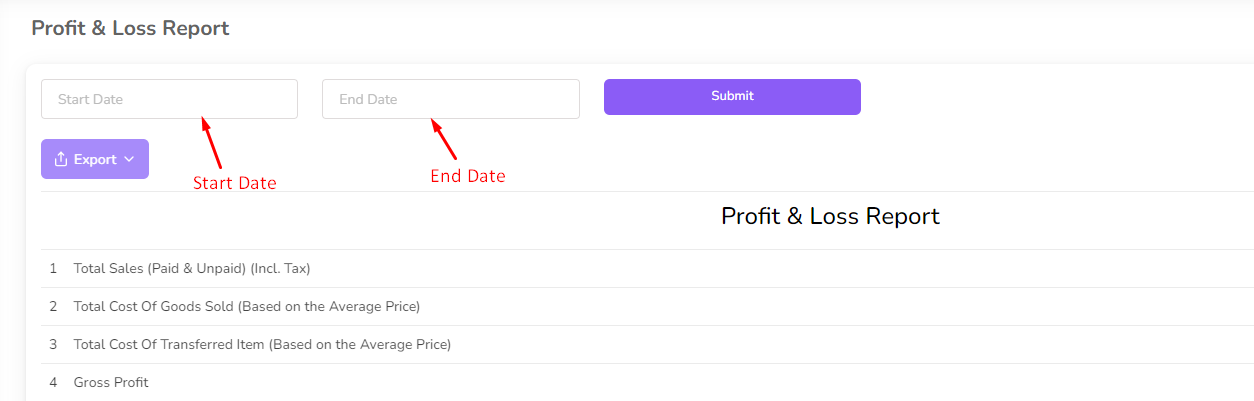
Profit & Loss Report
In this section you can view the profit and loss report.
To access the Profit & Loss Report page, navigate to the "Reports" section from the
left sidebar and click on "Profit & Loss".

In this page you can view the profit and loss report.

You can filter by date range
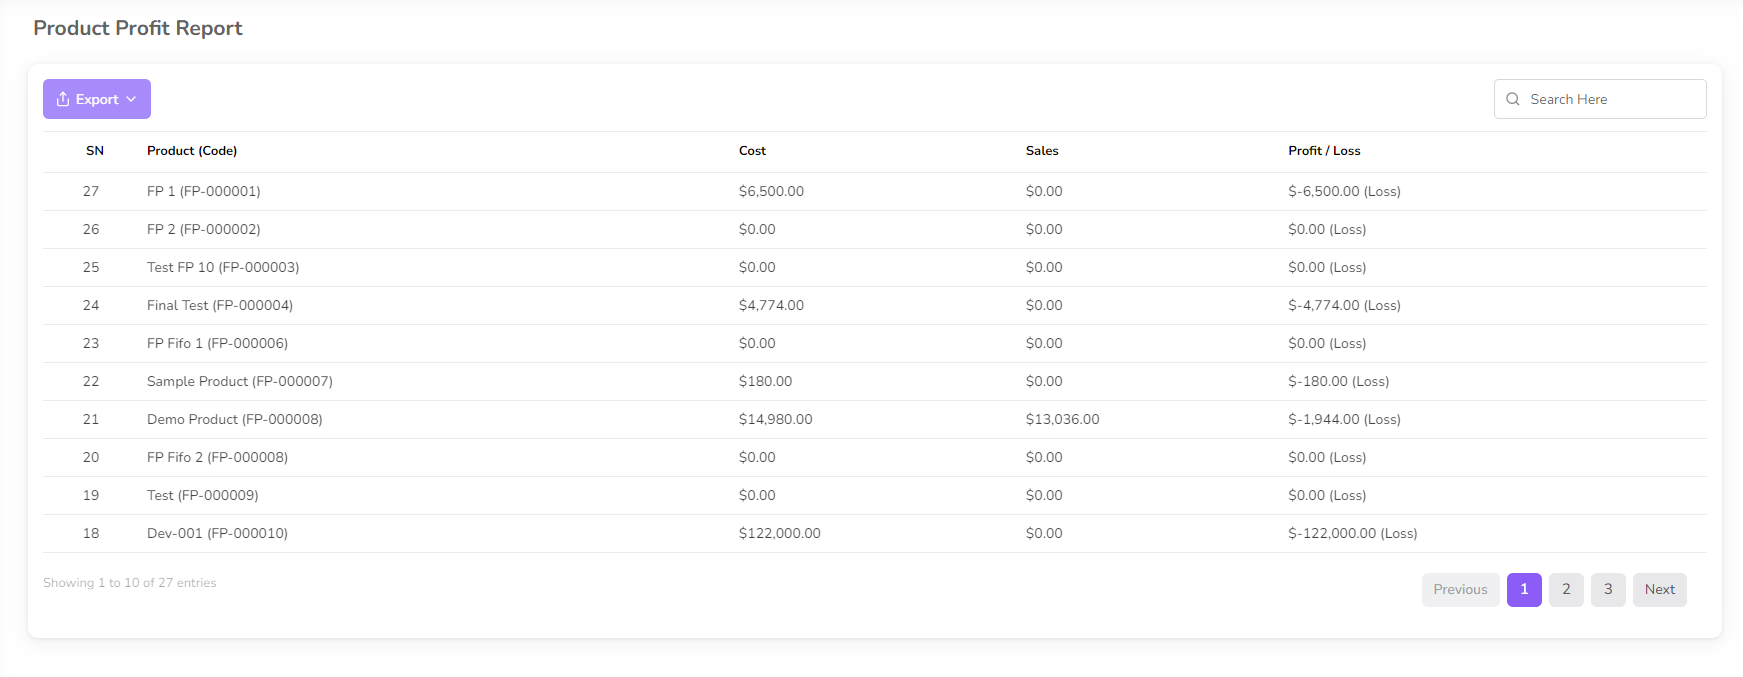
Product Profit Report
In this section you can view the profit report of a product.
To access the Product Profit Report page, navigate to the "Reports" section from the
left sidebar and click on "Product Profit".
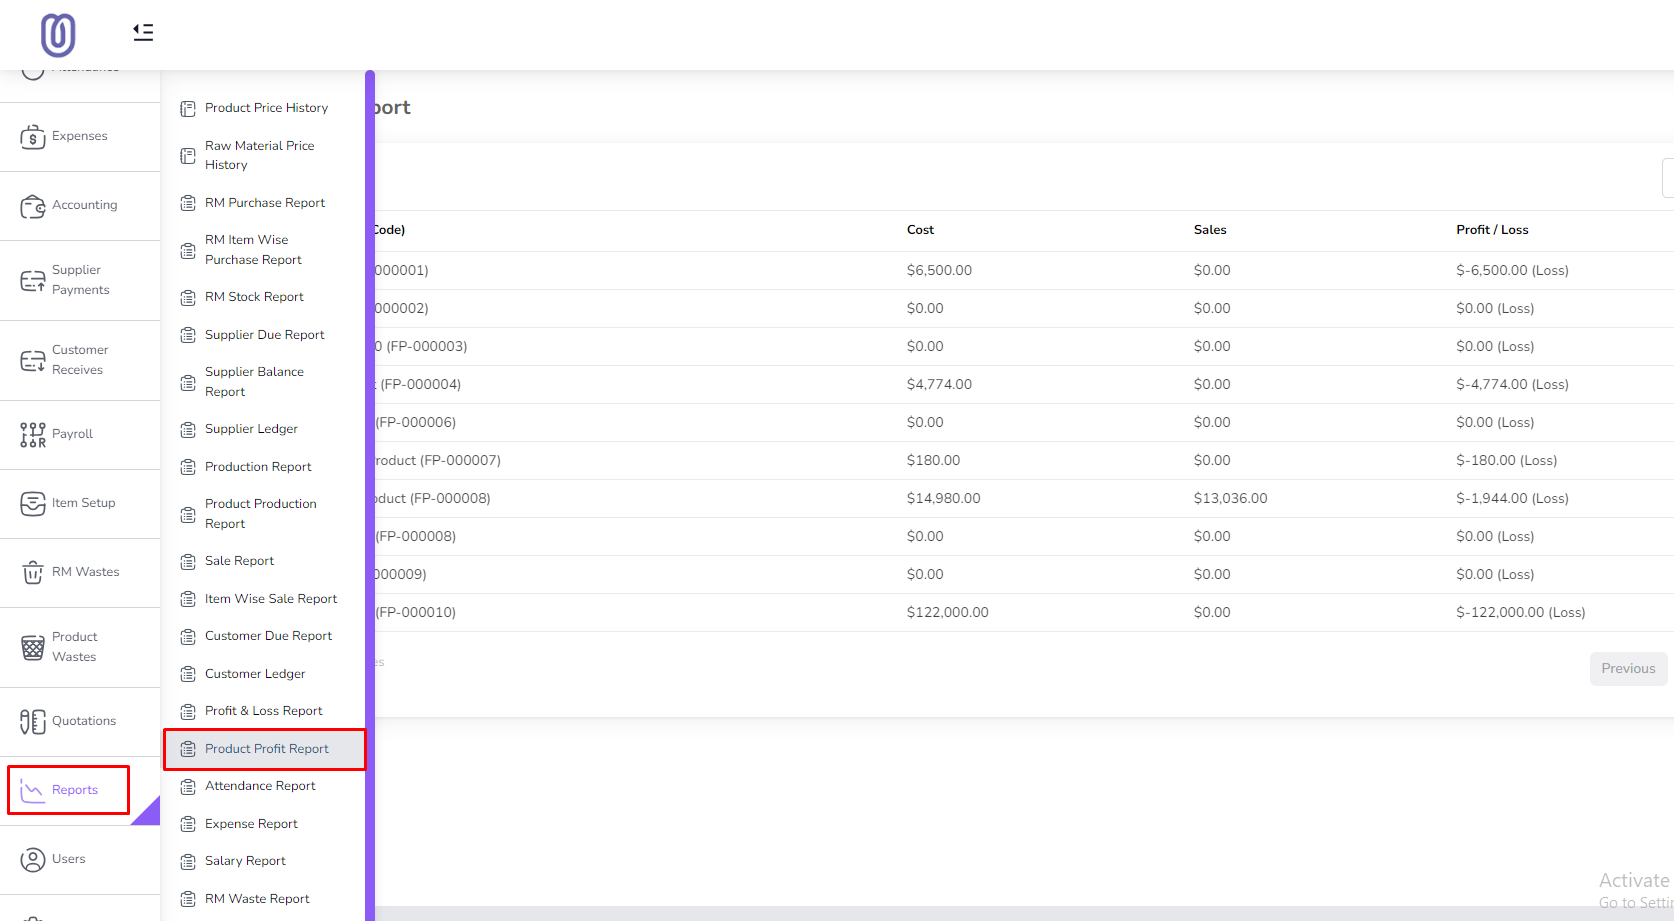
In this page you can view the profit report of a product.
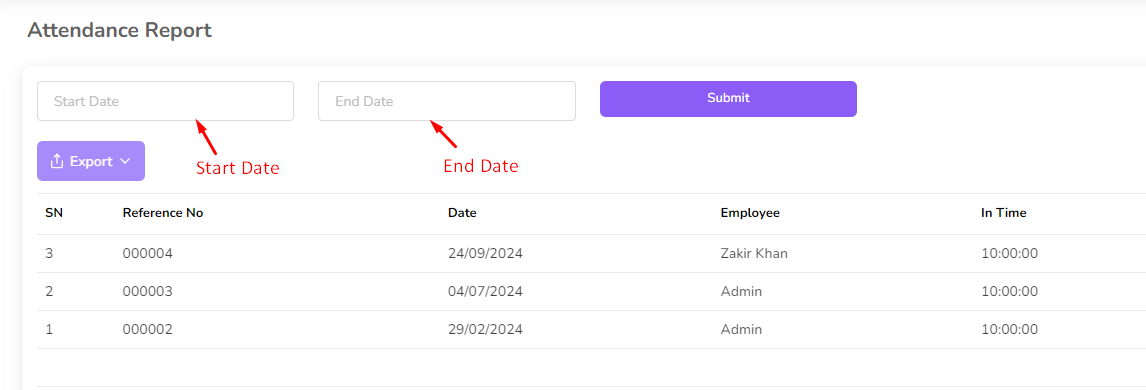
Attendance Report
In this section you can view the attendance report.
To access the Attendance Report page, navigate to the "Reports" section from the
left sidebar and click on "Attendance Report".
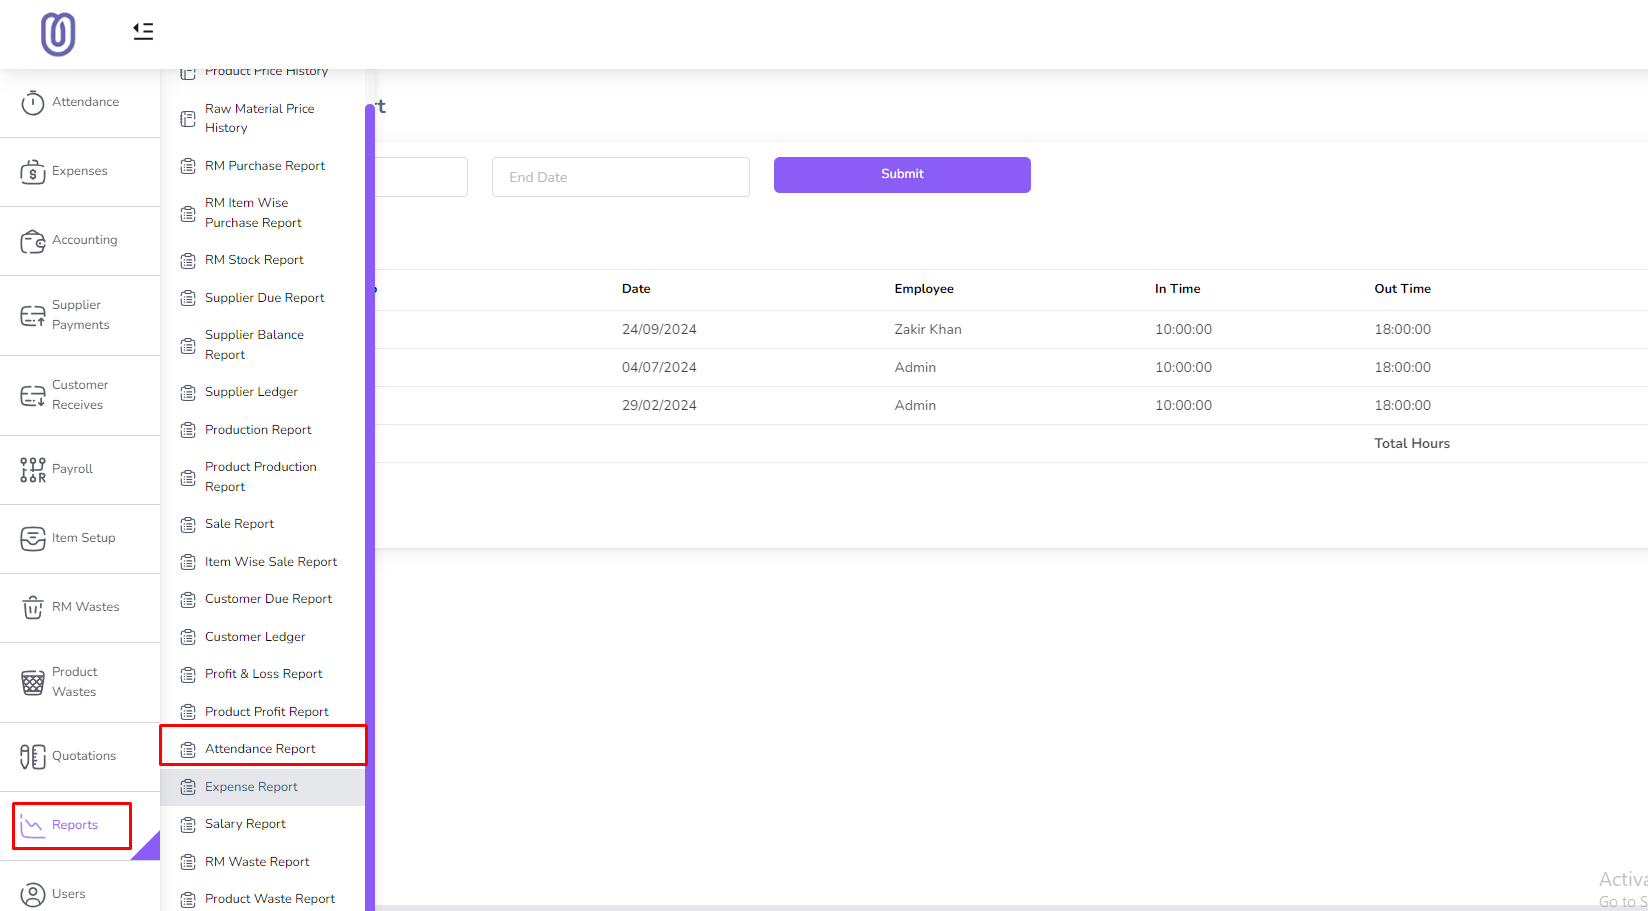
In this page you can view the attendance report.

You can filter by date range
Expense Report
In this section you can view the expense report.
To access the Expense Report page, navigate to the "Reports" section from the
left sidebar and click on "Expense Report".

In this page you can view the expense report.
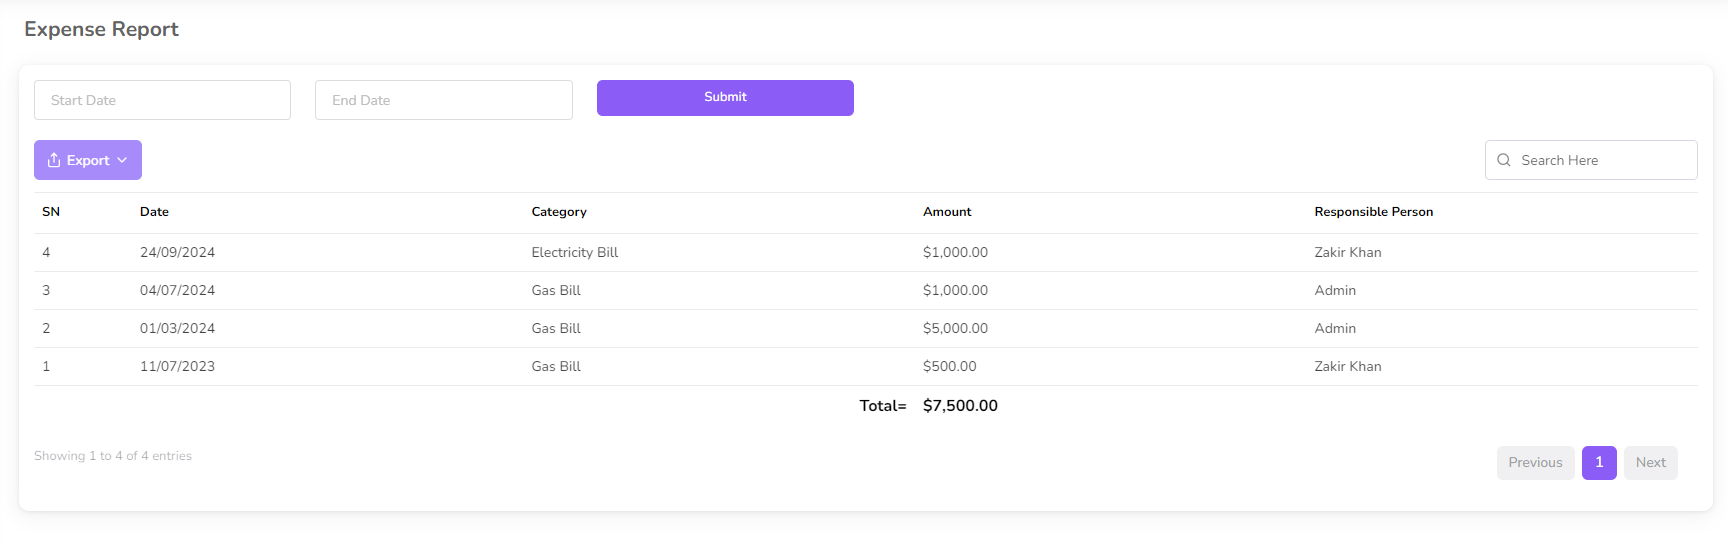
You can filter by date range

Salary Report
In this section you can view the salary report.
To access the Salary Report page, navigate to the "Reports" section from the
left sidebar and click on "Salary Report".

In this page you can view the salary report.
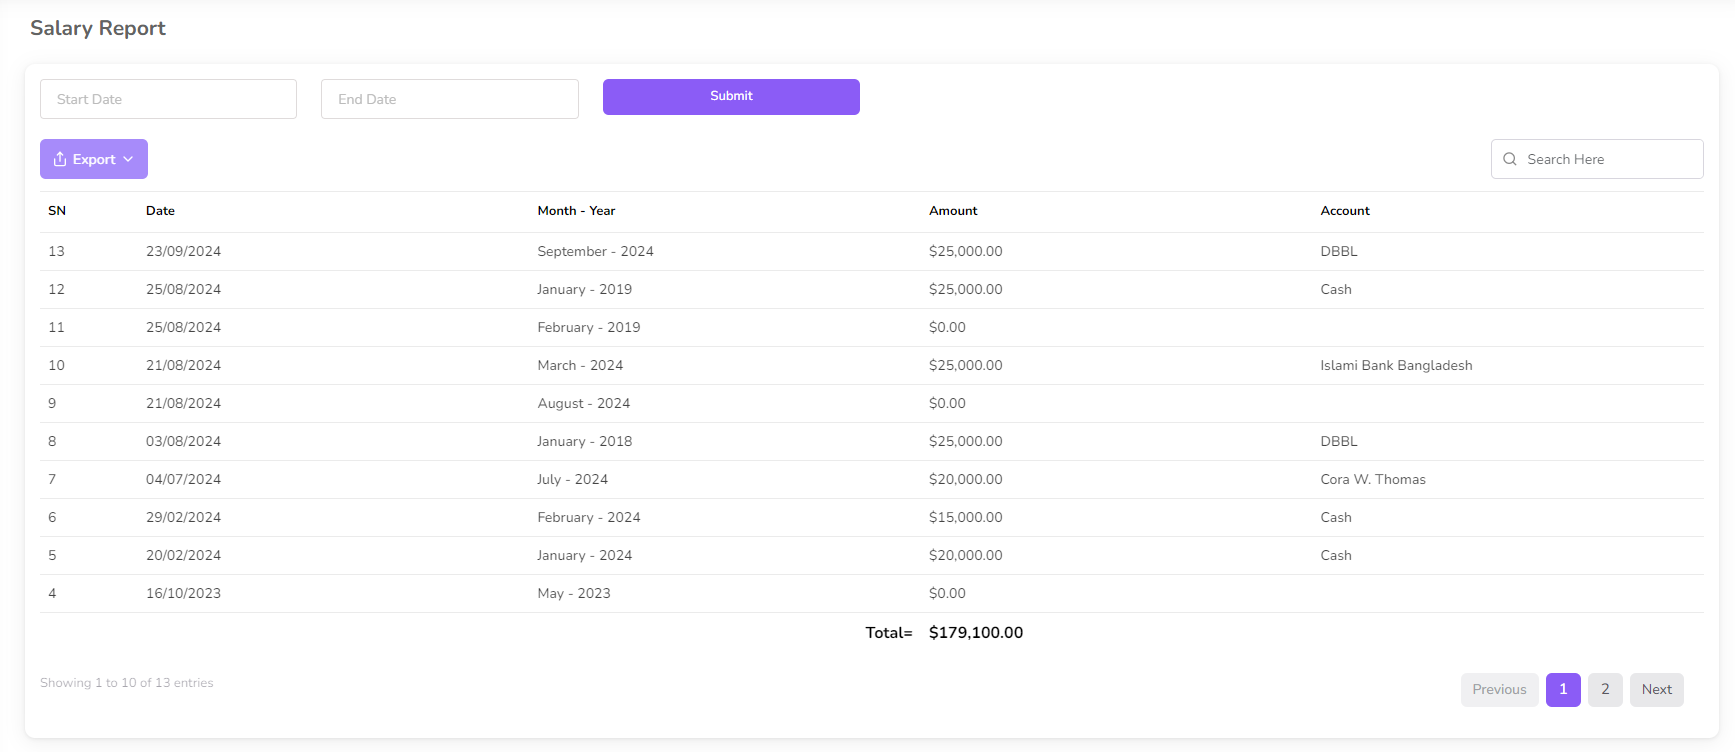
You can filter by date range

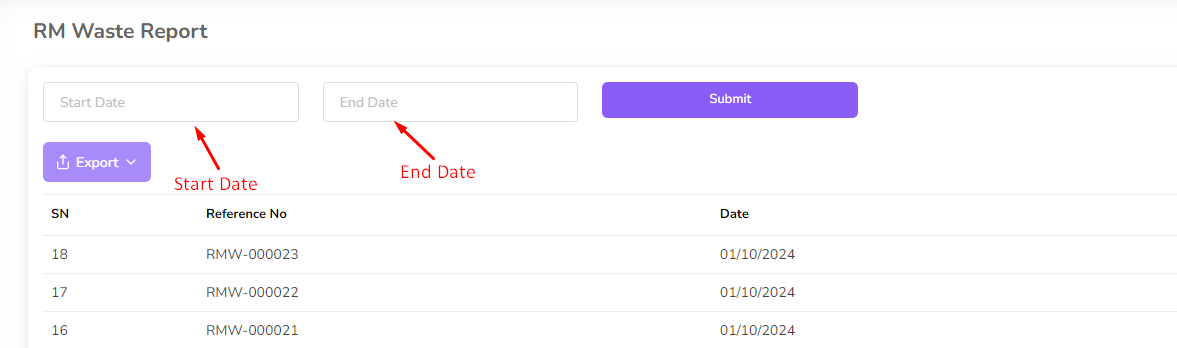
RM Waste Report
In this section you can view the RM waste report.
To access the RM Waste Report page, navigate to the "Reports" section from the
left sidebar and click on "RM Waste Report".

In this page you can view the RM waste report.

You can filter by date range
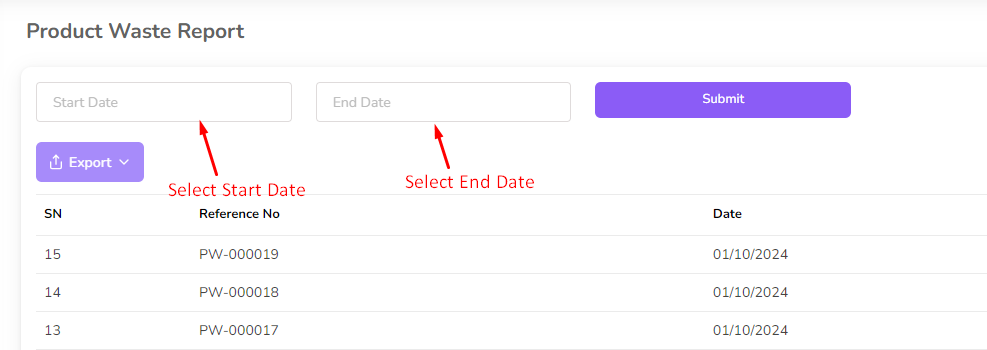
Product Waste Report
In this section you can view the product waste report.
To access the Product Waste Report page, navigate to the "Reports" section from the
left sidebar and click on "Product Waste Report".

In this page you can view the product waste report.
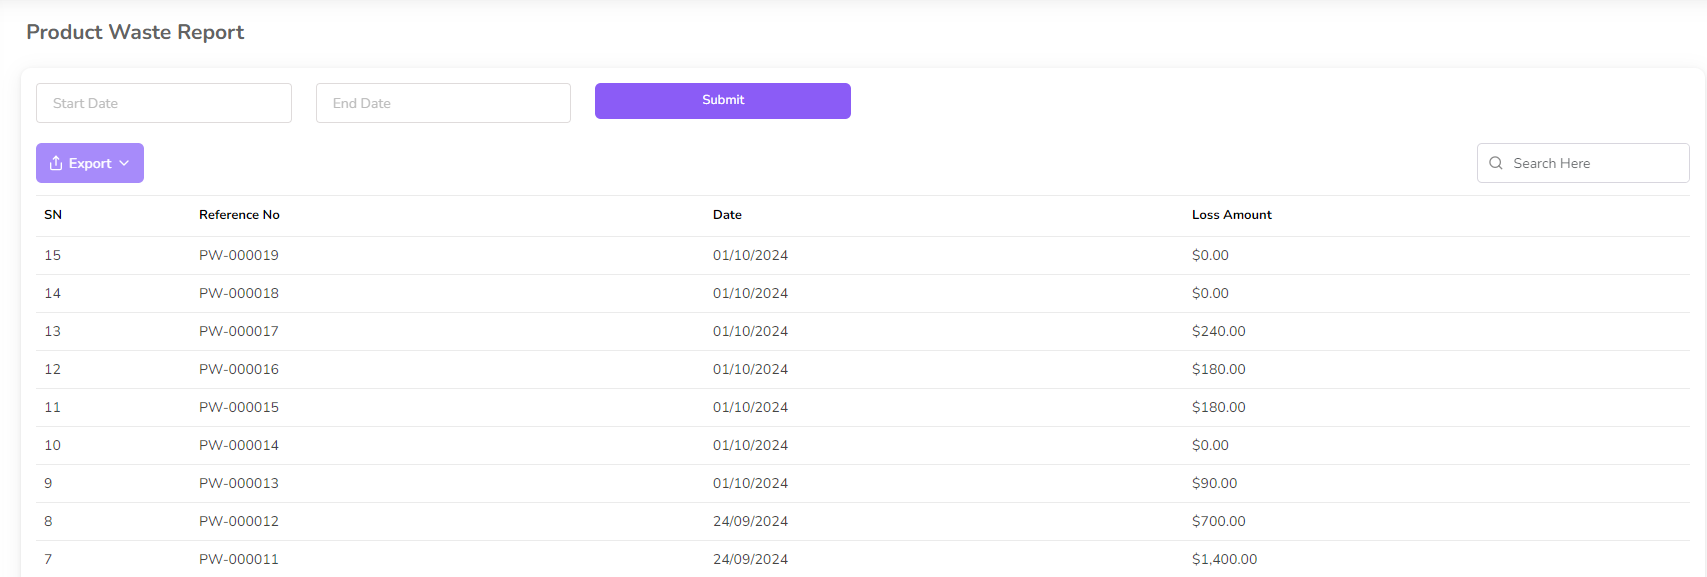
You can filter by date range
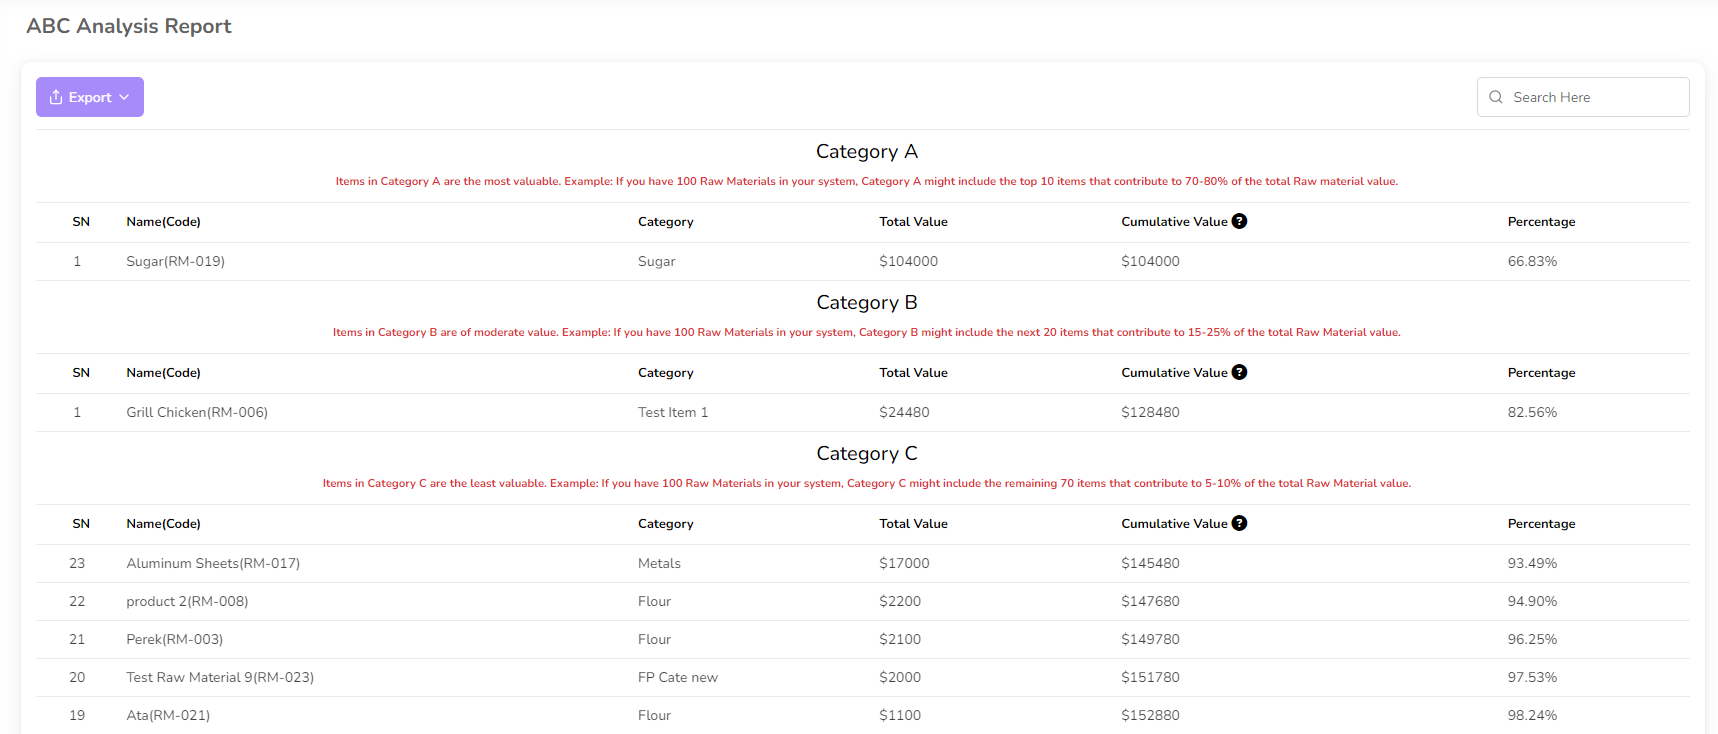
ABC Analysis Report
In this section you can view the ABC analysis report.
To access the ABC Analysis Report page, navigate to the "Reports" section from the
left sidebar and click on "ABC Analysis".

In this page you can view the ABC analysis report.
Role Manage
In this section you can manage the Role. You can add, edit and delete the Role.
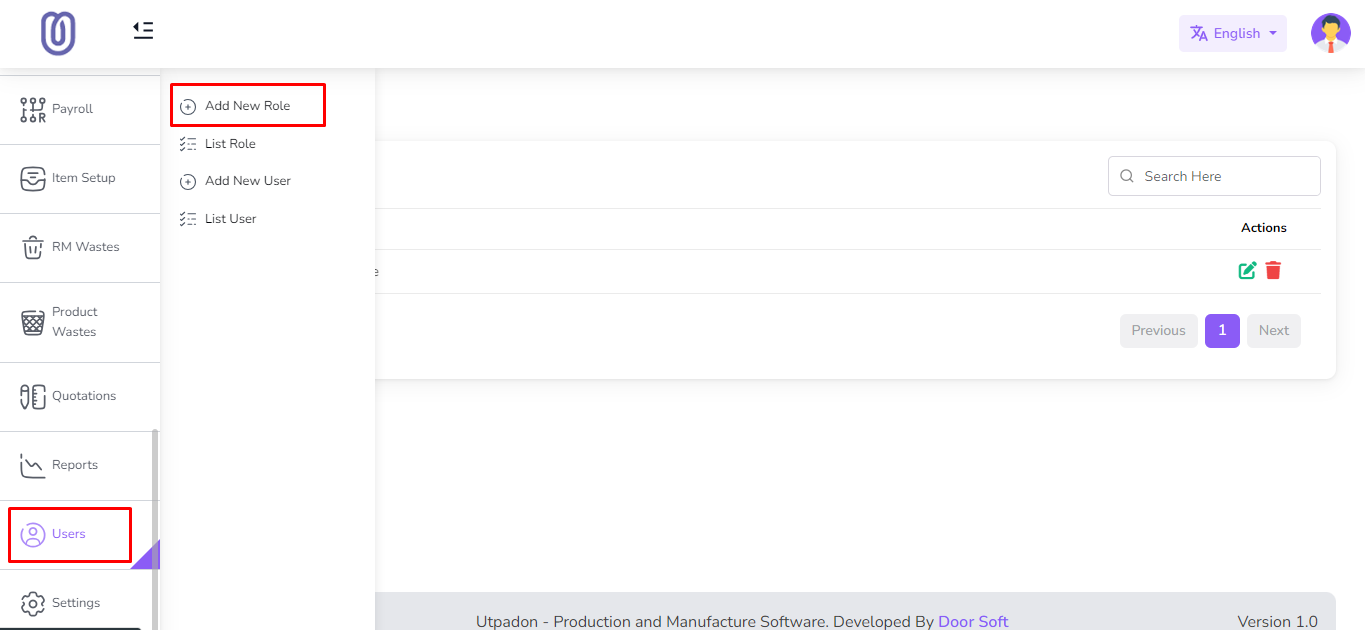
To access Role List, navigate to the “Users section from the left sidebar and click on
"Role List".
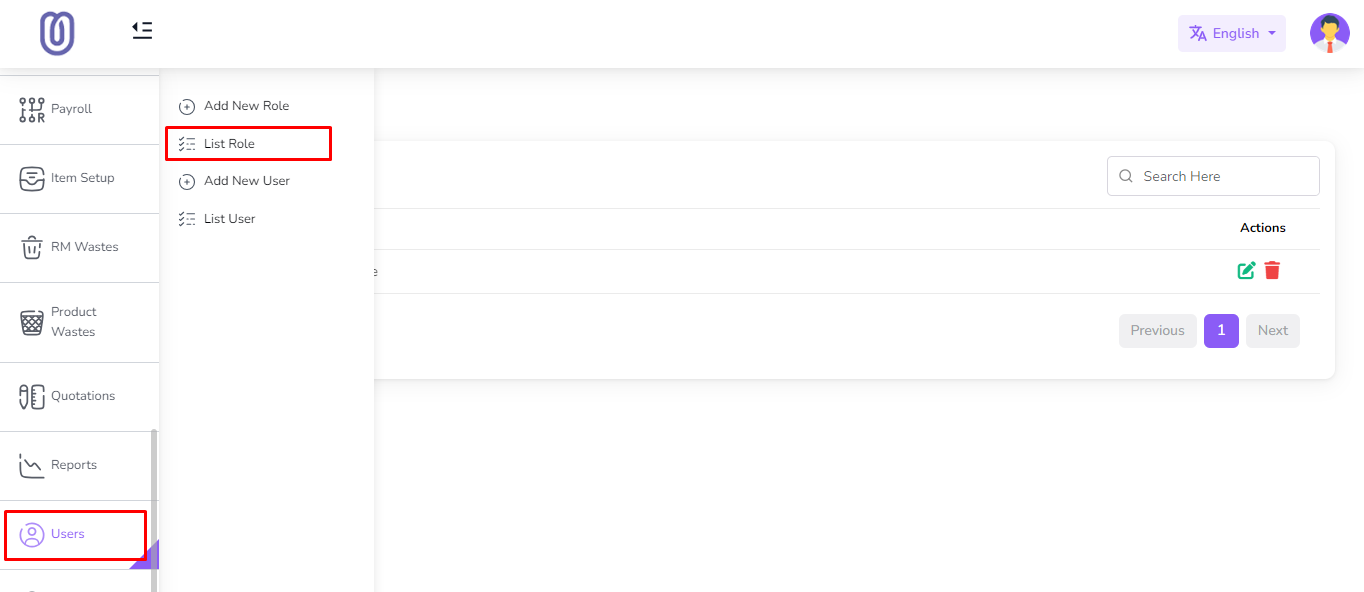
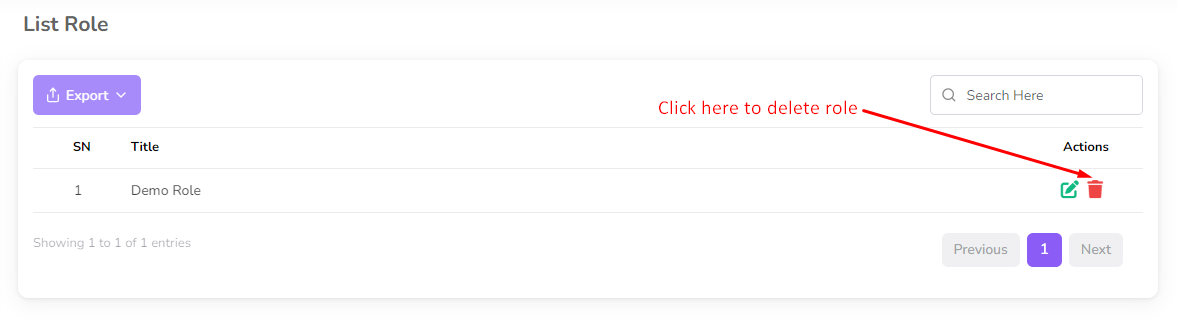
After clicking on "Role List" you can view the role list with role title;
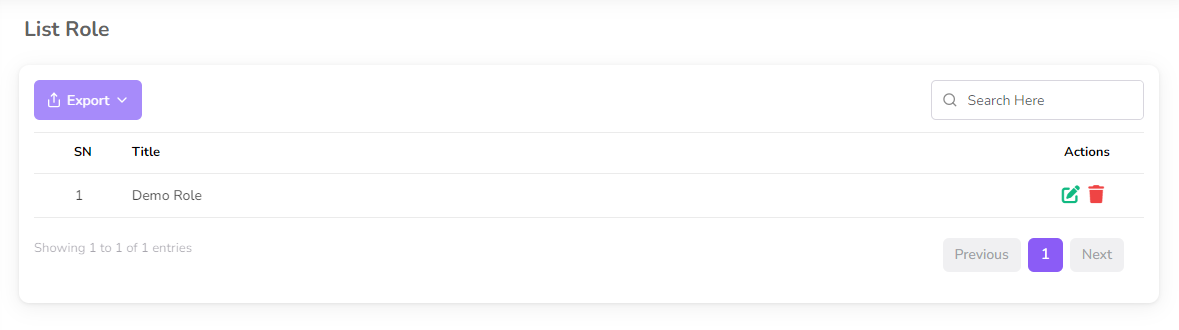
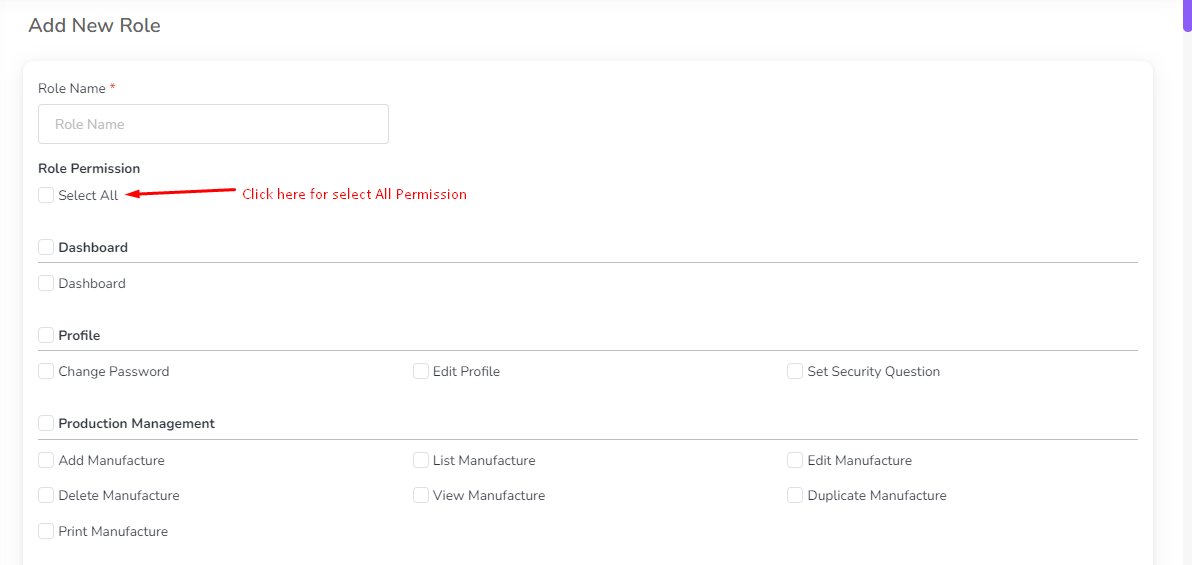
To add a new role, click on the "Add New Role" from the sidebar menu.
Fill the role title, select the permission and click on the "Submit" button to save the
changes.
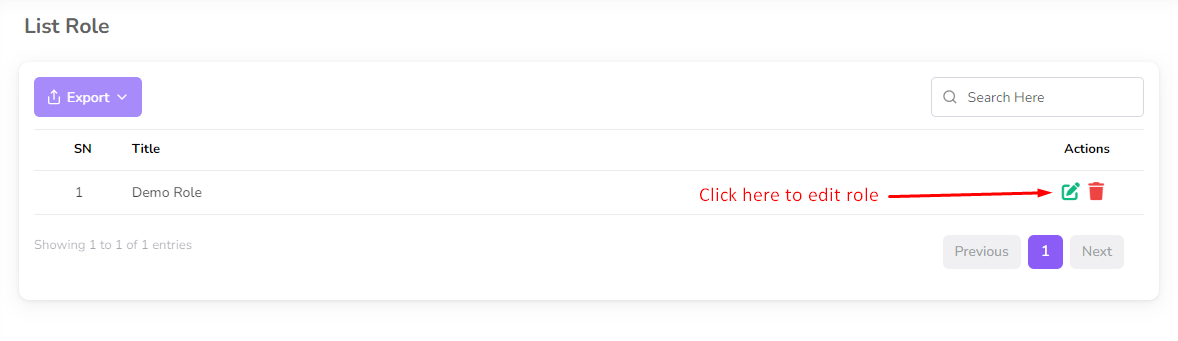
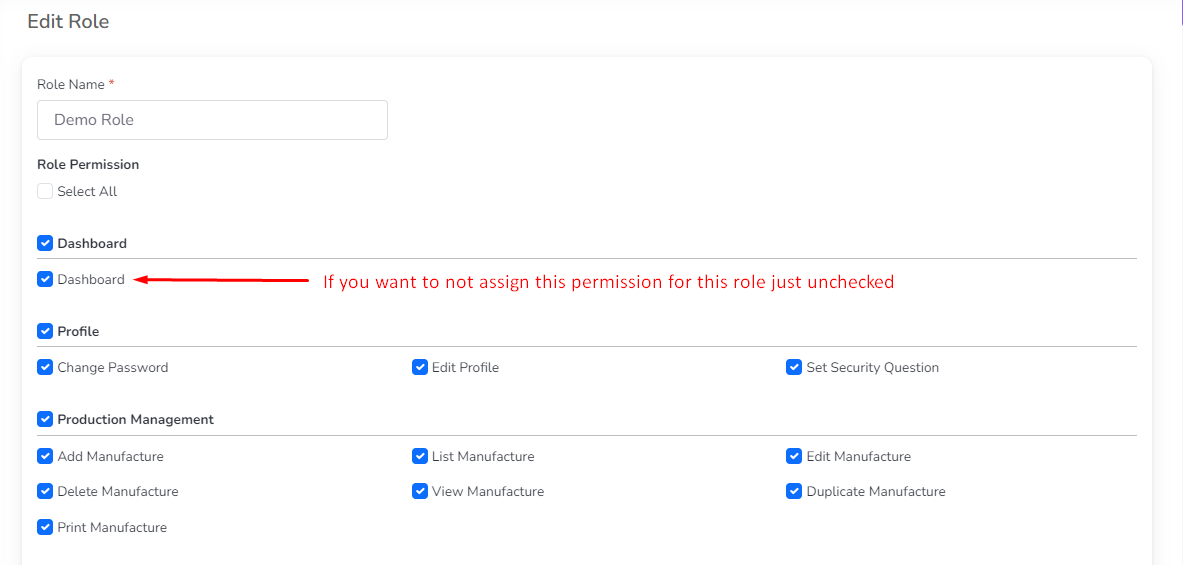
To edit the role, click on the "Edit" button from the role row.
After clicking on the "Edit" button you can edit the role title, if need change the
permission then select the permission and click on
the "Submit" button to save the changes.
To delete the role, click on the "Delete" button from the role row.
User Management
In this section, you can manage the users of the system. You can add, edit, and delete
users.
To access the User List, navigate to the “Users” section from the left sidebar and click on
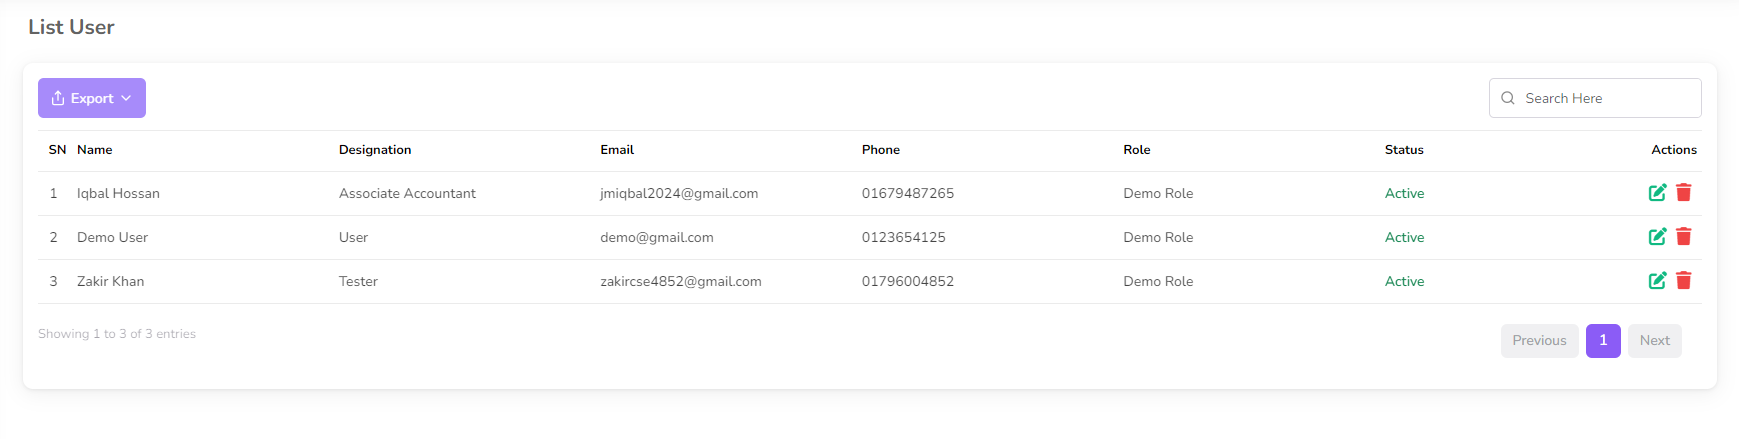
"User List".

After clicking on "User List", you can view the user list with user details.
To add a new user, click on the "Add New User" from the sidebar menu.
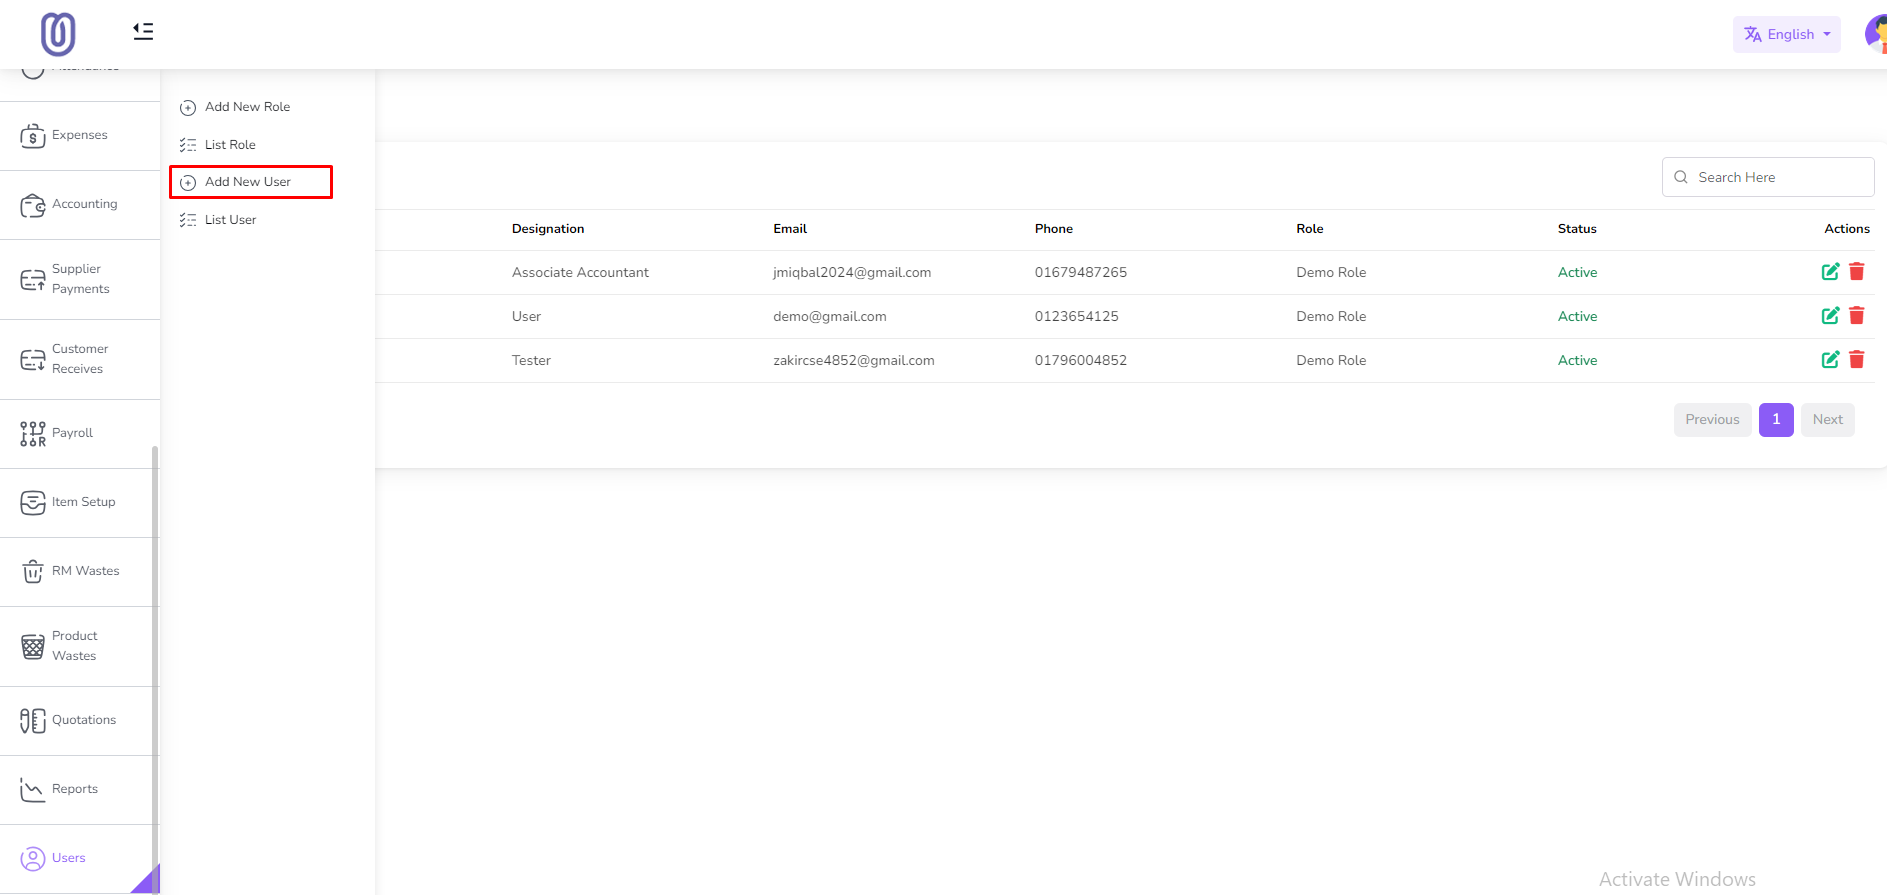
Fill the user details, select the role, and click on the "Submit" button to save the
changes.

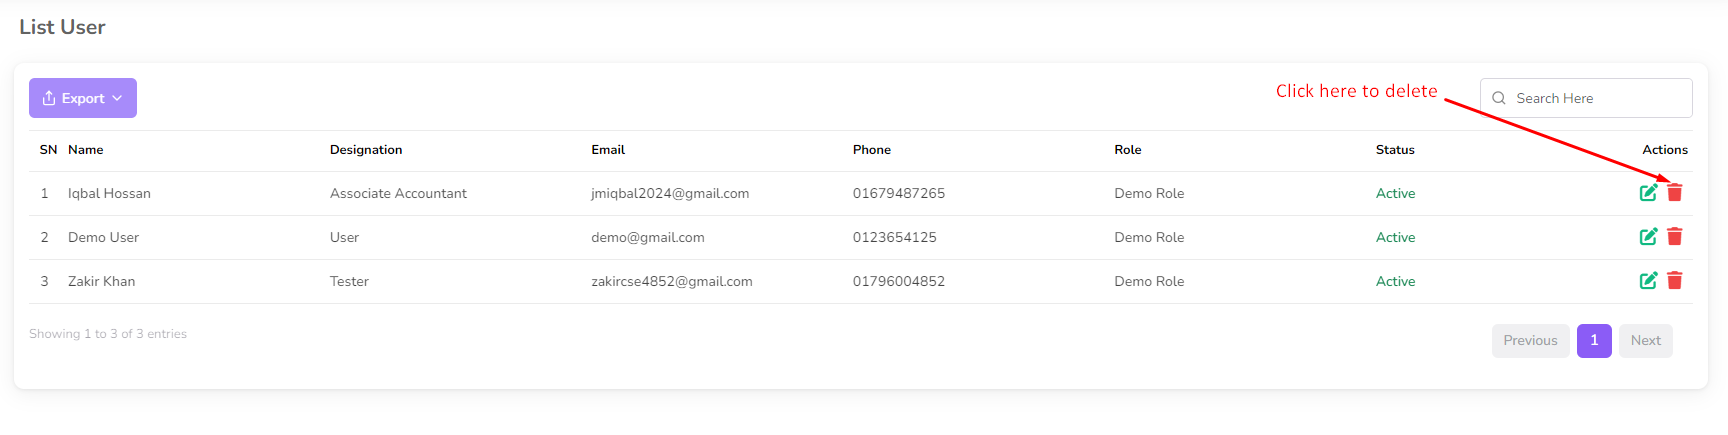
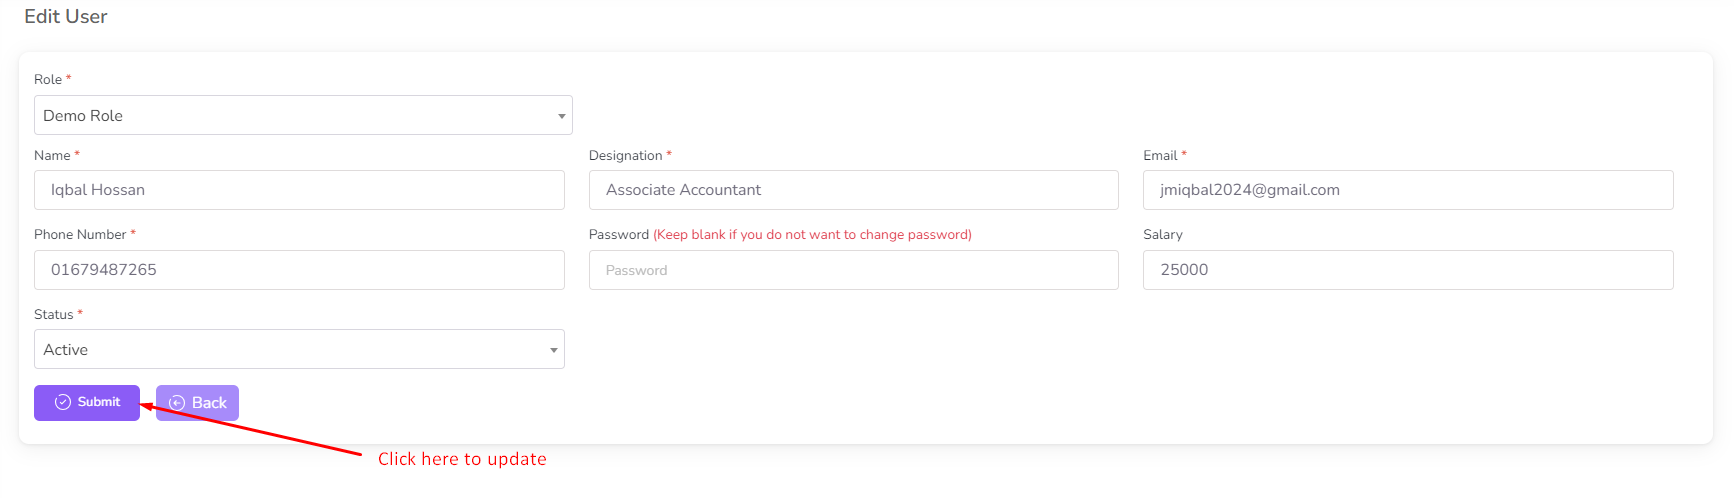
To edit the user, click on the "Edit" button from the user row.
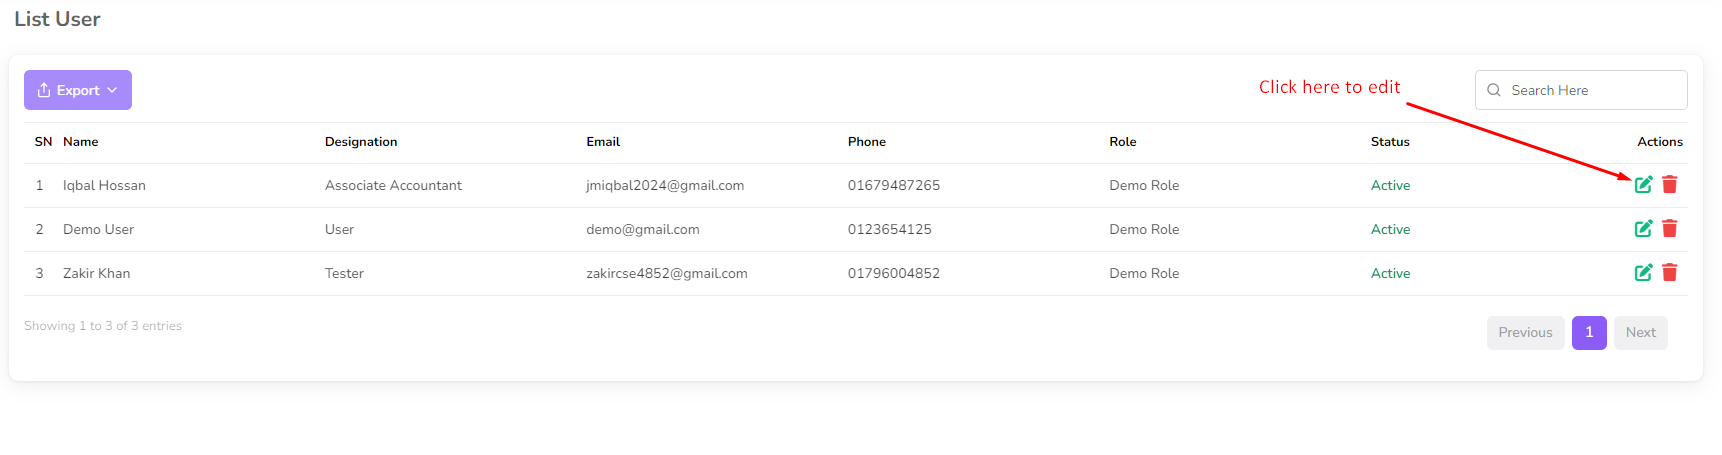
After clicking on the "Edit" button, you can edit the user details, if needed change the
role then select the role and click on
the "Submit" button to save the changes.
To delete the user, click on the "Delete" button from the user row.